To install the PHP version of Support Board on your server follow the steps below:
Open the archive supportboard X.X.X.zip and extract the folder in a server location of your choice.
Navigate to the link http://[your-site]/supportboard/admin.php and complete the installation.
Replace [your-site] with with your website URL.
If you change the directory name, replace supportboard with the new directory name.
Once the installation is complete, log in with the email and password you created in the previous step and you're done!
Display the chat
To display the chat on your website include the following scripts into the <head></head> or <footer></footer> area of each page where the chat is shown.
                                        <!-- Not required if jQuery is already loaded -->
                                        <script src="[SUPPORT-BOARD-URL]/js/min/jquery.min.js"></script>
                                        <script id="sbinit" src="[SUPPORT-BOARD-URL]/js/main.js"></script>
Replace [SUPPORT-BOARD-URL] with the URL of your Support Board installation, get it from Settings > Miscellaneous > Installation URL. E.g. https://example.com/supportboard/js/main.js.
URL parameters
lang=LANGUAGE-CODE See the multilingual docs for more details.
url=APP-URL Use this parameter if your application directory URL / folder has been changed.
Replace APP-URL with the FULL URL of the application folder. You can also define the URL via JavaScript: var SB_INIT_URL = "APP-URL".
Site migration
If you migrate the chat to a new domain / URL / folder you need to edit the config.php file (it's in the Support Board folder) and update the SB_URL constant with the new URL.
Minify JS
For performance reasons, you may want to load the minified main.js file: [SUPPORT-BOARD-URL]/js/min/main.min.js.
Please note that if you contact us for support you will need to load again the non-minified version.
To install the WordPress version of Support Board on WordPress follow the steps below:
Go to the Plugins page and click Add new then Upload plugin and upload the file supportboard X.X.X.zip.
Once the installation is complete you should see a new left menu item named Support Board .
You're done, the chat is automatically shown on all pages.
If you want to show the chat on another website, follow the steps of the PHP installation.
To display the chat on your website go to https://cloud.board.support/account/?tab=installation and copy the embed code, then paste it into your website pages.
If you are using WordPress, you can download the Support Board Cloud plugin here.
Activate the apps from Settings > Apps.
Requirements
Your web project must support HTML and PHP, and pages containing the chat must be opened via a web browser.
You cannot display the chat on a HTML page opened directly on a local computer. Use a local server like Xampp instead.
Your server must allow the access of the following file: supportboard/include/ajax.php
If you're using the WordPress version of Support Board and you have any security plugins installed, please make sure that they don't block the supportboard/include/ajax.php file.
Minimum JQuery version: JQuery 1.1+.
Minimum PHP version: PHP 8.0+.
Minimum MySQL version: MySQL 5.5+.
The following PHP modeles: CURL, ZIP ARCHIVE, MBSTRING must be enabled and working correctly.
Most servers have these modules enabled by default.
The following PHP setup is recommended: POST MAX SIZE = 20MB, MEMORY LIMIT = 512MB, MAX INPUT VARS = 5000.
Read and write file permissions must be granted for the Support Board uploads, resources/language and apps folders.
Support Board must be able to save and read the files in these folders.
The SQL mode ONLY_FULL_GROUP_BY,STRICT MODE and the ANSI_QUOTES setting, must be disabled.
All Support Board folders should have 755 permissions, all Support Board files should have 644 permissions.
Once the installation is completed you can check the system requirements from Settings > Miscellaneous > System requirements.
Activation
To activate Support Board and enable all of the features (including updates and more secure encryption), you need to enter the Envato purchase code in Admin > Settings > Miscellaneous.
For help finding your Envato purchase code click here.
Apps installation
To download, install, and activate the apps go to the Settings > Apps area of Support Board and enter the Envato purchase code or license key.
You can buy the apps here.
Updates
To update Support Board and the apps, enter the admin area and click on the version number in the lower left corner.
You can also activate automatic updates via Settings > Miscellaneous.
To enable the updates, you need to have a valid Envato purchase code. To update the Support Board apps you need to have a separate valid License Key or Envato purchase code for each specific app. Besides, the License Key must not be older than 1 year (only for apps purchased outside of CodeCanyon). If your License Key is expired, you will need to purchase a new license to enable App updates again. Apps purchased on CodeCanyon have lifetime updates.
The latest versions of the apps may not work if Support Board has not been updated to the latest version.
If you're using the WordPress version of Support Board , keep in mind that you cannot update Support Board from the WordPress plugins page.
Manual updates
To manually update Support Board and the apps go to https://board.support/synch/manual.php.
When updating Support Board, you should also edit the sw.js file and update the SB_CACHE_NAME constant with the new version number.
Optimal configuration
Support Board is a powerful tool, but its abundance of features can pose a challenge when it comes to quick setup.
To streamline the process, we provide a list of the most commonly used features that we advise setting up.
By incorporating all these features, you will have access to the most essential and beneficial functionalities.
Activate email notifications from Settings > Notifications.
Make sure to activate the following options: Agent email notifications, Sounds admin > Incoming conversations and messages, and Push notifications.
For more information on how notifications work, you can click here.
Configure the SMTP server under Settings > Notifications > SMTP.
For more details check the email notifications section.
In case you are using the cloud version, the SMTP is already activated, but you may want to use your own anyway.
In case you are utilizing the chatbot, make sure to check out the optimal configuration here.
If you are facing difficulties in synchronizing services like Google or WhatsApp, our team can help you by configuring them.
For further information, please visit our hire us page.
By utilizing your personal accounts such as Google or Facebook, you can enjoy free credits, free quotas, and significantly lower costs compared to other chat services.
Additionally, you will have full control and transparency over your data and expenses.
Having problems?
If you're having any issues at all, please contact our support team via the chat widget on right of this page.
Before contacting us, please make sure that your server has all the requirements listed above.
Debug mode
Enable debug mode if you have issues with Support Board or you are customizing it.
To enable debug mode, add the debug attribute to the URL of the admin area. E.g. https://www.your-site.com/supportboard/admin.php?debug.
Blank screen when accessing the admin area
Check if the browser console has error (on Chrome you can open it from Settings > More tools > Developer tools > Console).
Enable the PHP debug and check the PHP error logs.
If you have the WordPress version, disable all security plugins and plugins related to your hosting.
System requirements
For any issue you can check the system requirements from Settings > Miscellaneous > System requirements.
If you get an infinite loading, it means that some system requirements is not ment.
Our support doesn't include assistance for the issues reported by the system requirement function, please check your PHP debug log and contact your hosting support for assistance.
Cross-domain configuration
If you want to use the same chat installation on multiple domains, your server should allow cross-origin requests.
To enable cross-origin requests on your server follow the steps below:
Cross-domain configuration via server
For Apache servers — Edit the .htaccess file of the domain where the plugin is installed and enter the code <IfModule mod_headers.c>Header set Access-Control-Allow-Origin "*"</IfModule> at the very top of the file.
To make it works you need to have at least AllowOverride +FileInfo or AllowOverride All in the Apache config.
For nginx servers — Edit the file /etc/nginx/nginx.conf of the domain where the plugin is installed and enter the code http { add_header Access-Control-Allow-Origin "*"; } at the top of the file. If you're using Plesk go to
Domains > example.com > Apache and nginx settings > Additional nginx directives and insert add_header 'Access-Control-Allow-Origin' '*';.
If none of the previous solutions work or you can't change the server settings, follow the steps below:
Edit the file supportboard/config.php and enter the code define('SB_CROSS_DOMAIN', true); at the end of the file.
Upload the following folders into your destination domain(the domain where the chat should be shown, not the one where Support Board is installed): supportboard/media/fonts and supportboard/media/icons. You can upload the files where you want, for example, http://www.example.com/chat-files.
If the chat is loaded on multiple domains upload the files on each domain.
Edit again the file supportboard/config.php and Enter the code define('SB_CROSS_DOMAIN_URL', 'YOUR-URL'); at the end of the file. Replace YOUR-URL with the URL that points to the files you just uploaded, for example, http://www.example.com/chat-files.
If the chat is loaded on multiple domains replace YOUR-URL with the an array of URLs, for example, ["http://www.example.com/chat-files", "http://www.example-2.com/chat-files"].
Unable to install an app
Your server/hosting has file and folder permissions issues, or a firewall is blocking our website.
You can verify it from Settings > Miscellaneous > Check Requirements (keep in mind that even if it's all green, you still have a server problem, it just isn't caught by the requirements checks).
You can solve the issue by installing the apps manually.
Go here for the manual installation: https://board.support/synch/manual.php
Hide admin.php from URL
By default, the admin URL is something like https://your-website.com/support/admin.php.
You can hide the admin.php part of the URL and make it like https://your-website.com/support/ by inserting the following code in your .htaccess file:
If you can no longer log in to the admin area you can reset your password and email by following the steps below:
Edit your MySQL Database. You can edit it from your hosting panel, usually with phpMyAdmin.
Edit the table sb_users.
Find your admin account, and make sure the value of the column user_type is admin.
Reset your password by editing the password column and by inserting the new password as a hash. To generate a hash for your password, visit
https://board.support/docs/files/password.php?p=123456 (replace 123456 with your password), or Enter the hash $2y$10$i7OComVhUh8BHcyx9VzUfuN.hnNsnKzK1Hd/GKK2KIwBo7Y6stppu (password: 12345678).
Reset your email address from the column email.
If you're using the WordPress version, you can delete the user from the database and WordPress will generate it again.
You can also create a new WordPress user with administrative privileges, then logout from your current account, and log in with the new one. Once you're into Support Board , change the password of your previous agent from Users > Agents.
If you encounter the "Too many login attempts. Please retry again in a few hours." error, click here.
Admin account deleted or set as an agent
If you accidentally delete all admin and agent accounts and can no longer log in to the admin area, or if your only admin account has been changed to an agent and you've lost access to settings and the user area, you can fix the issue by following the steps below:
Edit your MySQL Database. You can edit it from your hosting panel, usually with phpMyAdmin.
Edit the table sb_users.
You can convert any existing user to an admin by editing the column user_type, and entering the value admin.
You can also add a new user by assigning a value to the columns first_name, last_name, password, email, and user_type fields.
The value of the password column must be a hash.
To generate a hash for your password, visit https://phppasswordhash.com/.
Also, the value of the column user_type must be admin.
Server down
If your server and/or website goes down or suddenly stops working after a few minutes of chat usage,
the issue could be related to your server's Firewall. This usually happens as a result of an IP Address Banning
(Fail2Ban) or Web Application Firewall (ModSecurity) settings. The multiple AJAX requests from the chat to the database
are recognized as a "server attack" and so your server places a temporary block on your IP address.
This issue should only affect you and/or your developers; visitors/users should not be affected.
To confirm whether or not this is the issue, use a VPN service like Hotspot Shield.
When the server goes down, activate the VPN to change your IP and try accessing your website again.
If the website works normally, the issue is confirmed.
To solve it temporarily disable fail2ban or contact your hosting support for additional support.
403 Forbidden Error
The 403 Forbidden error is strictly a server-side issue related to file permissions or a firewall rule that blocks access to the resource.
We can not help with it because it is not related to our product.
Please send this message and the URL of the blocked resource to your server support, and they will solve the issue.
Below you will find the most common causes of the 403 Forbidden error.
WordPress plugin — If you're using the WordPress version, please make sure you don't have any security plugin generating the issue.
File permissions — The file permissions of the resource are not correct. The file permissions should be 644 for files and 755 for folders.
Firewall — The firewall of your server is blocking the resource. You can check it by disabling the firewall or by using a VPN.
ModSecurity — The ModSecurity of your server is blocking the resource. You can check it by disabling the ModSecurity or by using a VPN.
Cloudflare — The Cloudflare firewall is blocking the resource. You can check it by disabling the Cloudflare firewall or by using a VPN.
You can solve the issue by opening your CloudFlare website settings and by checking Application Settings > Direct PHP File Access.
Blocking zoom on iOS devices
When using the chat on iPhones the textarea is automatically zoomed when the user's start typing a new message.
To stop the zoom Enter the code below into the <head> area of all the pages that include the chat.
The chat may not be showing due to the following reasons.
You may not see the chat because you have disabled it in the settings area.
To fix this, visit the settings section and deselect all options related to that:
Chat > Manual initialization, Chat > Login initialization, Chat > Hide chat outside of office hours, WordPress > Manual initialization.
Try disabling any performance plugins or techniques like cache or JS minification on your website as they might be causing problems.
Once disabled, check again.
Try disabling any CDN or Proxy (e.g. CloudFlare).
Once disabled, check again.
PHP and WP versions only You cannot see and test the chat as a user if you're logged-into the admin area.
To test the chat as a user, please log out of your admin account or from WordPress.
Alternatively, you can use another browser window in "private" or "incognito" mode.
Additionally, you can force a logout by executing the SBF.reset() function in the browser console.
PHP and WP versions only You're trying to access the chat from a domain, or subdomain, different from the one of the installation. Details here.
Conversations are not visible to administrators or agents
The conversations may not be showing due to the following reasons.
The agent has been given a department, yet the conversations have not been assigned to that specific department.
One or more of the following settings have been activated: Miscellaneous > Routing, Miscellaneous > Queue, Miscellaneous > Hide conversations of other agents
You are using the WordPress version and the WordPress > Multisite routing option has been activated.
You are using the chatbot and the human takeover feature is activated.
For cases 1, 2, and 3, make sure to log in with the correct admin/agent or check your admin/agent profile to ensure that there are no departments assigned.
In case 4, please check the archived conversations.
CONVERSATIONS
Manage conversations
Conversations have a total of four different statuses: mark as read, archive, delete and restore.
You can manage the status of a conversation by opening it in the conversations area and then clicking any of
the corresponding icon buttons in the top right of the conversation window.
Search for conversations
You can for conversations by department ID, assigned agent ID, conversation title, conversation ID, message text, message attachments name, user first name, user last name, user email.
If you search for a specific message text, the conversation containing that message will be shown at the correct position and the message will be highlighted.
Information
When you empty the trash, all the conversations in the trash are permanently deleted.
When a user sends a new message to an archived or trashed conversation, the conversation is automatically restored and will now be visible in the Inbox area.
Trashed conversations are deleted automatically after 30 days.
When a user is deleted, all the conversations and messages are permanently deleted too.
An agent can delete their messages by opening the message menu and clicking Delete. The message menu becomes visible when you hover the mouse cursor over the message.
The left conversations list use auto-pagination, which is limited to 100 results per scroll.
Reply to a message
You can reply to a message by opening the message's menu and, and clicking Reply to.
The reply to feature is supported only on the following messaging services: WhatsApp, Telegram, Facebook Messenger.
Text editor and automated messages features
The text editor of the admin area and automated messages(example: welcome and subscribe messages) can be used to create stylized messages:
— All text links are automatically converted to clickable hyperlinks.
To set the link name, append the following string to the URL: #sb-example. Replace example with your desired link name and white spaces with --.
— The editor also supports text formatting syntax:
To make text bold, surround it with *: *your text*.
To make text italic, surround it with __: __your text__.
To make text strikethrough, surround it with ~: ~your text~.
To insert a single-line code comment, surround it with`: `your text`.
To insert a code block, surround it with ```: ```your text```.
HTML and other code languages — For security reasons, no HTML, JavaScript (JS), or other code languages are permitted. However, you can use HTML snippets by utilizing custom rich messages (discussed below).
To insert a line break into a message, use the keyboard combination SHIFT + ENTER or CTRL + ENTER.
Merge fields
Merge fields are strings replaced by external values when used. Merge fields can be used in any message or automated message, including chatbot messages.
Code
Description
{user_name}
Full name of the active user.
{user_email}
Email of the active user.
{agent_name}
Full name of the active agent.
{agent_email}
Email of the active agent.
Rich messages
Rich messages are special messages with interactive features like buttons, dropdowns, or inputs.
They allow an agent to request information from the user via a user input form or to diplay interactive contents.
Rich messages can be inserted into a chat message using shortcodes. Shortcodes accept various parameters like title and description.
The available rich messages are listed below.
How it works:
1
Create and send
Create a rich message by inserting the shortcode into the text editor of the admin area. Customize all of the parameters with your information and send your message.
2
Message is displayed
When a shortcode is used, the user sees the rich message (not the shortcode) and can select or enter the required information to complete the form submission.
3
User's response is submitted
Once the rich message form has been filled out and sent by the user, a success message is shown and the form data is saved.
Rich Messages
Name
Shortcode
Description
Card
[card image="URL" header="TITLE" description="Lorem ipsum dolor sit amete" link="URL" link-text="Purchase" extra="$599" target="_blank"]
Call-to-action card with an image, title, description, link, and more.
Slider
[slider image-1="URL" header-1="TITLE" description-1="Lorem ipsum dolor sit amete" link-1="URL" link-text-1="Purchase" extra-1="$599" image-2="URL" header-2="TITLE" description-2="Lorem ipsum dolor sit amete" link-2="URL" link-text-2="Purchase" extra-2="$599" target="_blank"]
Slider of call-to-action cards with an image, title, description, link, and more. You can add up to 10 slides.
Form to collect the user's email and phone number.
All attributes are optional. Follow up settings used as default values.
Add the attribute required-messaging-apps="true" to force users to provide their email and phone on messaging apps.
Merge fields are supported.
Display a link or open an article.
The attribute target="_blank" is optional and open the link in a new window.
The attribute style="link" is optional and change the button design.
To open an article on click the link value must be #article-ID, replace ID with the article ID.
Display a YouTube or Vimeo video. The value of the attribute type can be youtube or vimeo.
The attribute id is the ID of the video, get it from the URL.
The attribute height is optional and sets the video height in px.
If your text includes the characters ,, :, or ", you must prepend the \ character to them. For example: \,, \:, \".
Global parameters
All of the rich messages support the following parameters:
Parameters
Description
id="123"
The ID of the rich message (used also to save the JSON data).
title="ABC"
The rich message title.
message="ABC"
The rich message description that appears underneath the title.
success="ABC"
The message that appears when the user completes and sends the rich message.
The user input is appended to this message.
settings="ABC"
Extra field for optional extra values.
Rich message translations
To translate a rich message string, the original rich message text must be in english, add the exact english text and its translations in Setting > Translations > Front End.
Show a rich message on chat initialization
To display a rich message, such as a list of buttons, when a user initiates a chat for the first time, enter the rich message shortcode into the welcome message.
Custom rich messages
You can create custom rich messages with your own custom content by going to
Settings > Miscellaneous.
Currently, custom rich messages are static and there are no interactive options available as
there are with shortcodes. However, you can insert custom HTML codes.
HTML codes
When creating a custom rich message, you can use the following codes:
You can send a confirmation email to the user by filling in the Follow-up Email fields.
The email uses the template defined in Settings > Notifications > Email template.
If the delay is not set, a dynamic time interval is utilized and it is determined as follows:
If Settings > Miscellaneous > Office hours is configured, and the current time falls within the defined office hours, or if at least one agent is online,
then the delay will be set to 15 seconds. In all other cases, the delay will be set to 5 seconds.
Follow-up messages are sent a maximum of once every 24 hours.
If the user provides an email address and the newsletter feature is enabled, the email address will be subscribed.
The follow-up message is sent only to users without email address.
If the chatbot's human takeover feature is activated, the follow-up message is only sent during human takeover.
Rating
Display the feedback form to rate the conversation when it is archived.
The rating message is compatible with the messaging channels.
The rating buttons are not displayed on messaging channels. However, if Artificial Intelligence and OpenAI are set up, the user's reply will be analyzed to extract the rating.
The rating is visible in the right panel of the conversations area, in the agent ratings report of the reports area, and in the agent profile.
Enable the rating email reminder by setting the delay (in hours) in the Email reminder delay option.
The email remind the user to provide a feedback and it is sent only if the user hasn't rated the conversation after the set delay.
For this feature to work, you must also set the Redirect URL — enter any URL that includes the chat widget (e.g., your website URL).
Once the user clicks the Helpful or Not helpful link in the email, they will be redirected to the specified Redirect URL, and the rating will be saved automatically.
The chat will open showing the rating panel, allowing the user to provide additional feedback.
To learn more about the office hours option, please click here.
The offline message is sent to the same user maximum 1 time per hour.
By default, the offline message is also sent if all agents are offline, even during office hours.
To prevent this, enable the Disable agents check option.
If the chatbot's human takeover feature is activated, the offline message is only sent during human takeover.
If you or any other agent is online using Slack, they will be considered as online agents also by Support Board.
Privacy message
Present a privacy message accompanied by Accept and Decline buttons.
The user's approval by clicking on the Accept button is required to start using the chat.
This feature ensures privacy policy enforcement and GDPR compliance.
The privacy message is not shown if the Settings > Users > Require registration option is enabled.
The privacy message is also sent to messaging channels like WhatsApp, but the user does not have the option to approve or decline the privacy policy.
The messaging functionalities are not blocked either.
The message is sent after the user initiates the conversation by sending their first message.
Pop-up message
Show a pop-up notification to all users.
The popup message is always shown until the user manually closes it; then it stays closed.
Attachments
Here, you can access information regarding the uploading of files and the message's attachments.
The following image formats are displayed automatically:.jpg, .jpeg, .png.
The allowed file attachments extensions are set in the supportboard/include/upload.php file.
Add new allowed file extensions by adding the code define("SB_FILE_EXTENSIONS", ["exe", "abc",...]) to the config.php file of your Support Board installation folder.
Replace ["exe", "abc",...] with an array containing the extensions you want to allow.
The uploads folder location is supportboard/uploads by default for the PHP version, while for the WordPress version it is wp-content/uploads/sb.
You can customize it from the config file.
You can also upload files to AWS S3.
Information
Here, you can access information regarding a variety of features associated with conversations.
Tags
Tags enable more efficient organization and grouping of conversations. Please refer to the information below for further details.
You can manage the tags from Settings > Admin > Tags.
Tags can be assigned to conversations through different methods: via the admin area by navigating to Settings > Automations > More, and by inserting the JS variable SB_DEFAULT_TAGS into a page showing the chat or into a web page displaying the chat or the tickets panel.
To locate conversations with specific tags, simply enter the tag names into the search bar located at the top-left corner of the admin conversations area, or you can select the desired tag from the dedicated filters menu on top-left.
The tags filter is visible only if at least one tag is assigned to a conversation.
Check the Starred tag option to display the starred tag icon in the conversations area.
This allows you to select conversations assigned to the first tag with one click.
The first tag on top is always the starred tag.
You can disable the tags from Settings > Admin > Disable features > Tags.
Notes
Notes allow agents and admins to add comments to conversations.
Notes are only visible to agents and admins.
If you are usign OpenAI, we suggest enabling the note data scraping option.
Manage the note settings from Settings > Admin > Notes settings.
You can disable the tags from Settings > Admin > Disable features > Notes.
Activate advanced AI-powered features by using the Artificial Intelligence app. Learn more here.
Transcript
The full conversation can be sent to the user by the agent or admin as a transcript file.
Agents and admins can send conversation transcripts to users by clicking the Transcript button in the top-right corner of the admin's conversation window.
Agents and admins can automatically send the transcript to the user when the conversation is archived by using the close message available at Settings > Messages & Forms > Close message.
The transcript can be sent to the user only if the user has an email address.
If the conversation has been translated, the transcript will also include the translated messages.
Conversation sources
The conversation source indicates the origin of the conversation.
It can be from the chat widget, a messaging channel, or the tickets panel.
The list below show all the possible conversation sources.
Normal chat widget conversation. The value is empty in this case.
ig - Instagram messaging channel.
fb - Facebook Messenger messaging channel.
wa - WhatsApp messaging channel.
tg - Telegram messaging channel.
tk - Tickets panel conversation.
em - Email messaging channel.
tm - Text message messaging channel.
ln - LINE messaging channel.
vb - Viber messaging channel.
wc - WeChat messaging channel.
za - Zalo messaging channel.
Miscellaneous
The date and time format is automatically detected based on the browser's language settings.
USERS
Manage users
Manage users from the Users area in the left menu of the admin area.
Import users
You can import users from Settings > Users > Import users. Only CSV files are supported.
You can download an example CSV file here.
In the example file, the first row is the header and the columns Height and Hair color are custom user fields added from Settings > Users > Custom fields.
Search users
You can search users by name, surname, email, and custom fields.
Delete users
You can delete a user by opening the User edit box and then clicking Delete user.
To delete multiple users at once, select the users you want to delete from the Users table and then click the top right Delete icon.
When a user is deleted, all of their conversations and messages are automatically deleted permanently.
The conversation attachments will be deleted permanently. If AWS S3 is enabled, also the AWS S3 files will be deleted.
If a user of a deleted user come back to the website, a new user is automatically created.
Visitors are automatically deleted every 24 hours.
Merge users
You can merge two users into one directly from the user table. Select any two users, then click the Merge Users button at the top.
When two users are merged, all their conversations are combined under the new user account.
The system automatically identifies and merges relevant information from both users into the new account.
Additional user table columns
To display additional columns in the user table go to Settings > Users > Users table additional columns and add the new columns.
The value of each column is the slug of the user detail or extra user detail you want to display. The slug is lowercase and with spaces replaced by the char -.
For example, the slug of the extra user detail "Date of birth" is "date-of-birth".
User types
Type
Description
user
A "user" is any user with an email.
lead
A "lead" is any user with no user details, who is automatically registered, and with at least one conversation.
visitor
A "visitor" is any user who has not started a conversation.
Note: Visitors are automatically deleted every 24 hours.
Manage agents and admins
Manage, create, and delete agents and admins from the Users area.
Configure agents' privileges and permissions from Settings > Admin > Agent privileges.
It can create a supervisor from Settings > Admin > Supervisor.
The Supervisor is a special agent with specific privileges, it must be an administrator.
You can add multiple supervisors by adding comma separated admin IDs.
To create an agent or ad admin, go to the users area and click the button Add user on the top right.
Only agents and admins can log in the Support Board admin area.
When you activate the Support Board plugin on WordPress, an admin account is automatically created using the same username and password as the currently logged-in user.
Collect user details
You can gather user details, such as their name and email, through various methods:
The registration form is a pre-chat form that requires the user to enter specific information before starting the chat.
Use it to require users to provide certain information, such as their name and email, before starting a chat.
You can configure the registration form in Settings > Users.
Information
You can use the registration form as a pre-chat form by limiting the information requested to the user to only the user's email address or the user name, for example.
To do that, set the Require registration option to Registration form and enable the required user fields under the Registration fields list.
The log-in form is shown only if the email field is enabled.
The password field is always shown when the user system is set to "WordPress".
If a user tries to register with an email that's already registered, an OTP will be sent to allow them to log in.
Keep in mind that in real-world use, duplicate registrations rarely occur since users remain logged in on the same device, it usually happens only during testing.
Information
OTP
The OTP feature verifies a user's email during registration by sending a one-time code to their email address. The user must enter this code in the registration form.
Enable it from Settings > Users > Email verification, and customize the OTP email from Settings > Users > Email verification email.
The email also uses the template defined in Settings > Notifications > Email template.
Note that the OTP is always sent — even if the feature is disabled — when a user tries to register with an email that's already registered.
Login verification URL
The login verification URL feature can be found under Settings > Users > Login verification URL in Support Board.
This feature allows Support Board to authenticate an external login from an external source and automatically register and log in the user.
Support Board will send a request to the specified URL, appending the user's email address and the password entered in the chat login form as URL parameters.
The parameters are named email and password.
Example: https://example.com/login.php?email=example@mail.com&password=12345678.
The expected response from the URL should be a JSON object like below:
If a user forgets their password, they can click on the Forgot password button and an email containing a login link will be sent to their registered email address.
Once the user clicks the link, they will be logged in automatically.
You can customize the email sent to users from Settings > Users > Login link email.
The email uses the template defined in Settings > Notifications > Email template.
This feature is available only if Require registration is set to Registration and login form or Login form.
Miscellaneous
New users are automatically displayed in the user table in real time.
To view online users enable Settings > Users > Register all visitors.
To receive the online user notification you have to enable Settings > Notifications > Online users notification, Settings > Miscellaneous > Pusher (if you are using the cloud version, this setting is automatically activated) and Settings > Users > Register all visitors (activated by default).
The feature covers all user types, including visitors and leads. Notifications are only sent once per user within a 24-hour period.
Agents and admins can set their status to online or offline from the bottom-left profile panel.
If the option Settings > Notifications > Away mode is active, the offline status is activated automatically when the agent or admin has been inactive in the admin area for at least 10 minutes.
Inactivity is defined as not performing any mouse clicks, movements, or key presses.
The automatic offline status feature is not enabled on mobile devices.
For this feature to work correctly, Pusher should be enabled.
The users table use auto-pagination, which is limited to 100 results per scroll.
SETTINGS
Settings
Office hours
You can set the office hours timetable from Settings > Miscellaneous > Office hours. Office hours are used for:
Disabling and hiding the chat during out-of-office hours.
Disabling the chatbot during regular office hours and enabling it during out-of-office hours.
More information
If a day has only one start and end time, enter them in the first two fields. For example, use 10:00 AM to 5:00 PM and (empty) to (empty), not 10:00 AM to (empty) and (empty) to 5:00 PM.
Do not leave empty values. Set them to closed instead.
You have to set values to closed if you want to set a whole day as not office hours.
The office hours are in UTC format.
Set your UTC from Settings > Miscellaneous > Timezone.
The date and time format of the timetable matchs automatically the one used in the country of the browser language of the user.
Articles
Knowledge base articles provide instant answers to customers to help reduce customer support volume.
You can access the articles from the left Support Board menu.
How to display the articles area
The articles can be shown in the chat dashboard by enabling them from Settings > Articles > Display in dashboard.
Alternatively, articles can be shared in any chat conversation via the rich message shortcode, [articles].
Follow these steps to display the articles on a page of your domain and website.
You can display them in three ways:
REST API METHOD
Insert the code below into your page.
Replace [SUPPORT-BOARD-URL] with the URL of your Support Board installation and [YOUR-TOKEN] with any admin token.
If you are using the cloud version, the URL is https://cloud.board.support/script/include/api.php, to get the token click here, also, remove the first two scripts.
Include the attibure nojquery => true if you already have jQuery included in your page.
Include the attibure nojs => true if you already have the chat embed code included in your page.
Insert the code below into your page.
Replace [SUPPORT-BOARD-URL] with your Installation URL, get it from Settings > Miscellaneous > Installation URL.
Replace [SUPPORT-BOARD-PATH] with the path of your Support Board installation.
This method is not available in the cloud version.
If jQuery is alraedy included in your page, do not include it again.
Insert the code below into your page.
This method is not recommended for SEO purposes as the as the articles are loaded asynchronously and the page may not be indexed by search engines.
Replace [SUPPORT-BOARD-URL] with your Installation URL, get it from Settings > Miscellaneous > Installation URL.
If you are using the cloud version, the URL is https://cloud.board.support/script.
If you're using the WordPress version you can use the shortcode [sb-articles].
This method is supported only in the WordPress version.
The page shows the article categories, you must add parent categories and assign articles to them.
The articles will be shown in the same location of the code above.
You can hide the chat widget by adding the JS code var SB_DISABLED = true; to the page.
One-page navigation
The article's one-page navigation appears automatically on all articles.
It is generated from the article's h2 and h3 heading blocks.
URL rewrite
You can enable the URL rewrite from Settings Articles > URL rewrite.
The default URLs of Support Board are not user-friendly and they include parameters.
You can rewrite the URLs via .htaccess file. The code below rewrites the URLs of the categories and article pages.
The categories URL changes from articles.php?categories=ID to articles/category/ID.
The article URL changes from articles.php?article_id=ID to articles/ID.
Change articles with the name of your articles page and set the articles page URL in Settings > Articles > Articles page URL.
Language
You can add new article translations by opening an article.
Click the + icon on top right and select the language you want to translate the article into.
To delete a translation, hover the language flag icon and click the trash icon.
You can add new category translations by opening a category. Click the + icon on top right and select the language you want to translate the category into.
To delete a translation, hover the language flag icon and click the trash icon.
You can enable automatic translation of articles and categories by activating both the multilingual via translation feature and Settings > Articles > Language > Automatic translation.
You also have to set the default language of your articles from Settings > Articles > Language > Default language.
The language used for the automatic translation is the user's language detected by Support Board. You can also force a specific language by adding the URL parameter lang=LANGUAGE-CODE.
The language menu is shown at the bottom of the article.
It shows all the available translations of the article.
If there is at least one translated article in the user's language, only the translated articles are displayed in the category page or main page.
Otherwise, all articles are displayed in the original language.
Force the articles page to be shown in a specific language by adding the URL parameter lang=LANGUAGE-CODE.
Replace LANGUAGE-CODE with the two-letters language code.
More information
If you use categories, all the articles must be assigned to a category.
You can create an internal chat link to an article with the button rich message.
The articles are always included into the training of your OpenAI chatbot.
If you update an article, you'll need to train the chatbot again, the process isn't automatic.
If some block is not saved, e.g. text block, disable all browser extentions and try again.
To hide the chat widget insert the following code into the articles page: <script>var SB_DISABLED = true;</script>.
Language and translations
Support Board is fully multilingual and provides powerful features to detect the user's language on the fly.
Chat language
Support Board is already translated into 45+ languages. There are many options available to set the language:
OPTION 1
Go to Settings > Chat and check the Language option.
Set it to multilingual to automatically use the chat language of the user's browser or the language saved in the user profile.
OPTION 2
Add the URL parameter lang=LANGUAGE-CODE to the script that loads the chat, replacing "LANGUAGE-CODE" with the two-letters language code you would like to display.
E.g. https://board.support/supportboard/js/main.js?lang=es or https://cloud.board.support/account/js/init.js?id=123456&lang=es for the cloud version.
This feature will force the chat to always use the same language and the Settings > Chat > Language option will be ignored.
Go to wikipedia.org/wiki/List_of_ISO_639-1_codes for the complete languages code list (see column 639-1).
For Traditional Chinese use zt, for Simplified Chinese use zh, for Brazilian Portuguese use pt.
OPTION 2 - WORDPRESS ONLY Go to Settings > WordPress and set the option Force language.
This feature will force the chat to always use the same language and the Settings > Chat > Language option will be ignored.
OPTION 3 - WORDPRESS ONLY
The WordPress version of Support Board uses the default language of the WordPress installation;
or the language of the current page or post if the website is multilingual.
This feature is compatible with WPML, Polylang, and other multilingual plugins.
This feature is automatically disabled if the Settings > Chat > Language option is active.
Admin language
To translate the admin area follow the steps below:
Translate the texts in your language from the Settings > Translations.
To set the admin area language you have three options:
Activate the option Settings > Admin > Automatically translate admin area.
This feature automatically translate the admin area to match the agent profile language or the agent browser language.
Edit the file config.php inside your Support Board installation directory and Enter the code
define('SB_ADMIN_LANG', 'LANGUAGE-CODE'); at the end of the file content.
Replace LANGUAGE-CODE with the language code of the language you want to use, use only 2 letters, for example, insert only es, not es_ES.
This option is not available in the cloud version.
Chatbot and message translations
To automatically translate chatbot messages and other texts, use the Artificial Intelligence app and follow the steps outlined here.
Edit and add new translations
You can translate almost any custom content like rich messages, built-in messages, departments, chat header, and more.
To add a new translation or edit and existing translation, follow the steps below:
Go to Settings > Translations, if you want to add a new translation, click New translation.
Enter the English content you wish to translate in the first field.
The original text must be in English.
If the original text has breaklines, replace them with the \n code.
Enter the corresponding translation in the second field. To add breaklines, use the \n code.
If you have the artificial intelligence app you can also translate all contents to any language automatically through the multilingual via translation feature.
Add a new language
To add a new language, follow the steps below:
Via FTP or a File Manager, go to
supportboard\resources\languages\front.
Duplicate (copy and paste it in the same directory) the
supportboard\resources\languages\front\source.json file.
Go to
Settings > Translations and the new language should appear automatically.
To add a new language for the admin area, follow the exact same steps, but use folder admin instead.
New languages will not be lost or deleted on plugin updates.
Information
To delete translations of emails, articles, and more, hover the language flag icon and click the trash icon.
If a translation string is missing, add it by clicking the button Add new translation.
If a translation string is not working, make sure to remove all white spaces and break lines at the start and the end of the string.
The translations edits are not saved in the database but directly in the translation files.
When a translation is edited, and saved, a backup is created into the uploads folder.
The backup is restored automatically on plugin update and plugin activation.
You can add missing translation strings also by code. Edit the language files located in supportboard\resources\languages.
After editing a file, the new strings will be visible under Settings > Translations.
Remember to click Save changes in order to preserve your translations and avoid losing them when Support Board is updated.
Departments
Departments give you the power to distribute conversations and assign various agents to specific departments.
For example, you can create a department entitled "Sales" and assign specific conversations to that department.
To start using departments, follow the steps below:
Go to Settings > Miscellaneous and add, delete and manage the departments. After saving, reload the page.
Go to Users > Agents and edit an agent, you will see a new field where you can set the department of the agent.
Reload the page and you're done! In the Conversations area, you will now see an option to set the department.
Settings
Display in dashboard Displays the departments' list in the chat dashboard and force users to choose a department before starting a conversation.
Display images Displays the department image instead of the department color.
Display in conversation list Displays the department color in the conversation list of the admin area.
One conversation per department Restrict users from opening multiple conversations within the same department, allowing only one conversation to be active per department.
Label Replace the label Departments (plural) with another text. The name is displayed in the admin and tickets area.
Label single Replace the label Department (singular) with another text. The name is displayed in the admin and tickets area.
Dashboard title Set the title of the chat dashboard list. Default: Departments.
How it works
Agents and admins with no assigned department always see the conversations of all departments.
Agents and admins with an assigned department can only access conversations, users, and agents within that department.
When a conversation is assigned to a new department, an email notification is sent to all of the agents assigned to the new department.
The chatbot can assign a department to the active conversation through the Q&A set data feature, or the flows actions feature.
How to assign a department to a conversation
You can assign a department to a conversation in several ways:
Via Settings > Miscellaneous > Departments settings > Display in dashboard.
In this case, the user will be required to select a department before starting a new conversation.
Via Settings > Automations > More.
Via JavaScript, with the variable var SB_DEFAULT_DEPARTMENT = ID;. Enter the code into the pages where the chat is displayed and replace ID with the department ID.
For more details check the API
here.
When the queue is activated via Settings > Miscellaneous > Queue, or routing is activated via Settings > Miscellaneous > Routing,
Support Board automatically assigns the users conversations to all available agents proportionately.
Only online agents are counted as "available" agents and will receive new conversations.
Conversations are assigned proportionally between all online agents.
If no agents are online, the conversation will remain unassigned and will be automatically assigned to the first agent who comes online.
Admins are not included; admins always see all the conversations.
Agents must archive a conversation to mark it as completed; this will automatically give them access to the next conversation in the queue.
A conversation is active if it's not deleted, or archived.
Agents can switch their status between online and offline by hovering over their profile image and then clicking the label of the profile pop-up at the bottom-left of the admin area.
Agents can only search and filter their conversations.
Agents can only view their conversations; however, they can see all of the conversations of a single user.
To enable agents to view all unassigned conversations, activate Settings > Miscellaneous > Hide conversations of other agents and View unassigned conversations.
Queue and routing are compatible with the departments.
If human takeover is active, the queue or routing is activated only on human takeover.
When routing or queue is active, the agents menu will be automatically enabled.
More information - Queue only
When the queue is activated users enter into a queue automatically when an agent's chat limit is reached.
When a user enters the queue, a message with the current position in the queue and the estimated waiting time is displayed.
Support Board automatically assigns the conversations to all available agents proportionately.
When an agent marks a conversation as completed (by archiving it), the queue is updated and a new conversation is received.
If a user is in the queue and leaves (e.g. by closing the browser) for more than 1 minute, the conversation is saved;
however, once the user comes back, the queue is reset and the user will lose their previous position.
If the user leaves, the conversation remains unassigned and therefore invisible to agents, but only visible to admins.
You can use the following merge fields in the queue message: {position}, {minutes}.
They will be replaced by the real values in real-time.
The waiting time is displayed in minutes and is calculated as follows: queue position X response time = waiting time.
For example, if a user is 5th in the queue, and the response time has been set to 4 minutes (via Settings > Miscellaneous > Queue), then the total wait time displayed to the user will be 20 minutes.
When the sound option is active, a sound is played when it's the user's turn.
For conversations started from messaging apps like WhatsApp, it is not possible to respect the limit of conversations per agent, all conversations will be immediately and proportionally assigned to an online agent.
If no agents are online, the conversation will remain unassigned and will be automatically assigned to the first agent who comes online.
Use the offline message to prevent the chat from showing the queue update message to the user.
To test the queue, follow the steps below:
To simulate multiple users and agents, open the chat in multiple different browsers (e.g. Opera, Firefox, Brave, Chrome, etc.). Each browser can simulate two users/agents: one in normal mode and one in "private" or "incognito" mode.
To reset the chat and start a new user session, open the browser console, enter SBF.reset(), and press ENTER.
More information - Routing only
When the routing is activated Support Board automatically assigns the users conversations to all available agents proportionately.
If the Routing > Disable online status check option is active, the conversations are distributed proportionally among all agents, regardless of whether they are online or offline.
When an agent comes back online after being offline, all unassigned conversations are automatically assigned to them.
When routing is active agents can manually route conversations to other agents from the right panel of the conversations area.
If the conversation is archived and the user reopens it in the future by sending a new message, if the assigned agent in the conversation is offline, the conversation is assigned to another agent.
Manual routing
When the routing is activated via Settings > Miscellaneous > Hide conversation of other agents agents see only their own conversations and can select the unassigned ones.
Routing if offline: if the conversation is archived and the user reopens it in the future by sending a new message, if the assigned agent in the conversation is offline, the conversation is assigned to another online if there is at least one, otherwise to no agent.
View unassigned conversations: allow agents to view the unassigned conversations, when an agent replies the conversation is automatically assigned to him and the conversation is removed in real-time from the admin area of the other agents.
Check this option to enable the manual routing.
Agents menu
The Agents menu lets you assign conversations to specific agents.
It appears on the right side of the conversations area and is automatically enabled when queueing or routing is active.
Select multiple conversations (see keyboard shortcuts) to assign the selected conversations to a specific agent.
Assign an agent to a conversation
You can assign an agent to a conversation in several ways:
By enabling the Settings > Chat > Agents menu option.
In this case, the user will be required to select an agent before starting a new conversation.
Via Settings > Automations > More.
Via JavaScript, with the variable var SB_DEFAULT_AGENT = ID;.
Enter the code into the pages where the chat is displayed and replace ID with the agent ID.
For more details check the API here.
Email piping lets you sync multiple email addresses to receive messages directly in Support Board.
It also allows you, your agents, and users to reply to chat messages via email.
Activation
Go to Settings > Notifications > Email piping and enter your POP3/IMAP email server information.
Go to Settings > Notifications > SMTP and enter your SMTP email server information.
The email address must be the one to which the email piping server connects to.
Support Board will send all emails from this email address and you, your agents, and your users will reply to this email address.
For more details check the email notifications section.
Information
The email address of Settings > Notifications > SMTP > Sender email should match the one used by the email piping server.
If the email address does not match, or if multiple email addresses are configured for email piping, and the Username setting is defined as an email address, Support Board will automatically include a reply-to field in the email notification.
This ensures that when the user replies, their response is directed to the correct email piping address, keeping the conversation linked properly.
The Notifications > User email notifications and Notifications > Agent email notifications settings are enabled automatically when email piping is active.
When agents reply in Support Board, emails are always sent to the user.
If you're using the Artificial Intelligence app, and the human takeover feature is activated, no emails are sent if the chatbot knows the answer.
If the Convert all emails option is active:
All emails sent to your inbox will be converted to chat messages, mind that all emails, including spam, promotional emails and more would be wrongly converted too.
Email sent by email addresses of agents and admins will be ignored, use another email address for testing.
Each email sent directly to the email piping address will generate a new user conversation.
You can not use the same email address used for the email piping to reply. All your Support Board agents and admins must use a different email address.
Agents must reply via email from the same email address registered in Support Board.
The email is sent to the agents only if they are offline. If they are online no emails are sent.
For Google Gmail and Google Workspace emails, you need to replace your Google password with a Google app password, details on https://support.google.com/accounts/answer/185833 (Create & use App Passwords section).
Enter imap.gmail.com as host and 993 as port. You need also to allow access to Gmail to less secure apps, you can do it from
https://myaccount.google.com/lesssecureapps.
If you're using Google Workspace with a custom domain, check Admin Console > Security > Access and data control > API Controls > App access control.
Make sure SMTP access isn't restricted for third-party apps.
Email piping requires php5-imap module (IMAP module).
If it's not installed on your server you can install it with the command apt-get install php5-imap.
If you have issues contact your hosting/server support.
The Delimiter option add a text at the top of all emails:
### Please type your reply above this line ###
.
This text tells Support Board to delete all the content below it and it's usefult to cut out all of the reply quotes. Activate it if you see duplicated messages in the chat.
If this option is active, you and your users can not use the string ### in the emails.
Email attachments are supported.
In order for email piping to work, email replies must contain the Support Board recipient's name. Ex. Support Board | SB2457-4734 <example@email.com>.
All major email clients like Outlook Web, Outlook, Gmail, Yahoo Mail, support the recipient's name by default via chatbot reply or reply all buttons.
Because of the nature of how emails work, each email client uses their personal codes, delimiters, and automatic strings, and more.
For this reason, some chat messages converted from emails can contain invalid texts.
We are working to optimize as many email clients as possible, for now, the following email clients are optimized and should not return any invalid text: Outlook Web, Outlook, Gmail, Yahoo Mail.
Email piping supports departments, if the user's conversation is assigned to a department, the email notifications are sent only to the agents assigned to that department.
If the email includes the reply-to attribute, it will serve as the primary user email address and notifications will be sent to that email.
The Filters option allows you to filter the emails that are converted into chat messages.
Add keywords separated by commas. If the email body, subject, or sender contains one of the keywords, the email will not be converted into a chat message.
Cron job
Support Board tries to process emails via cron jobs every 60 seconds, details here.
If you're using the cloud version the cron job is already activated by default and it will run at least once every 60 minutes.
You can manually trigger execution and speed up cron jobs via API with the PHP function sb_email_piping(), or the WEB API function email-piping.
You can create a cron job that runs the URL [SUPPORT-BOARD-URL]/include/api.php?piping=true. Use the command */59 * * * * wget [SUPPORT-BOARD-URL]/include/api.php?piping=true to run it via a command.
Replace [SUPPORT-BOARD-URL] with your Installation URL.
To obtain the URL, follow these steps:
If you are using the WP or PHP version, go to Settings > Miscellaneous > Installation URL.
If you are using the cloud version, use this URL: https://cloud.board.support/script/include/api.php?piping=true&cloud=API-TOKEN and replace API-TOKEN with your API token.
You can also use this cron job file: download. The cron job command is php -f YOUR-FILE-PATH/cron.php.
If you manually run the cron job, activate the Disable cron job option to stop Support Board from manually triggering it and to improve performance.
Pusher
Activate Pusher from Settings > Miscellaneous > Pusher to use the WebSockets instead of HTTP AJAX requests for the chat functionalities.
WebSockets drastically improve the chat performance by removing the need for repeated AJAX requests to your server for checking for new messages and conversations.
WebSockets also improve responsivness of the chat: faster messages delivery, more accurate online and typing status, more accurate online users list and more.
If you are using the cloud version, this setting is automatically activated.
Enter the name of your app and choose the cluster closest to your location.
From the left menu of the dashboard click App Settings and enable client events.
From the left menu of the dashboard click Keys, copy App ID, Key, Secret, Cluster.
Go to Settings > Miscellaneous > Pusher, and paste app ID, key, secret, cluster.
You're done.
Information
Pusher is free to use for up to 200k messages and 100 concurrent connections per day.
Messages are used for the following functions and more: user registration, online user status, chat messages, and chatbot messages.
Pusher channels count calculation is explained here.
When Pusher is active the following AJAX requests are replaced by WebSockets: checking for new messages, checking for new conversations, online/offline status, typing status, online users list.
When Pusher is active the last activity value of users and agents is updated only on page load or when they send new messages.
When Pusher is active the option Settings > Users > Register all visitors is automatically activated and it can not be disabled.
If your server becomes overloaded, crashes, experiences excessive RAM usage, high CPU usage, or in general, slows down or has performance issues, activate Pusher.
Direct messages
Direct messages allow you to send а single chat message, email, or text message, to a single user or several users. Read the information below to understand how it works.
To send a message go to the Users area and click the direct message icon.
Direct message buttons are also available in the profile box of the user.
To send a message to all users, enter All in the User IDs field.
To send a message to a group of users, enter their IDs in the User IDs field.
You can check the users and then click the direct message icon to enter the IDs automatically.
The chat message is sent to the active conversation, if any, otherwise to a new conversation.
If the Settings > Notifications > User email notifications option is active, all users with an email are notified via email.
If the Settings > Notifications > Text message notifications > Active for users option is active, all users with a phone number are notified via text message.
If the Settings > Notifications > Push notifications option is active, a push notification is sent to all users.
The message is also sent to messaging apps such as WhatsApp and Messenger if the user is connected to them.
To send a message to all users of a single messaging app enter one of the following strings: whatsapp, messenger, instagram, telegram, twitter, zalo, wechat, viber, line.
Enter tickets to send a message only to the users who created a Support Board ticket via the Tickets app.
Direct email
Set the email template from Settings > Notifications > Email template.
The HTML language is supported.
The subject supports merge fields.
Direct text messages
To enable direct text messages you must enable the SMS in Settings > Notifications > Text message notifications.
Automations allow running multilingual automatic tasks when conditions set by you are met.
To delete a condition, set it to empty. To disable an automation, delete all conditions.
Automations are sent only 1 time to users.
If you used an automation in the past, and users already received it, you need to delete the automation and create a new one to show it to the users.
Repeat only works if used in conjunction with date time.
When date time is used in conjunction with the criteria is exactly, the value must not contain hours and minutes (hh:mm). Ex. 25/10/2021 (25/10/2021 10:30 will not work).
The Settings > Users > Register all visitors option must be active if there are message automations that are executed on page load.
City, countries, languages work automatically only if both the settings Settings > Users > Register all visitors and Settings > Users > Full visitor details are enabled.
Cities work only if the user detail location is set and equal to city, country, or if the user detail city is set.
Countries work only if the user details country_code, or country is set, or if the user detail location is set and equal to city, country. The country name must be in english.
languages work only if the user details browser_language, or language is set.
A visitor is a Returning visitor only if it visits the website again after 24h or more.
The pop-ups appear only if the chat is closed, and they overwrite the default pop-up. You can check the message fallback option to send a message instead of showing the pop-up if the chat is open.
You may need to enable Settings > Users > Register all visitors if you want to send an automated message to new users.
Chat messages and popup fallback messages are sent only if the last user or agent message of the conversation is older than 10 minutes.
This feature prevents unwanted automated messages to be sent during an agent-user conversation.
The Custom variable condition check for the JavaScript variables with the given names and values.
For example, the condition example=ABC is met if into the chat's page there is this JavaScript code: var example = "ABC";.
Add multiple variables separated by commas.
Automations are not compatible with the messaging apps like WhatsApp, Messenger, Instagram, Telegram, Twitter, Zalo, WeChat, Viber, Line.
To get the List ID, enter in SendGrid and click Marketing > Contacts(https://mc.sendgrid.com/contacts), then click on a list, or create a new one. The last part of the URL is the list ID. Ex. https://mc.sendgrid.com/contacts/lists/8558c1e7-3c99-4428-a68f-78df2e437f8e (the list ID is 8558c1e7-3c99-4428-a68f-78df2e437f8e).
Elastic Email
To get the Key, enter in Elastic Email, then click Settings from the top right profile menu. Click Create Additional API key (https://elasticemail.com/account#/settings/new/create-api), set a name and choose Plugin or Full access, or Custom and make sure the permission Contacts is set to View & Modify.
The List ID is the list name. Important! Existing list's or segment names must not have any spaces in them.
Campaign Monitor
To get the Key, enter in Campaign Monitor, then click Account settings from the top right profile menu. Click API keys > Generate API key.
To get the List ID, enter in Campaign Monitor, then click List and subscribers from the top menu. Select a list and then click Settings from the left menu and copy the List API ID.
HubSpot
To get the Key, enter in HubSpot, then get go to Settings > Integrations > Private apps and create a new app.
Enter app name, then open the Scope tab and add the following scopes: crm.lists.write, crm.lists.read, crm.objects.contacts.read, crm.objects.contacts.write.
Click Create app and copy the token. Paste the token into the Key field of Support Board.
To get the List ID, enter in HubSpot, then get it from Contacts > List > List details.
Moosend
To get the Key, enter in Moosend, then click Settings > API key.
To get the List ID, enter in Moosend, then get it from Audience > Email lists.
GetResponse
To get the List ID, enter in GetResponse, then get it from Lists > Your list > Settings(https://app.getresponse.com/lists). Copy the List token value.
To get the Key, enter in ConvertKit, then get it from Settings > Advanced > API secret.
To get the List ID, enter in ConvertKit, then get it from Grow > Landing Pages & Forms. Open you form and copy the numeric part of the URL. For example the ID of the form with URL https://app.convertkit.com/forms/designers/3003412/edit is 3003412.
ActiveCampaign
To get the Key, enter in ActiveCampaign, then get it from Account settings > Developer.
To get the List ID, enter in ActiveCampaign, then get it from Left menu > Lists or Left menu > Contacts > Lists.
Open your list and copy the list ID in the URL. For example the ID of the list with URL
https://schiocco.activehosted.com/app/contacts/?listid=1&status=1 is 1.
The list ID must be in this format: domain:list-ID. The domain is the first part of your dashboard URL. For example the domain of https://schiocco.activehosted.com/ is schiocco and the final value to insert in Support Board is schiocco:1.
MailerLite
To get the Key, enter in MailerLite, then get it from Left menu > Integrations > MailerLite API.
To get the List ID, enter in MailerLite, then get it from Left menu > Subscribers > Groups.
View a group and copy the Group ID from the URL (e.g. ....group=18783408688903967...).
To get the List ID, enter in MailerLite, then get it from Contacts > Contacts lists > Your list.
Get the List ID by clicking the ? icon next to the lists's email, e.g. 1202546.
Sendy
To get the Key, enter the Sendy settings area and copy the API KEY.
To get the List ID, enter your brand, then click View all lists and copy the list ID.
The list ID setting must also include your Sendy full URL. Enter the URL plus the list ID spearated by the char |, e.g. https://example.com|TDf6o892Mx11VXGC51ui567u.
SendFox
To get the Key, enter in SendFox, then get it from Settings > API > Personal Access Tokens.
To get the List ID, enter in SendFox, then get it from Audience > Lists.
Open a list and copy the ID from the URL (e.g. the List ID of the URL https://sendfox.com/dashboard/lists/489151/contacts is 489151).
Klaviyo
To get the Key, enter in Klaviyo, then get it from Settings > Account > API keys.
To get the List ID, enter in Klaviyo, then get it from Lists.
Open a list and copy the ID from the URL (e.g. the List ID of the URL https://www.klaviyo.com/list/Y8364W/ is Y8364W).
To get the List ID, enter in Acumbamail, then get it from Lists.
Open a list and copy the ID from the URL (e.g. the List ID of the URL https://acumbamail.com/app/list/1225126/ is 1225126).
Amazon Web Services
Amazon S3
Upload attachments to your Amazon S3 bucket instead of the server where Support Board is installed.
Follow the steps below to set it up.
Enter the IAM dashboard and click Left menu > Access management > Users.
Click Add new user, enter the username and continue.
Select Add user to group and on the User groups section below click Create group.
In Permissions policies search for AmazonS3FullAccess and select it. Click Create user group.
Assign the new group to the user you are creating and continue, then click Create user.
Select the newly created user and open the Security credentials tab.
In the Access keys area, click Create access key and select Application running outside AWS.
Continue until you get the keys and save them in Support Board > Settings > Miscellaneous > Amazon S3.
Visit the Amazon S3 dashboard and click Create bucket.
Set the bucket name and region you want. Save the region and name in Support Board > Settings > Miscellaneous > Amazon S3.
Check ACLs enabled and Bucket owner preferred.
Uncheck Block all public access and all related checkboxes.
Click Create bucket.
This feature is technical and optional. Support does not cover any help related to this feature.
Be aware that it may take up to 24 hours for a newly created bucket to become active.
If you have recently created an S3 bucket and it is not working, wait for 24 hours and try again.
More settings
Saved replies
Saved replies, also known as canned messages, refer to a collection of pre-written messages that agents can quickly access and employ in the chat editor.
Manage them from Settings > Admin > Saved replies.
Saved replies can be printed by typing # followed by the saved reply name, plus a space.
The saved replies pop-up can be opened by typing ##.
Use \n to do a line break.
Copilot
If the chatbot is active, searching saved replies will also include results from the chatbot.
You can ask the chatbot to suggest replies based on your search query.
NOTIFICATIONS
Notifications
To understand how notifications work and when they are sent read the information below.
If you think notifications are not working, most probably you're just testing them in the wrong way, please read the information below before asking for support.
Email notifications
Both agents and users can receive an email notification when a new message is received.
Email notifications for admin and agents
Only 1 email is sent. Subsequent messages will not trigger a new email alert.
All emails sent by Support Board use the template defined in Settings > Notifications > Email template.
Include the {content} merge field—it's required and will be replaced with the actual email body.
Email notifications for agents
To activate email notifications for agents, enable the option Settings > Notifications > Agent email notifications.
When a user sends their first message, if the conversation is assigned to a department, an email is sent only to agents and admins who are offline and who are assigned to that department, or to those without any department assigned.
If the conversation is assigned to a specific agent, an email is sent only to that agent, otherwise an email is sent to all agents who are not online at the moment.
Subsequent emails are sent only to the last agent in the conversation.
Email notifications are sent only to offline agents and admins.
If you're using the Artificial Intelligence app, and the human takeover feature is activated, no emails are sent if the chatbot knows the answer.
To prevent admins from receiving email notifications check Settings > Notifications > Do not send notifications to admins.
Email notifications for users
To activate email notifications for users, enable the option Settings > Notifications > User email notifications.
When an agent sends a message to a user, an email is sent to the user only if the user is offline.
Only 1 email is sent. Subsequent messages will not trigger a new email alert.
Create the email
To manage the emails and create the contents go to Settings > Notifications.
You can use text and HTML. New lines are automatically converted to <br />.
You can use the following merge fields in the email. Merge fields are automatically replaced with the updated information.
Merge field
Description
{recipient_name}
The name of the user or agent who is receiving the email.
{sender_name}
The name of the user or agent who was sending the message that triggered the email notification.
{sender_profile_image}
The profile image of the user or agent who was sending the message that triggered the email notification.
{message}
The links to any attachments that were part of the message that triggered the email notification.
{attachments}
The emails attachments.
{conversation_link}
A link to open the conversation in the admin area. This merge field is only available for agent's emails.
{conversation_id}
The conversation ID.
Cron job
You can run the following cron job for sending email notifications to both users and agents, in which case you also need to select Settings > Notifications > Email notifications via cron job.
Sending emails via cron job will improve your email notifications: they will include the whole conversation and will be sent only 1 time.
You can create a cron job that runs the URL [SUPPORT-BOARD-URL]/include/api.php?email-notifications=true.
Use the command */59 * * * * wget [SUPPORT-BOARD-URL]/include/api.php?email-notifications=true to run it via a command.
Replace [SUPPORT-BOARD-URL] with your Installation URL, get it from Settings > Miscellaneous > Installation URL.
If you are using the cloud version, use this URL: https://cloud.board.support/script/include/api.php?email-notifications=true&cloud=API-TOKEN and replace API-TOKEN with your API token.
Our support doesn't include assistance with this feature, as it is for advanced users and related to your server.
For help with this, feel free to hire us.
Problems?
You can test the email feature by sending an email from Settings > Notifications > Send an agent email notification.
Emails may not be delivered several reasons; below are the most common ones:
Reason
Description
Solution
Hosting problems
The email server of your web hosting provider is not able to send emails or the emails are sent
but they are automatically detected as spam and deleted by the email clients.
If the settings at Settings > Notifications > SMTP are not set, your server will send the emails instead.
Contact your web hosting provider regarding email support or use your SMTP server by activating it in Settings > Notifications > SMTP.
SMTP problems
The email is not sent also if you activated the SMTP option in the Notifications area.
If you don't receive the emails make sure they are working by sending a test email from Settings > Notifications > Send a user email notification or Send an agent email notification.
If you don't receive the test email, your SMTP server, is not working. Open the browser console for more details about the error.
Because this is not an issue related to Support Board , the support doesn't cover it, please contact your server/hosting/SMTP support instead.
You can use sendgrid.com, you can send 40000 emails for 30 days for free, then 100/day forever for free.
Google Gmail
The email is not sent also if you activated the SMTP option in the Notifications area and you are trying to the Gmail SMTP server.
For Google Gmail and Google Workspace emails, you need to replace your Google password with a Google app password, details on https://support.google.com/accounts/answer/185833 (Create & use App Passwords section).
Enter smtp.gmail.com as host and set 465 or 587 as port.
If you're using Google Workspace with a custom domain, check Admin Console > Security > Access and data control > API Controls > App access control.
Make sure SMTP access isn't restricted for third-party apps.
Push notifications
Push notifications are like Desktop notifications but with some key difference.
Desktop notifications, also called Web notifications, are requested directly by the client while Push notifications come from a server.
The main difference is that the Push notifications work always, also if your device is offline, or Support Board is not open.
Also, they are persistent and always visible until closed.
Push notifications require an external service to work.
We support Pusher and OneSignal, they are free to use for up to 2000 users/devices.
Pusher does not support iOS devices. You need to use OneSignal if you have an iOS device.
Cloud version
The cloud version of Support Board uses OneSignal by default, you do not have the option to configure it.
For the admin area everything is already configured and you only have to check the Settings > Notifications > Push notifications > Active for agents option, save the changes, and reload the admin area.
Activation - Pusher
Go to Settings > Notifications > Push notifications and select Pusher as provider.
Go to Settings > Platform create a push notification integration and select the Web Configuration.
Enter a name and the domain where Support Board is installed. Enter only the root domain URL, excluding the full admin Installation URL.
For instance, if the Installation URL is https://www.example.com/supportboard/admin.php, just enter https://www.example.com.
If you are using the WordPress, you have to access the Support Board admin area outside of WordPress, click here for more details.
Scroll to Advanced Push Settings - Service Worker and enter the following service worker values.
Path to service worker files: get the value from Settings > Notifications > Push notifications > Service Worker path.
Main service worker filename: sw.js
Updater service worker filename: sw.js
Service worker registration scope: get the value from Settings > Notifications > Push notifications > Service Worker path.
Scroll to CLICK BEHAVIOR and as Matching Strategy select Origin: Take actions on a previous tab open to the same domain.
Click Save.
Go to Settings > Keys & IDs and copy AppID and Rest API Key.
Paste them into Support Board > Settings > Notifications > Push notifications > App ID and API key.
Click Save changes.
For iOS users only, access the Support Board admin area via Safari, then click the Share button and select Add to Home Screen.
Reload Support Board and you should see the prompt to activate the Push notifications. If you do not see it click Settings > Notifications > Push notifications > Subscribe.
Upload this file to your site at the following location: https://your-site.com/service-worker.js
Go to Settings > Notifications > Push notifications > Service Worker URL and enter the URL of the file.
E.g. https://your-site.com/service-worker.js.
You're done.
Information
Pusher is free to use for up to 1000 concurrent subscribers.
While you should be able to use the free plan for the admin area and all the agents, you may need a paid plan for Push notifications sent to the users depending on your site traffic.
Push notifications only work for full HTTPS websites. The only exception is localhost to ease development.
When a user click the notification the last page visited by the user is open and the chat is open automatically.
On desktop the browser needs to be running since that is the process that receives the push messages.
When Push notifications are active, they replace desktop notifications.
On Android and mobile devices, desktop notifications may not work, in which case you need to use Push notifications.
Push notifications can not be received on a desktop PC unless a browser is running.
Push notifications on iOS devices (iPhone) are available only from iOS 16.4.
You need to install Support Board as a PWA (details here).
You need to use OneSignal. Pusher does not support iOS devices.
When a user sends a message, if the conversation is assigned to a department, a push notification is sent only to agents and admins who are offline and who are assigned to that department, or to those without any department assigned.
If the conversation is assigned to a specific agent, a push notification is sent only to that agent, otherwise a push notification is sent to all agents who are not online at the moment.
Subsequent push notifications are sent only to the last agent in the conversation.
To prevent admins from receiving push notifications check Settings > Notifications > Do not send notifications to admins.
If you're using the Artificial Intelligence app, and the human takeover feature is activated, no notifications are sent if the chatbot knows the answer.
If you're using the WordPress version, Push notifications are not supported in the WordPress admin area, you need to access the Support Board admin area directly, more details
here.
If the Routing setting is active, only the agent assigned to the conversation receive the notification, admins see all conversations but don't receive notifications.
If queue or routing settings are active, only the agent assigned to the conversation receive the notification.
Notifications are not sent for messages sent by the user while waiting in queue.
Admins see all conversations but don't receive notifications.
If a user conversation is assigned to a department, only the agents assigned to that department receive the notification.
If a user conversation is not assigned to any department, only agents with no assigned department receive the notification.
If human takeover is active, no notifications are sent if the chatbot knows the answer.
When an agent click the notification the admin area is open and the right conversation is selected.
If the admin area is already open the notification will not open a new tab.
If Push notifications are not working, make sure you allowed the notifications, in Chrome you can check this from Privacy and Security > Site settings > Notifications.
If they don't work on a mobile device, try these steps too: install the PWA or delete it and install it again, restart the mobile device.
If you are using Chrome, to enable Push notifications also when the tab is closed you must enable the Continue running background apps when Google Chrome is closed option from Chrome > Setting > System (chrome://settings/system).
If Push notifications are not working, make sure that the conversation is not assigned to a specific agent or a wrong agent ID.
Click here for more details.
If Push notifications are not working, and you are using Windows, ensure that the notification feature is not being blocked by Windows.
To do this, click on the Start button and search for Notifications. Then, open the Turn app notifications on or off option and verify that your browser is not being blocked.
If Push notifications are not working, ensure that the Support Board admin area is not visible and open.
If the admin area is open, please minimize it or open another window or browser tab.
If Push notifications are not working, your system might be blocking them.
If you are using Windows 10+ check this link.
If you are on Mac check this link.
For all devices also check this link.
Desktop notifications
Desktop notifications
Desktop notifications are not sent if the user is viewing a page with include the chat (the user browser is open and visible, and the active page contains the chat).
Desktop notifications are not supported on iPhone and iOS devices.
Desktop notifications work only for secure URLs that use HTTPS (not HTTP). Your Support Board admin URL must use HTTPS.
When Push notifications are active, they replace desktop notifications.
Both agents and users can be notified via text message when a new message comes in.
Text message notifications are provided by Twilio.
Twilio is a paid service, but it is cheap, and you can use the trial version to test text message notifications for free.
Text messages sent to your Twilio phone number can also be received in Support Board. This allows you to chat with users via SMS in a true two-way messaging experience. More details below.
Once into the dashboard, click Get a Trial Number, then Choose this number.
Enter the Support Board admin area, go to Settings > Notifications > Text message notifications, and paste account SID, auth token, trial number (or a purchased phone number).
Find all details in the Twilio dashboard.
If you're using the trial version, you can send notifications only to verified numbers.
Enter the Twilio dashboard and click the left button # (Phone Numbers), then click Verified Caller IDs and add your phone number.
To start using the service live and to receive text messages in Support Board you need to purchase a phone number.
After the purchase go to Phone numbers > Manage > Active numbers, click your number, and enter the URL of Support Board,
get it from Support Board > Settings > Notifications > Text message notifications > Get configuration URL.
You're done.
Information
When a user sends their first message, if the conversation is assigned to a department, a text message is sent only to agents and admins who are offline and who are assigned to that department, or to those without any department assigned.
If the conversation is assigned to a specific agent, a text message is sent only to that agent, otherwise a text message is sent to all agents who are not online at the moment.
Subsequent text messages are sent only to the last agent in the conversation.
To prevent admins from receiving text message notifications check Settings > Notifications > Do not send notifications to admins.
Text message notifications are sent only to offline agents and admins.
Ensure that your agents and admins are assigned a phone number so that agent text messages can be sent to the appropriate numbers.
All phone numbers must have the country code starting with the symbol + (eg. +15558675310).
You can get the user's phone number via registration form, follow-up message, or via [email] shortcode.
You can manually enter the user phone from the admin area or via API.
If you're using the Artificial Intelligence app, and human takeover is active, no text messages are sent if the chatbot knows the answer.
To use the Sender ID feature enter the sender name in the Sender number field.
Sound notifications
When Settings > Notifications > Sounds are enabled, a sound will play whenever a new message or conversation is received.
Audio will only play when the user or agent engages with the document by clicking somewhere in the admin area or on the page displaying the chat widget.
This is because of a security feature of the browsers.
If the sound is set to repeat, it will loop as long as the admin area or the chat widget page is not open or minimized.
If the the admin area or the chat widget page is open and visible, you will not hear the sound.
Telegram notifications
For more details about Telegram notifications click here.
AI
ARTIFICIAL INTELLIGENCE
The settings below are related to the Artificial Intelligence app.
Installation
From Settings > Apps, click Artificial Intelligence and enter your license key to install and activate the app.
More details here.
If you have the cloud version click Active.
Human takeover
The human takeover happens in these cases:
When a human agent replies to a user's message.
When the Settings > Artificial Intelligence > Human takeover > Active option is checked.
It is triggered automatically when the chatbot fails to understand a user's message or it can be requested manually by the user explicitly asking to contact a human agent.
General information
When the human takeover is activated the chatbot is automatically disabled for as long as the last human agent that replied to the conversation is online.
If no agents have responded to the conversation yet, the chatbot will remain active.
After that, the chatbot is activated again but no default fallback messages will be sent within 10 days of human takeover if the chatbot doesn't know the answer to the user's question in the same conversation.
The chatbot is fully activated again if the conversation is archived or deleted.
If you're using Slack, no messages will be sent if the chatbot knows the answer. Once the human takeover is active all conversation's messages are sent to Slack.
When a human agent reply to a user the human takeover is activated automatically.
To fully disable the chatbot on human takeover, check the option Human takeover > Disable chatbot.
If the human takeover is already active, it will not be activated again, and the human takeover message will not be sent.
The fallback message will be sent instead.
The Settings > Artificial Intelligence > Human takeover > Fallback message feature sends an automatic fallback message when a user sends a new message while human takeover is active.
It's useful for letting users know that their messages have been received and that an agent will reply shortly.
The fallback message is sent at most once every 30 minutes and only if the user's new message is sent more than 30 minutes after the last agent reply.
Human takeover works seamlessly across all messaging apps, like WhatsApp, Messenger, Telegram, and others. Users don't need to click a confirmation button, any text reply confirming the request will activate the human takeover automatically.
Human takeover option
When the option Human takeover is active the following happens:
If enabled, the request is sent only if the message sent by the user is longer than 3 chars and contains at least two words. This optimization prevents mistaken requests.
The conversations to which the chatbot was able to answer correctly, are marked as read and moved at the bottom of the Inbox list.
When the user confirms the human takeover, or if it is automatic, the following happens:
The conversation is marked as unread and moved on top of the Inbox.
Any future user messages in the same conversation sent within 10 days of the human takeover will trigger agent notifications.
The notifications are sent according to their settings; see notifications for more details.
No human takeover requests within 10 days of the human takeover will be sent in the same conversation.
If queue settings are active, the queue or routing is activated.
If the disable outside office hours option is active, the human takeover is disabled outside office hours or if all agents are offline.
More details here.
Manual human takeover
The human takeover can be requested manually by the user explicitly asking to contact a human agent.
This setting is active by default.
Human takeover via Q&A
You can enable the human takeover for specific user messages via Q&A by adding the human takeover action in set data and actions.
OpenAI Chat
To enable human takeover on an OpenAI Chat add the following tool function in the OpenAI chat area settings:
                                {
                                    "name": "sb-human-takeover",
                                    "description": "I want to contact a human support agent or team member. I want human support.",
                                    "parameters": {
                                        "type": "object",
                                        "properties": {},
                                        "required": []
                                    }
                                }
Smart reply
Smart Reply suggests quick responses in real-time during a conversation.
Once active, you will see the suggested replies in the conversation area, if any.
Information
The Smart Reply return suggestions from your OpenAI chatbot.
If the language detection feature is active, the smart replies will use language detection as well.
If the multilingual via translation feature is enabled, the smart replies will utilize multilingual translation as well.
To read the complete text of a smart reply, hover the mouse pointer over it for a duration of 3 seconds.
To restore the previous message, press the keyboard shortcuts CTRL + Z.
Optimal configuration for the chatbot
Support Board provides powerful tools to assist you in the process of creating the chatbot.
Change the chatbot name from Settings > Users > Bot name.
Problems?
The most frequent reasons for OpenAI or Google not functioning properly are listed below.
For more details about the issue, open the browser developer tools and then the console tab, send a message through the Support Board chat, and an error should appear in the console.
On Chrome you can open the console from Settings > More tools > Developer tools > Console.
You can hire us to make the synchronization for you, details at the hire us page.
OpenAI
Click the Settings > Artificial Intelligence > OpenAI > Troubleshoot problems button and check for any error.
If there is an error, it will be related to your OpenAI account, follow the error message instructions to fix the issue.
Make sure to check the option Settings > Artificial Intelligence > OpenAI > Chatbot.
If the training is not working as intended, for instance, if the chatbot is not responding to questions relevant to the training data, and no training errors are being shown, there may be file permission issues.
To address this, please ensure that the uploads folder includes the embeddings folder.
It must exists and contains files. This issue only affects the PHP or WordPress versions, if your are using the cloud version ignore this point.
If the training is not working as intended, for instance, if the chatbot is not responding to questions relevant to the training data,
try to delete all training data from Chatbot > Training > Informaion > Delete all training data and train the chatbot again.
If the training is not working as intended, for instance, if the chatbot replies are cut off or partially incorrect, try asking the same question a few more times. The responses should improve over time.
OpenAI is needs to learn from the user interactions.
If your training data is from a website, and the website is multilingual, make sure the lang attribute of the <html> tag contains the correct language.
Delete all of your OpenAI settings, leave only the OpenAI key and try again.
If you are using the cloud version, you can use our OpenAI key by setting Settings > Artificial Intelligence > OpenAI > Sync mode to Automatic.
If this resolves your problems, it means that the issue originates from your OpenAI account.
You need to purchase credits to use this option.
Google
Click the Settings > Artificial Intelligence > Google > Troubleshoot problems button and check for any error.
If there is an error, it will be related to your Google account, follow the error message instructions to fix the issue.
If your synchronization was not successful we suggest reviewing our documentation and repeating the synchronization steps to correct any errors.
If needed, we provide integration services. Details at the hire us page.
OPENAI
OpenAI
The settings below are related to the Artificial Intelligence app.
Synchronization
Automatic sync mode
This feature is available only on the cloud version of Support Board.
The automatic sync mode is ready-to-use and does not require any additional settings. Set it at Settings > Artificial Intelligence > OpenAI > Sync mode.
If you want to activate the chatbot, check Settings > Artificial Intelligence > OpenAI > Chatbot.
The OpenAI (ChatGPT) integration gives your chatbot the ability to answer general questions about almost anything you can imagine.
To start using it, follow the steps below.
Get an API key from https://platform.openai.com/api-keys and paste it into Settings > Artificial Intelligence > OpenAI > API key.
If you are using the cloud version, set Settings > Artificial Intelligence > OpenAI > Sync mode to Manual.
Enable the chatbot from Settings > Artificial Intelligence > OpenAI > Chatbot.
Enable the Settings > Artificial Intelligence > OpenAI > Chatbot option, and save your changes.
Your chatbot should now be active.
The playground is accessible from the Chatbot area, which you can find by clicking the 🙂 smile icon on the left menu.
If the chatbot isn't working, click the Settings > Artificial Intelligence > OpenAI > Troubleshoot problems button and follow the instructions.
The following integrations are available from Settings > Artificial Intelligence and can be used to enhance the OpenAI chatbot's capabilities.
Integrations are conversational, multilingual, and compatible with any messaging app such as WhatsApp, Messenger, Telegram, and more.
Google Calendar
Enable this integration to allow the OpenAI chatbot to access your Google Calendar, so users can book appointments and manage them on your calendar.
Tasks
Book an avent: The chatbot can book events in your Google Calendar on behalf of the user.
Update an avent: The chatbot can update an existing event for a user in your Google Calendar.
Cancel an avent: The chatbot can cancel an existing event for a user in your Google Calendar.
List events: The chatbot can list the events of a user from your Google Calendar.
Show available booking times: The chatbot can show the available booking times.
Setup
Go to Settings > Artificial Intelligence > Google Calendar integration and click Activate.
Click Settings > Artificial Intelligence > Google > Synchronize and complete the synchronization process.
Set the available booking times under Settings > Miscellaneous > Scheduled Office Hours.
You are done. The chatbot can now book and manage events in your Google Calendar.
Information
The Slot duration setting is the duration of the booked event.
The Buffer time setting is used to add a buffer (in minutes) between bookings so you are not booked back-to-back.
The Minimum booking time setting is the minimum time (in minutes) required to book an event from the current time.
It is used to prevent bookings too close to the current time.
TidyCal
Enable this integration to allow the OpenAI chatbot to access your TidyCal account, so users can book appointments and manage them on your TidyCal account.
Tasks
Book an avent: The chatbot can book events in your TidyCal on behalf of the user.
Update an avent: The chatbot can update an existing event for a user in your TidyCal.
Cancel an avent: The chatbot can cancel an existing event for a user in your TidyCal.
List events: The chatbot can list the events of a user from your TidyCal.
Show available booking times: The chatbot can show the available booking times.
Setup
Go to Settings > Artificial Intelligence > TidyCal integration and click Activate.
In your TidyCal account, go to Integrations > Advanced > API Keys or click here.
Create a Personal Access Token, copy it, and paste it into Settings > Artificial Intelligence > TidyCal integration > Access token. Then, save the changes.
Enter the title of the booking type you want to use in Settings > Artificial Intelligence > TidyCal integration > Booking type title, and save the changes.
Configure the available booking times, buffer times before and after bookings, and the slot duration directly in your TidyCal account.
You are done. The chatbot can now book and manage events in your TidyCal account.
Information
Only events without a price are supported.
The selected booking type is cached for 24 hours. If you update it, you may need to wait up to 24 hours for the changes to take effect. To apply changes immediately, create a new booking type or change its title and update it in the Support Board settings.
Settings
See information about most OpenAI settings here.
Chatbot mode
This feature is related to the Settings > Artificial Intelligence > OpenAI > Chatbot mode option.
It allows you to configure the information OpenAI will use to respond to user messages.
Only general questions
OpenAI will respond only to general questions and questions related to previous user messages in the same conversation, without using any information you provide.
This is the default setting.
Only questions related to your sources
OpenAI will only respond to questions related to the information you provide. The user messages will be ignored.
You have to first train the chatbot with your sources.
All questions
OpenAI will only to questions related to the information you provide, to general questions, and to questions related to previous user messages in the same conversation.
You have to first train the chatbot with your sources.
This is the recommended mode.
Chat Use this mode if you are using an OpenAI Chats.
Small talk
This feature enable pre-built generic questions anda answers that allow the chatbot to handle casual, polite, and social "chit-chat" like "Hello," "How are you?", or "Tell me a joke," making bots feel more human and engaging, rather than just task-focused.
If you are using the cloud version you have to set Settings > Artificial Intelligence > OpenAI > Sync mode to Manual and use your own API key.
You can use multiple chats by adding their IDs in Settings > Artificial Intelligence > OpenAI Chats - Department linking and selecting Chats in Settings > Artificial Intelligence > OpenAI > Chatbot mode.
To activate a chat, both the chat and the conversation must be assigned to a department.
The chat is used only for the chatbot and smart replies, not for the message rewriting and other AI features.
Chatbot
Select the Chatbot mode setting to specify the questions that the chatbot is capable of responding to.
Utilize the human takeover feature to enable the chatbot to redirect the chat to a human agent as necessary.
Fallback message
The fallback message is sent when OpenAI is unable to understand the user question.
Prompt
The prompt instructs OpenAI on how to respond by providing relevant information that can be utilized to answer user inquiries.
To comprehend the process, refer to the example prompts listed below.
If you choose to activate the human takeover feature, you need to tell OpenAI to respond with I don't know if it is unable to provide an answer to the user's question.
You should always include the following text in the prompt: Respond "I don't know", if not sure about the answer.
Replies from the training sources can be utilized with the prompt feature as they are compatible.
Spelling correction
This feature automatically fix any spelling mistakes in the agent's message.
Smart reply
This feature allow to enable the Smart Reply feature also if the chatbot is not active.
If the chatbot is active the Smart Reply feature will use OpenAI automatically.
Speech recognition
OpenAI supports the use of voice messages through speech recognition.
When this option is active, audio messages will be converted to written text.
You do not need to activate this feature for the chatbot to understand audio messages.
The speech recognition feature of the chatbot is always enabled.
For this feature to work better, the user language should be know.
To automatically detect the user's language, you can enable the language detection feature.
The text will be displayed alongside the audio player.
The generated text is compatible with the translation features.
Image and file analysis
When this option is enabled, the chatbot analyzes and interprets images and files sent by the users.
For the list of supported files, click here.
Uploaded files are stored temporarily in your OpenAI account and deleted immediately after OpenAI returns a response.
Only GPT-4 models and newer support this feature.
This feature does not work on localhost, it requires an online server or AWS S3.
Source links
When this option is active, the response will automatically include the links to the sources and training data used for generating the answer.
To include articles as sources you have first to set the articles page in Settings > Articles > Articles page URL.
Note data scraping
When this option is active, you will see a menu in the notes panel.
The menu enables the automatic extraction of specific information from the user's messages like login details, URLs, or even the summary of the conversation.
OpenAI parameters
Support Board allows you to adjust various OpenAI parameters such as temperature and logit_bias, for more details visit https://platform.openai.com/docs/api-reference/completions/create.
Don't set any values if you don't know what these parameters do or OpenAI may stop working.
Logit bias
The Logit bias parameter must be JSON string and the keys must be strings, for example: {"2435":-100, "640":-100}.
Generate user questions
When this option is active, OpenAI will generate new user questions in real time when you open the chatbot training panel.
Use conversations for training
Automatically use conversations to train the chatbot at regular intervals.
You will find the training data in Chatbot > Training > Conversations.
The training is done via cron job every 24 hours.
Only user and agent messages are used, chatbot messages are ignored.
More details here.
Context awareness
When this option is enabled, OpenAI will recognize the context of the web page from which the user is writing the message.
The context includes only the page's meta title and meta description texts. T
his option is supported solely for the chat widget and is not compatible with messaging channels.
Message rewriting
This feature adds a button to the text field of the conversation area, click on it to rewrite your message and make it more friendly and professional.
Greetings will be added automatically if there is no previous agent messages.
If your language is not English, update your agent or admin profile and select the correct language.
Set the Prompt to guide OpenAI on how to rewrite messages.
Set Execution mode to automatic to rewrite all messages, or to negative sentiment to rewrite only messages flagged as negative by OpenAI's sentiment analysis.
Training
With this feature, your chatbot can undergo training using your website, texts, PDF documents and more.
Once the training is successfully completed, the chatbot will be able to answer questions related to your contents.
Training using files
This training process enables you to train the chatbot using PDF and TEXT files.
To access this feature, navigate to Chatbot > Training > Files.
Select your files, click the Train chatbot button and await completion of the training process.
It is only possible to upload files in PDF and TXT formats.
As soon as the training is completed, the uploaded files are removed.
Training using a website
This training process enables you to train the chatbot using websites.
To access this feature, navigate to Chatbot > Training > Website.
Enter the website URLs, click the Train chatbot button and await completion of the training process.
If you retrain the same website, you must first delete the previous website's training data; otherwise, only new URLs will be trained.
You can provide the website URL and all child URLs will be included and crawled, but with large websites, it is more efficient and less prone to errors and infinite link loops to utilize an XML sitemap instead of relying on the website URL.
You can create it with a service like https://www.xml-sitemaps.com.
If you want to train your chatbot using specific pages from your website instead of all of them, you can make use of an XML sitemap.
Create one using a tool like https://www.xml-sitemaps.com, and then remove the pages you do not wish to include by editing the file in a text editor.
To use the XML sitemap, you need to upload it either onto your server or an external online location.
Afterward, add the URL of the sitemap in Chatbot > Training > Website.
If your sitemap contains more than 1000 URLs, it's advisable to split it into multiple files and train the chatbot with one file at a time to prevent server crashes.
You can upload large files and your XML sitemap with a service like https://tmpfiles.org.
Training via questions and answers
This training process enables you to train the chatbot by adding questions and answers individually.
To access this feature, navigate to Chatbot > Training > Q&A.
This training process enables you to train the chatbot using the conversations from the users and agents.
To enable this feature, check the Settings > Artificial Intelligence > OpenAI > Use conversations for training option.
The training data will begin to be generated in the coming days and will be available in the Chatbot > Training > Conversations area.
While this method is powerful and automated, it can produce low-quality training data if the responses from your human agents or the user messages are unhelpful or incorrect.
We strongly recommend reviewing the training data regularly.
This method is not recommended for most chatbots. Use the chatbot training panel instead.
Training using the chatbot training panel
Once you have finished training your chatbot, you may want to continue enhancing it.
This feature allows you to select conversation messages and use them to add new questions and answers or improve existing ones.
You can open the chatbot training panel from the conversation area by hovering the mouse over a message, opening the message's menu, and selecting Train chatbot.
The OpenAI chatbot will be trained automatically with the new information.
You can control the questions and answers generated from this window from Chatbot > Training > Questions and answers.
The training window is not compatible with OpenAI Chats.
Training using real-time information
This feature allow the chatbot to answers to questions that require real-time information, such as, "What is the temperature in London today?".
To add new training data, simply train the chatbot again.
The previous training data will not be lost, and only the new sources will be added.
If you are using the cloud version, there are character limits for training the chatbot.
However, if you are using the PHP or WP version, there are no limits imposed.
You can view the character limits here.
The embedding model is essential for training your chatbot and handling all user messages.
We currently use the text-embedding-3-small model.
It is necessary for these scenarios and cannot be disabled or changed.
You can find pricing information at https://openai.com/pricing.
Check out the pricing for the text-embedding-3-small model in the Embedding models section.
Go to Chatbot > Training > Information, and click the Delete all training data button to remove all previous training data for the chatbot.
The embeddings are stored as JSON files in the Support Board uploads folder and are secured using the password-by-filename approach.
If you are using training data and your chatbot is multilingual, set the default training data language at Settings > Artificial Intelligence > OpenAI > Training data language..
Leave it as default if the training data default language is in English.
You can give priority to a specific training source with the Settings > Artificial Intelligence > OpenAI > Training sources priority setting.
The sources with higher priority will have more influence on the chatbot's responses to user questions.
Note that user questions that closely match Q&A or flow questions may take precedence anyway.
Run the training via cron job
If you're using the cloud version, just enable the Settings > Artificial Intelligence > OpenAI > Training via cron job option and the cron job will be activated.
You can disregard the instructions below.
To automatically train the chatbot with your website content at regular intervals, create a cron job that runs the URL [SUPPORT-BOARD-URL]/include/api.php?open-ai-training=true, or use the command */59 * * * * wget [SUPPORT-BOARD-URL]/include/api.php?open-ai-training=true to run it via a command.
Replace [SUPPORT-BOARD-URL] with your Installation URL, get it from Settings > Miscellaneous > Installation URL.
If you are using the cloud version, use this URL: https://cloud.board.support/script/include/api.php?open-ai-training=true&cloud=API-TOKEN and replace API-TOKEN with your API token.
For the cloud version, the cron job can be executed at most once every 7 days.
We strongly recommand providing an XML sitemap instead of the website URL for performance reasons.
Automatic training is limited to websites; files, Q&A, and articles are excluded. Re-training will delete the previous website training data.
Multilingual training
If your user base is multilingual, you can train the chatbot with content in multiple languages and limit the chatbot to retrieve answers only from the sources in the user's language.
To activate this feature, check the Settings > Artificial Intelligence > OpenAI > Multilingual Training Sources option.
Files Files currently support only one language.
Websites The language of the website is detected automatically.
For Support Board to comprehend the language of your web pages, the <html> must contain the attribute lang.
Q&A Q&A currently support only one language.
Articles All article languages are used automatically.
Conversations If automatic translation is active, only messages in the agent's language will be used.
Q&A
The information below is related to the Question and Answers section of the chatbot training area.
Add questions and answers to the chatbot to improve its performance. The chatbot will use this information to respond to user inquiries.
Question
Enter the user messages that will trigger the answer. Add as many question variations as necessary.
For example the questions to the answer I'm a chatbot! could be Who are you?, What are you?, Are you a bot?.
Answer
Enter the text that will be used to answer the user question.
Set the specified user values when the question is asked. You will see such values in the user details panel.
You can use the following merge fields to assign values extracted from the user messages.
Include these fields in the answer and they will be replaced with the actual values: {language}.
You can also use this feature to perform actions like assigning departments, agents, and tags to the conversation.
Flows
The information below is related to the chatbot flows area available under Chatbot > Flows.
Flows allows you to esely create conversation flows powered by the chatbot.
Use them to guide the user toward a specific goal with a series of pre-defined messages.
Flow blocks
Start: Use the start block to set when the flows should start.
It can be everytime the user start a new conversation, when it sends a specific message, or on page load.
If you set conditions, the flow will only start when all conditions are met.
If you set a depertment, the flow will only start for conversations assigned to that department.
If you set a source, the flow will only start for conversations from that source, for example, WhatsApp or Instagram.
Send message: Send a message to the user.
Send choices: Send a list of buttons to the user or allow it to choose one.
When conversational mode is enabled, buttons are hidden, the chatbot sends only text, and users select options by replying with text.
The AI interprets the message and selects the corresponding option, continuing the flow as if the button were pressed.
This creates a more natural, chat-like experience and is automatically activated, only when needed, on messaging channels such as WhatsApp and Instagram.
If the user's reply doesn't match any option, a fallback message with the available choices will be sent.
You can add variations to the button texts by separating them with the | char, for example: Yes|Yeah|Sure. They will help the AI to understand the user reply.
The last active or selected choice text is sent to OpenAI to serve as context for future messages.
Send video: Send a video to the user.
Get user details: Get the user details and store them in Support Board.
You will see such values in the user details panel.
You can leave the description field empty for default details, but it's required if using custom user fields.
Note that user details will not be saved if you test this flow in the playground, as the user there is temporary. To see details saved, test the flow with a real user.
Set data: Set the specified user values when the block is executed.
You will see such values in the user details panel.
Actions: Execute the specified actions when the block is executed.
Conditions: Use it to create different branches in the flow.
If the conditions are met, the flow will follow the branch set as true, otherwise the one set as false.
Rest API: Use it to send data to your server.
The body must be a JSON array. Details like user ID and conversation ID are automatically included in the data sent to your server under the sb key.
Use the save response section to save specified user details with values from your server response. Use the JSON dot notation.
Our support doesn't include assistance with this feature, as it is for advanced users and requires custom code on your server.
For help with this, feel free to hire us.
Flow connector: Connect the flow to another flow and start it.
Information
Flows can be multilingual. Add translations for messages, button texts, and other content in the translations area.
You can also use the multilingual via translation feature for automatic translations.
If the default language of your flows is not English you have also to set the default language under Settings > Artificial Intelligence > OpenAI > Training Sources Language.
Users can move back to earlier steps and update previously entered details in a conversational manner.
For example, they might say "Sorry, I entered the wrong email", "I need to update my email and phone number", or even a general message like "Sorry, I entered the wrong details, go back", which will return them to the previous step.
Tools calling
Tools calling allows to connect the chatbot to external tools and systems to retrive information needed to answer the user.
The chatbot will query your server and return the information from your server to the user.
The data sent to your server is in the body and it includes the user input, user ID, and conversation ID.
Tools calling is used by Q&A and Flows.
More details here.
Our support doesn't include assistance with this feature, as it is for advanced users and requires custom code on your server.
For help with this, feel free to hire us.
Parameters
URL:
Enter the URL of the API endpoint that will supply the necessary values for the function.
Headers:
If you are setting up a Q&A, enter key-value header parameters, separated by commas. E.g. apikey:123345, json:true.
If you are setting up a flow, enter add key-value header parameters by clicking the Add new item button.
Properties:
Enter values that the user must provide to the chatbot.
For example a city, a tracking number, etc.
The chatbot will ask the user for these values.
If you already know all the possible values, you can enter them in the Allowed values field.
Data sent to your server
Support Board will send the following information to your server.
If you use the POST method, it will be included in the JSON body, if you use the GET method, it will be included in the header.
The arguments array contains the values provided by the user.
The keys are the name converted to kebab case, for example if the property name is Order Number, the key will be order-number.
You can pass the user input arguments to the URL by adding merge fields named as the kebabe case name of the arguments in the URL.
For example, if you have an argument named Order Number, you can add {order-number} in the URL and it will be replaced with the actual value provided by the user.
The user_id is the ID of the user in Support Board and conversation_id is the ID of the conversation.
You can use these IDs to retrieve more information about the user and the conversation via the REST API.
Response from your server
Your server must returns a JSON array with the values required by the chatbot. Include success: true only when the request is successful and the expected information is returned.
Do not include it if the information cannot be retrieved (e.g., when an invalid order number is provided).
See the example below for more details.
The following settings are compatible with OpenAI:
smart reply, human takeover, disable for the tickets area, disable during office hours, bot response delay, reply to user emails, reply to user text messages.
Set the OpenAI chatbot language from Settings > Chat > Language.
Set it to Multilingual if your website supports multiple languages or if your users speak different languages.
If you are using messaging channels like WhatsApp, or Instagram, you must detect the user language via language detection.
For more details click here.
If a human takes control, the OpenAI chatbot is deactivated.
The default model is gpt-5-mini.
Consecutive user messages are treated as a single message by the chatbot, resulting in one unified reply
GOOGLE
Google
The settings below are related to the Artificial Intelligence app.
Synchronization
To start using the Google AI services follow the steps below.
Automatic sync mode
This feature is available only on the cloud version of Support Board.
Activate the Cloud Natural Language API, Cloud Translation API, and Google Calendar API.
Select the project and the go to Left menu > APIs and services > OAuth consent screen.
Select External and click Create.
In App name enter what you want, in User support email and Developer contact information enter your email.
Click Save and continue.
In the Data access area, click Add or remove scopes, scroll bottom and into the Manually add scopes area enter https://www.googleapis.com/auth/cloud-language,https://www.googleapis.com/auth/cloud-translation,https://www.googleapis.com/auth/calendar.
Click Add to table and then Update and Save and continue.
In the Audience area, click Add users and add your Google email, use the same email as the currently logged in account.
Click Save and continue.
Click PUBLISH APP. There is no need to complete the review process, leave it in the pending review state.
Go to Left menu > APIs and services > Credentials and click Create credentials, select OAuth client ID.
As Application type select Web application. Enter any name you want.
In Authorised redirect URI enter the redirect URL, get it from Support Board > Settings > Artificial Intelligence > Google > Authorised redirect URI.
Click Create.
Copy Client ID and Client Secret and paste them into Support Board > Settings > Artificial Intelligence > Google.
Save the settings.
Click Support Board > Settings > Artificial Intelligence > Google > Synchronize.
Login with the same Google account you have used till now. On the next screen click Continue. On the next screen select all scopes and click Continue.
Copy the Refresh token and paste it into Support Board > Settings > Artificial Intelligence > Google > Refresh token.
You are done! Note that the app does not need to be approved by Google.
If you are a Google Workspace user, go to https://admin.google.com/ and click Google Cloud Session control.
Set Re-authentication policy to Never require re-authentication.
Automatic translation
The automatic translation feature automatically translates user messages into agent language and agent messages into user language.
To enable it check the option Settings > Artificial Intelligence > Automatic translation.
If you are using the cloud version and Artificial Intelligence > Google > Sync mode is set to Automatic, the multilingual features will work automatically.
Otherwise you have to complete the synchronization and the setup below.
The multilingual via translation and language detection features also require these steps.
On the top search bar type cloud translation, select the Cloud Translation API service and enable it.
Please note that this is a paid service with a free tier, additional charges may occur.
Enable the billing by clicking Left menu > Billing and by enabling a billing account with a valid payment method.
Information
The user messages in the admin area are translated automatically in real-time to match the agent language.
The agent messages are translated automatically in real-time to match the user language.
Agents can view the original message by opening the message menu and by clicking View original message.
The agent language is based on the language user detail of the agent if set, otherwise on the browser language, or admin area language.
The user language is based on the language user detail, if set, otherwise on chat language, if set, otherwise on the browser language.
The language can also be detected with the language detection feature.
The notifications are also translated.
To avoid translating a string, enclose it with the characters ` or ```.
Multilingual via translation
The feature at Settings > Artificial Intelligence > Multilingual via translation automatically translates user messages into the default language of OpenAI, and translates chatbot messages into the language spoken by the user.
For this feature to work both agents and users must have a language set in their profile details, otherwise the system will use the default languages set for agents and users.
Use language detection to automatically set the user language based on the user's messages.
If English is one of the languages, English must be the default language, the original texts must be in English.
If you are using OpenAI with training data, set the default training data language under Settings > Artificial Intelligence > OpenAI > Training Sources Language.
Leave it as default if the training data default language is in English.
To enhance performance and minimize translation costs, the translations are automatically integrated into the translation files.
Detect the language of the user' messages and change the user language accordingly, if available, otherwise, show a fallback message.
You can use the following merge fields in the message: {language_name}.
The user message must be at least 2 words long.
Language detection is executed only for the first 2 user messages of a conversation.
As long as the OpenAI chatbot is operational and programmed to respond to generic inquiries, the fallback message will never be dispatched, since OpenAI will consistently provide answers to any use message.
Google search
The Google search feature at Settings > Artificial Intelligence > Google search gives your chatbot the ability to search for answers on Google.
This feature is helpful for providing answers to questions that require real-time information.
Create a search and setup it is as you want. We recommend to add only your website and Wikipedia if you want your chatbot to reply to general questions, leave disabled the option Search the entire web.
Use the Entities option to exclude invalid results.
Go to Edit search engine > Setup > Basic and copy the Search engine ID value, paste it in Support Board.
The Google search is performed only if the chatbot does not know the answer to the user's question and if the length of the user's message is greater than 4 characters.
Google search is not required to activate the spelling correction.
You can disable Google search and activate only spelling correction.
Google search is compatible with the OpenAI chatbot.
TICKETS
Tickets
The settings below are related to the Tickets app.
The Tickets app allows users to create conversations and send messages via a UI different from the chat.
Installation
From Settings > Apps, click Tickets and enter your license key to install and activate the app.
More details here.
If you have the cloud version click Active.
Display the tickets area
PHP VERSION
To display the tickets area include the following script into your page.
                                <script src="supportboard/js/min/jquery.min.js"></script> <!-- Not required if jQuery is already loaded -->
                                <script id="sbinit" src="supportboard/js/main.js?mode=tickets"></script>
You can not include both chat and tickets area on the same page. Make sure to remove the script that loads the chat.
You can show the tickets area also by inserting the code <script>SB_TICKETS = true;</script> into any page showing the chat.
To set the position of the tickets area Enter the code <div id="sb-tickets"></div>.
The tickets area will be displayed inside this div element. Add the data-offset="123" attribute to set a height offset in pixels.
The minimum height of the tickets area on desktop is 450px.
By default, the tickets area is appended to the body.
WORDPRESS VERSION
To display the tickets use the shortcode
[sb-tickets]. Insert it in any page, post, or post type item.
CLOUD VERSION
To display the tickets area include the chat embed code into your page and add the attribute &mode=tickets to the script URL, e.g. <script id="chat-init" src="https://cloud.board.support/account/js/init.js?id=65895623&mode=tickets"></script>.
You can show the tickets area also by inserting the code <script>SB_TICKETS = true;</script> into any page showing the chat.
Information
If the tickets area is not visible, make sure to uncheck the option Tickets > Manual initialization.
Additionally, you can explore other potential reasons for this issue here.
You can also use the tickets area to display an inline or full-width chat panel.
Tickets are the same of chat conversations on the admin-side, the only difference from chat conversations is the front-end UI.
To create a ticket from the admin area, open a user and click Start a conversation.
Most of the settings of the chat are compatible with the Tickets App but not all of them.
The dashboard settings, the pop-up message, and more are not compatible.
Dedicated APIs for the Tickets App are available in the API section.
To remove the mandatory 'New ticket' form for new users, activate the welcome message of
Settings > Messages & Forms > Welcome message. The welcome message delay is ignored in the tickets area, the message is sent immediately.
To manually disable the mandatory registration only on a single page use the JavaScript code var SB_REGISTRATION_REQUIRED = true.
Set it to true to force the registration instead.
The tickets area is compatible with Google reCaptcha v3.
WHATSAPP
WhatsApp
The settings below are related to the WhatsApp app.
Installation
From Settings > Apps, click WhatsApp and enter your license key to install and activate the app.
More details here.
If you have the cloud version click Active.
WhatsApp Cloud API Setup - Automatic sync mode
This feature is available only on the cloud version of Support Board.
Click Synchronize now and complete the procedure.
To add new numbers, visit https://business.facebook.com/wa/manage/phone-numbers/.
If you add new numbers after the sync process, you will need to sync them again.
All numbers will be automatically synchronized.
If you wish to disable specific numbers, you can delete them from Settings > WhatsApp > Cloud API numbers.
If you sync again with the same phone number and do not receive the verification SMS or call, you can enter the latest PIN you received and it will work.
If you do not receive the messages sent to your WhatsApp number in Support Board, please check the following:
Create a new app, enter the app name, as uses cases select Connect with customers through WhatsApp, and select the Business Account used for WhatsApp.
In Support Board > Settings > WhatsApp > Cloud API > Secret key enter a random string then go to https://developers.facebook.com/apps and select your app.
From the left menu, click Use cases > Connect with customers through WhatsApp > Customize.
Click Configuration. Under the Configure webhooks section enter Callback URL and Verify Token:
Retrieve the Callback URL from Support Board > Settings > WhatsApp > Cloud API > Configuration URL.
Set the Verify Token in Support Board > Settings > WhatsApp > Secret key and save the changes, then use it to verify the webhook.
In Webhook Fields select the following: messages, history, smb_app_state_sync, smb_message_echoes.
Click API testing.
Get a phone number for testing by clicking Get new text number.
Click Add a recipient phone number and add your personal WhatsApp number to verify it.
Copy the Phone number ID and paste it into Support Board > Settings > WhatsApp > Cloud API numbers > Phone number ID.
Send the message, check for the message in your personal WhatsApp account and send a reply, and it should then appear in Support Board.
To reply to the test number from Support Board, generate the Temporary access token and paste it in Support Board > Settings > WhatsApp > Cloud API numbers > Token.
To activate the WhatsApp integration for all phone numbers and add a live phone number, refer to the following guidelines.
In Support Board > Settings > WhatsApp > Cloud API numbers > Token enter the permanent access token, follow the instructions below for getting it.
Visit https://business.facebook.com and go to Left menu > Settings > Business settings,
then go to Users > System Users to view your admin system user, or create a new one.
Open the user and click Add Assets, then select the app used for the WhatsApp API integration and check Develop App, or Full control.
The system user needs to be an admin. If you do not see the option, click Business settings.
Click Left menu > Account > Apps. Select your app or add it.
Make sure the system user is there and has full control.
If not, click Add user, select the system user, click Full control, and click Assign.
Click Left menu > Apps and under Select Assets choose your app, assign Full control and save.
From Left menu > WhatsApp accounts select the WhatsApp account linked to your appp, then click Assign people and select the System user, grant to it Full control.
From Users > System Users select the user you just created and click Generate New Token, click Apps and select the app used for the WhatsApp API integration, set the Token expiration to Never, enable the following permissions: whatsapp_business_management, whatsapp_business_messaging, business_management.
Click Generate Token and save. Paste the token in Support Board > Settings > WhatsApp > Cloud API numbers > Token.
To add additional phone numbers, go to https://developers.facebook.com,
select your app, and click Left menu > WhatsApp > API Setup.
To get started, click on Add phone number at the bottom and follow the instructions provided.
After activating the number, copy the Phone number ID and paste it into Support Board > Settings > WhatsApp > Cloud API numbers > Phone number ID.
If the number is in pending status, you need to enter your app dashboard and then from Left menu > WhatsApp > API Setup click Generate access token.
Please keep in mind that if you use your current WhatsApp business number in Support Board, it will no longer be usable with your
WhatsApp Business app, and you will need to migrate it following these instructions.
Your app must be submitted for review and approved by Meta.
From the left menu, click Review and complete the submission process for all the permissions you added.
Please note that help with this is not included in our support. If you require assistance, you can hire us.
Enter your dashboard and from Left menu > WhatsApp Accounts generate the API key and copy and paste it in Support Board > Settings > WhatsApp > 360dialog settings.
Complete the form and choose WhatsApp, Alerts & Notifications, With no code at all, 3rd party integrations.
From the Twilio console
copy ACCOUNT SID and AUTH TOKEN and paste them into Support Board > Settings > WhatsApp > Twilio settings, save the changes.
You will now set up a free test account to run some tests and make sure the integration works with Support Board.
From the left menu click Messaging > Settings > WhatsApp sandbox settings
and enter into WHEN A MESSAGE COMES IN and STATUS CALLBACK URL the URL of Support Board ,
get it from Support Board > Settings > WhatsApp > Twilio settings > Get configuration URL.
Mind that localhost will not work, you need a public URL and a live server.
From the left menu click Messaging > Try it out > Send a WhatsApp message.
Follow the instructions and send the message with the code to the WhatApp number provided. Click the next buttons until the configuration is complete.
Done! Support Board should start receiving the WhatsApp messages sent to the sandbox account, and you can reply to those messages from the Support Board.
To publicly use the WhatsApp integration with your customers you need also to complete the steps below:
Update your account and enable billing, you can do that here.
Purchase a Twilio number, which will be the phone number of your official WhatsApp Business account.
More details here.
You cannot use the phone number of your existing WhatsApp Business account, you must use a Twilio number.
More details here.
From the Twilio console go to Messaging > Services and create a new Messaging Service.
Click Add Senders, select WhatsApp Number as the sender type, and add the Twilio number you purchased.
Copy the Service SID and paste it into Support Board > Settings > WhatsApp > Twilio settings > Sender.
Unofficial WhatsApp API
Support Boar only supports the Official WhatsApp Cloud API, 360dialog, or Twilio. Unfortunately, unofficial WhatsApp APIs are not supported. However, you can still implement them using the Support Board API and Webhooks. For more details, visit https://board.support/docs/api/web.
Please be aware that you must possess coding skills as a developer to proceed with this task. Additionally, our default integrations are equipped with advanced features including chatbot support, automated messages, human takeover, WhatsApp rich messages, attachments, and more. Consequently, although setting up a basic integration for sending and receiving text messages is relatively straightforward, ensuring its flawless functionality is a more intricate process.
Templates
As for WhatsApp Business Policy,
you cannot send outbound marketing and solicitation messages to end users.
End user users must reach out to you first. You have 24 hours from when the end user's message was sent from WhatsApp to reply to the message.
To communicate with a user who has not contacted you before or has not been in touch for more than 24 hours, you must opt for the text message fallback or the WhatsApp message template.
To send a specific message template to a group of users, use the direct messages feature.
Text message fallback
To enable the text message fallback you must set up the SMS in Settings > Notifications > Text message notifications.
More details here.
WhatsApp message templates
A WhatsApp message template is a message format that you can use over and over again to message users once they have opted-in and given your app permission to send them messages.
You can not Enter the original message into the template, you must use it to notify the user of a new message and instruct him on how to view it,
for example by providing a link to your website where the chat is shown.
WhatsApp Cloud API
To get the Template name and manage the templates visit https://business.facebook.com and go to Left menu > Settings > More system settings, then go to Accounts > WhatsApp accounts > Settings and click WhatsApp Manager.
In Template languages enter all the language codes supported by your template, separated by commas.
Language codes list here (copy only the language code, e.g. it, es, en_US).
If you use a template that supports multiple languages, the matching language for the user will be automatically selected.
Otherwise, the default template language will be used.
In Header variables and Body variables enter the values separated by commas, you can use the following merge fields: {recipient_name}, {recipient_email}.
The number of parameters entered here must match the number of parameters of the template.
Use this feature if your template uses dynamic values. For image headers, pass the image URL as the first parameter.
Order is important, the first merge field will be used as the first template parameter.
In Button variables enter the link of your custom buttons, or the text of the quick replies with prefix quick_reply_, e.g. quick_reply_abcde.
Each value must be separated by a comma.
The number of parameters entered here must match the number of parameters of the template.
If there are buttons or call to actions with static values like a static URL, enter skip_parameter.
Order is important, the first merge field will be used as the first template parameter.
Example:
Template fallback
Set the WhatsApp template sent as fallback from Settings > WhatsApp > Cloud API template fallback.
If you are using multiple numbers with different WhatsApp Business Account, a dedicated template must be created for each WhatsApp Business Account, you can set a different template for each number but template name and language code must be the same.
The test template button, sends a test template from the first number.
Send template messages to a user who has not contacted you before
In Settings > WhatsApp > Cloud API numbers > Business Account ID enter you Business Account ID.
Get it from https://developers.facebook.com.
Choose your app and go to Left menu > WhatsApp > API Setup.
To send the template to specific users, go to the Support Board Users section and choose the intended recipients.
Then, click on the WhatsApp icon located at the top right corner.
If you are using the WhatsApp Cloud API with a template that supports multiple languages, the matching language for the user will be automatically selected. Otherwise, the default template language will be used.
If you are using Twilio and have parameters in your template, input the parameter values separated by commas in the Body section.
Enter the Template SID and the template attributes separated by commas into Support Board > Settings > Twilio template.
360dialog
Get the Namespace value from Left menu > WhatsApp accounts > Details.
Get Template name and Template default language from your 360dialog templates area.
In Custom parameters Enter the values separated by commas, you can use the following merge fields: {recipient_name}, {recipient_email}.
Use this feature if your template uses dynamic values.
Order is important, the first merge field will be used as the first template dynamic value.
Support Board will try to use the template with the same language as the user, if it is not available, it will use the template with the default language.
The following template languages are not compatible: en_GB(use en_US), pt_PT(use pt_BR), zh_HK and zh_TW(use zh_CN), es_AR and es_MX(use es_ES).
WhatsApp calls
The WhatsApp call features enable users and agents to initiate and receive voice or video calls directly from the chat interface and admin area.
WhatsApp calls are enabled by default for all WhatsApp numbers integrated with Support Board.
You can also enable or disable the WhatsApp calling feature from the WhatsApp Manager.
To do so, go to WhatsApp Manager, navigate to Left menu > Settings > More system settings, then open Accounts > WhatsApp accounts > Settings and click WhatsApp Manager.
From there, open the settings panel of your phone number and toggle the Voice and Video Calls option.
To initiate a WhatsApp call from the admin area, open a user profile and click the phone or video icon at the top right corner.
You have to create a calling permissions request template from WhatsApp Manager > Message templates.
As template type choose Calling permissions request.
Enter the template ID in Settings > WhatsApp > Calls > Call permission template ID.
You must also add a valid payment method to your Business Portfolio before you can send the template.
WhatsApp flows
For more details about the WhatsApp Flows click here.
Built-in flows
The Support Board automatically generates and sends the following flow.
To regenerate a flow, click the Settings > WhatsApp > Clear flows button.
Registraton - This flow is sent when a new user sends their first message to the WhatsApp number, and the Settings > Users > Require registration option is enabled.
Follow-up - This flow is sent if the Settings > Messages & Forms > Follow-up message option is active and the user does not have an email address.
Send custom flows
To send custom flows use the merge field {wa_flow id="123" header="" body="" button=""}.
Replace 123 with the flow ID and enter a text for the attributes header, body, and button.
WhatsApp shop
To displays the products of your shop use the merge fields below.
Display multiple products. Replace id with the catalog ID. Add products by grouping them into sections, via the attributes product_id_[A]_[B], replace [A] with the section index, starting from 1, replace [B] with the product index, starting from 1 for each section. You must also add the attribute section_[A]="" for each section, replace [A] with the section index. The attributes header and body are required, footer is optional.
When the user sends the order, the order information is sent to the URL specified in Settings > WhatsApp > Order webhook.
The page at that URL should process the order and send a message to the user via the PHP API function sb_whatsapp_send_message().
You cannot send a WhatsApp message to a user who has sent you a message more than 24 hours ago or has never messaged you before.
WhatsApp prohibits this action. Instead, you must use a WhatsApp template or send an text message.
If you encounter an "Error message: Re-engagement," it indicates this situation.
If you does not receive WhatsApp messages make sure you are not assigning the WhatsApp conversations to a department and that the WhatsApp number used for testing is not a phone number of a Support Board admin or agent.
Also, if you are not using the cloud version, make sure you setup correctly the WhatsApp webhook URL .
If you can not send messages, an error should appear in the admin area when you try to send a message to the user.
We cannot provide support for Twilio or 360dialog configuration, including all related issues.
We cannot provide support in getting your WhatsApp account or WhatsApp message template approved.
WhatsApp conversations and messages are compatible with queue and routing.
If you are testing with the sandbox and after 72 hours you can no longer send messages to your phone number you must link again your phone number to your sandbox.
You can send rich messages to WhatsApp.
If you send chips, buttons or select rich messages, with more than 3 options, you can use the whatsapp="Your menu text" shortcode attribute to set the text of the WhatsApp message menu.
The follow-up message is supported, but the message is always sent, also if an agent replies.
The offline message is supported, but the timetable is not sent.
The chatbot is supported. The human takeover feature is also supported.
To enable the Dialogflow chatbot support for audio messages, activate Settings > Artificial Intelligence > OpenAI > Speech recognition
The supported AI features include language detetction, spelling correction, multilingual via translation, Google search.
Twilio and 360dialog has many limitations. For example, Twilio does not support messages longer than 1600 characters. We strongly recommend to use the Official WhatsApp API.
MESSENGER
Messenger
The settings below are related to the Messenger app.
Installation
From Settings > Apps, click Messenger and enter your license key to install and activate the app.
More details here.
If you have the cloud version click Active.
Automatic sync mode
Complete the synchronization by choosing at least 1 Facebook page and enter the returned information in Settings > Messenger > Facebook pages.
You're done.
All messages sent to the Facebook pages and Instagram accounts you selected will appear in the conversation admin area of Support Board.
Mind that only new messages will be synchronized, the old ones will not be imported.
Manual sync mode
Create a new account at https://developers.facebook.com/ or login with your existing account.
Create a new app, enter the app name, as uses cases select Manage messaging & content on Instagram, Engage with customers on Messenger from Meta, Manage everything on your Page.
In Business tab, select I don't want to connect a business portfolio yet..
From the left menu, click Use cases > Engage with customers on Messenger from Meta > Customize, then click Messenger API Setup.
Under the Configure webhooks section enter Callback URL and Verify Token:
Go to Support Board > Settings > Messenger and set Sync mode to manual.
Retrieve the Callback URL from Support Board > Settings > Messenger > Get configuration URL.
Set the Verify Token in Support Board > Settings > Messenger > Secret key and save the changes, then use it to verify the webhook.
In Webhook Fields select the following: inbox_labels, message_deliveries, message_echoes, message_reactions, message_reads, messages, messaging_account_linking, messaging_handovers, messaging_optins, messaging_policy_enforcement, messaging_postbacks, messaging_referrals, feed
In the Generate access tokens section, click on Connect.
Select the pages you want to sync and complete the process.
Under the Webhook Subscription column, click on Add Subscriptions.
Select the following scopes: messages, messaging_postbacks, messaging_optins, message_reads, feed, and message_echoes.
In the Tokens column, click on Generate.
Copy the access token provided and paste it into Settings > Messenger > Facebook pages.
Copy the Page ID and Page Name and paste them into Settings > Messenger > Facebook pages.
Repeat these steps for all pages.
Save the changes.
From the left menu, click Use cases > Permissions and Features and add the following permissions:
pages_manage_metadata, pages_messaging, pages_read_engagement, pages_show_list.
If you want to sync comments, follow these steps:
From the left menu, click Use cases > Manage everything on your Page > Customize.
From the left menu, click Use cases > Permissions and Features and add the following permissions:
pages_read_user_content, pages_manage_engagement.
If you want to sync Instagram as well, follow these steps:
From the left menu, click Use cases > Manage messaging & content on Instagram > Customize, then click API setup with Instagram login.
Retrieve the Callback URL from Support Board > Settings > Messenger > Get configuration URL.
Set the Verify Token in Support Board > Settings > Messenger > Secret key and save the changes, then use it to verify the webhook.
In Webhook Fields select the following: messages, messaging_postbacks, messaging_seen, messaging_handover, message_reactions, standby, comments.
Enter your Instagram ID in Settings > Messenger > Facebook pages > Instagram ID.
To get it, open your web browser and enter the following URL:
https://graph.facebook.com/FACEBOOK-PAGE-ID/?access_token=ACCESS-TOKEN&fields=instagram_business_account.
Replace FACEBOOK-PAGE-ID and ACCESS-TOKEN with the corresponding Page ID and access token from the Facebook page linked to Instagram.
Save the changes.
From the left menu, click Use cases > Permissions and Features and add the following permissions:
instagram_basic, instagram_business_basic, instagram_manage_comments, instagram_manage_messages, instagram_business_manage_messages
From the left menu, click Publish.
Your app must be submitted for review and approved by Meta.
From the left menu, click Review and complete the submission process for all the permissions you added.
Please note that help with this is not included in our support. If you require assistance, you can hire us.
Instagram
To link Instagram to your Facebook page and Support Board follow the steps below.
Enter the Settings area of your Facebook Page and click Left Menu > Instagram (https://www.facebook.com/YOUR-PAGE-SLUG/settings/).
Click Connect account and complete the setup.
Sync Messenger with Support Board again and you're done.
Mind that only new messages will be synchronized, the old ones will not be imported.
Comments
Comments posted on your connected Instagram account and Facebook pages are delivered to Support Board, where you can reply to them as you would in a normal conversation.
The DM for Comments feature allows you to send a direct message to users who comment for the first time on your Instagram posts or Instagram Page automatically.
Leave the Post ID field empty to enable this feature for all posts.
The chatbot is supported for comments, including the human takeover feature.
You can disable the chatbot for comments from Settings > Messenger > Disable chatbot for comments.
Support for rich messages in comments is included. However, certain elements such as images, videos, chips, buttons, and select options are not supported.
You will see the actual comment rendered after you send the message.
Information
If you don't receive Instagram messages:
Make sure to enable Settings > Privacy > Messages & Forms > Connected tools - Allow access from your Instagram mobile app.
Make sure your Instagram account is not setup as a professional account, it must be a business account.
Go to Meta Business Suite, select your account, and go to Users > People. Under Instagram account click Manage and make sure to enable all the permissions.
If you don't receive Facebook Messenger messages, make sure that the Facebook page does not send automated replies, such as the welcome message.
Also make sure Facebook AI is disabled. No automatic replies should be sent by Facebook.
In case you encounter duplicated messages or an ongoing chat cycle between the chatbot and Instagram messages, you are facing a problem due to the presence of two Support Board installations or
Support Board Cloud accounts that are both synchronized with the same Instagram account.
To resolve this, access the second Support Board admin area, navigate to Settings > Messenger > Facebook pages, remove the Instagram ID value and save the changes.
Try also to click the Unsubscribe button.
The Unsubscribe button remove the webhook subscription from all of your Facebook pages, it is useful if you want to stop receiving messages from a Facebook page.
Every Support Board user has only 1 Facebook conversation and 1 Instagram conversation.
Support Board rich messages are automatically converted to Facebook rich messages when possible, some part of the rich message could be removed or changed.
Buttons, chips, and selects support a maximum of three choices and are only supported in the Instagram mobile app.
Only private Facebook messages will get sent to your team inbox. If someone posts a Facebook message on your wall it won't appear in your team inbox.
When someone sends a message to your company Facebook page or Instagram account they will get designated as a lead in Support Board.
You'll only be able to see the user's Facebook or Instagram name and profile picture.
Messenger conversations and messages are compatible with queue and routing.
The chatbot is supported. The human takeover feature is supported.
The supported AI features include language detetction, spelling correction, multilingual via translation, Google search.
If the chatbot is enabled, it is necessary to deactivate any automatic replies on Facebook Messenger, such as the welcome message.
The follow-up message is supported, but the message is always sent, also if an agent replies.
The offline message is supported, but the timetable is not sent.
Only 1 Facebook account can be synchronized, to link pages from multiple Facebook accounts, the account synchronized in Support Board must be an admin of all Facebook pages of the other Facebook accounts.
If you manage multiple Facebook or Instagram accounts and want to use them across multiple Support Board accounts, In each Support Board account, click Synchronize now, and in the Facebook Login for Business modal, select all Facebook pages and Instagram accounts you want to sync across all Support Board accounts.
Wait for the Facebook pages to synchronize, then manually remove any pages that should not be managed in the active Support Board account. Repeate these steps for each Support Board account.
Using this integration of Instagram and Facebook Messenger comes at no additional cost.
If the message exceeds 1000 characters, only the initial 1000 characters will be transmitted due to the character limit.
Only new messages, sent after the synchronization, will be synchronized, the old ones will not be imported.
User Data Deletion Request (cloud version only): To delete all of your data from Support Board, click Settings > Messenger > Unsubscribe then delete your account from here.
To enable the typing indicator on Messenger, you need to set up and enable the async PHP process.
TWITTER
Twitter
The settings below are related to the Twitter app.
Create your first app by entering the app name and clickGet keys, copy API Key (Consumer key) and API Key Secret (Consumer secret) and paste them in Support Board > Settings > Twitter.
Request the Elevated access from https://developer.twitter.com/en/portal/products/elevated. Click Apply for Elevated and complete the form as follow:
In the first area In your words and in Will your app use Tweet, Retweet, Like, Follow, or Direct Message functionality? enter I need access to the Account Activity API to start receiving Twitter Direct Messages to my chat software(Support Board ) and to reply to them directly from Support Board , details at https://board.support/twitter.
Disable all the other fields by clicking No: Are you planning to analyze Twitter data?, Do you plan to display Tweets or aggregate data about Twitter content outside Twitter?, Will your product, service, or analysis make Twitter content or derived information available to a government entity?
Wait a few days for Twitter to review and approve the Elevated access, you will receive an email from Twitter.
Once you have Elevated access, enter the developers dashboard (https://developer.twitter.com/en/portal/dashboard) and from the left menu click Products > Premium > Dev environments and under Account Activity API / Sandbox click Set up dev environment, in Dev environment label enter sb or the same value entered in Settings > Twitter > Synchronization > Dev environment label.
Enter your app Settings area from Left menu > Projects & Apps > Your project > Your app and under User authentication settings click Set up and activate OAuth 1.0a.
In App permissions check Read and write and Direct message, in Callback URI / Redirect URL enter the URL you get from Support Board > Settings > Twitter > Get callback URL, in Website URL enter your website URL.
Enter your app Keys and tokens area from Left menu > Projects & Apps > Your project > Your app > Keys and tokens and under Authentication Tokens generate Access Token and Secret, copy and paste them in Support Board > Settings > Twitter.
Enter your Twitter profile username in Support Board > Settings > Twitter > Your username.
Get it from your Twitter profile page, copy the name starting with @ or the URL part containing your username. Ex. https://twitter.com/SupportBoard1.
Save the Support Board settings and click the button Support Board > Settings > Twitter > Subscribe and you're done. All messages sent to your Twitter account will be received by Support Board.
More information
If you receive duplicate messages, the Twitter account you are using for testing may be the same as the one you synced. Try sending a message from another Twitter account.
Use a live domain, localhost is not supported.
When a message is received from a Twitter user you may send up to 5 messages in response within a 24 hour window. No messages can be sent after 24 hours of receiving the Twitter message.
You can send maximum 3 or 4 attachments depending by the media type.
The following Support Board rich messages are not supported: images slider, slider, card.
The chatbot is supported. The human takeover feature is supported.
The supported AI features include language detetction, spelling correction, multilingual via translation, Google search.
TELEGRAM
Telegram
The settings below are related to the Telegram app.
Installation
From Settings > Apps, click Telegram and enter your license key to install and activate the app.
More details here.
If you have the cloud version click Active.
If you have already created a Telegram bot in the past, type the command /mybots and open your bot, then click API token.
If you never created a Telegram bot before, type the command /newbot to create a new bot.
The BotFather will ask you for a name and username, enter them and generate the authentication token. More details at https://core.telegram.org/bots.
Copy the token and paste it into Support Board > Telegram > Token, then click Synchronize now. Your website must use HTTPS (SSL certificate), HTTP is not supported.
You're done. All messages sent to your Telegram bot will appear in the conversation admin area of Support Board.
More information
Support Board rich messages are automatically converted to Telegram rich messages when possible, otherwise they are removed from the message.
Telegram conversations and messages are compatible with queue and routing.
The chatbot is supported. The human takeover feature is supported.
The supported AI features include language detetction, spelling correction, multilingual via translation, Google search.
The Settings > OpenAI > Speech recognition feature is not supported for Telegram audio messages.
The follow-up message is supported, but the message is always sent, also if an agent replies.
The offline message is supported, but the timetable is not sent.
Agents can be notified via Telegram when a new message comes in.
Notifications are sent only when required, according to the other notification settings.
Enable Settings > Telegram > Notifications > All messages to always receive notifications for all messages.
Activation
Navigate to Settings > Telegram > Notifications and click Activate.
Enter the Telegram channel name in Settings > Telegram > Notifications > Channel name.
The name must exactly match your Telegram channel name.
This value must be saved before creating the channel.
Open Telegram on your phone or via the web app and create a new channel using the previously defined name.
After creating the channel, edit its settings and add the Telegram bot synched with Support Board as an administrator.
VIBER
Viber
The settings below are related to the Viber app.
Installation
From Settings > Apps, click Viber and enter your license key to install and activate the app.
More details here.
If you have the cloud version click Active.
Copy the token and paste it into Support Board > Viber > Token, then click Synchronize now. Your website must use HTTPS (SSL certificate), HTTP is not supported.
You're done. All messages sent to your Viber bot will appear in the conversation admin area of Support Board.
More information
Support Board rich messages are automatically converted to Viber rich messages when possible, otherwise they are removed from the message.
Viber conversations and messages are compatible with queue and routing.
The chatbot is supported. The human takeover feature is supported.
The supported AI features include language detetction, spelling correction, multilingual via translation, Google search.
The follow-up message is supported, but the message is always sent, also if an agent replies.
The offline message is supported, but the timetable is not sent.
SLACK
Slack
The settings below are related to the Slack App.
Installation
From Settings > Apps, click Slack and enter your license key to install and activate the app.
More details here.
If you have the cloud version click Active.
Once the app is installed go to Settings > Slack, click the Synchronize now button, and follow the instructions.
Having Problems?
The synchronization of Slack may not be successful for a number of reasons; below are the most common ones:
Problem description
Solution
You can receive messages on Slack, but you cannot send messages from Slack to Support Board
Navigate to /supportboard/apps/slack/post.php from your browser.
Also, in Workspace Settings > Permissions, you must allow anyone to create public channels.
If you have further issues please contact the Slack support team at https://api.slack.com/support.
Slack sync not working
Double check whether or not you chose a public Slack channel when you attempted to synchronize Slack.
If you did not, try syncing Slack once again, this time choosing a public channel instead.
The general channel is a good option.
Manually archive channels
To archive a channel in Slack, follow these steps:
Open the Slack channel you want to archive.
On the top right click the gear icon and select Additional options.
Click the info icon in the top right area of the screen, then click the More icon, and then click Additional options....
Click Archive this channel.
Department linking
If the Settngs > Slack > Department linking option is active, when a conversation in the Support Board is assigned to a department, a new message is sent to the linked Slack channel, informing Slack users that a new conversation has started and inviting them to join the dedicated user Slack channel.
However, the full conversation can only be accessed on the dedicated Slack channel of the specific user.
Get the department IDs from Settings > Miscellaneous > departments.
Get the channel IDs by clicking the button Get channel IDs.
User fields
The Settings > Slack > User fields option allows you to choose which user details to include in the message sent to the main channel when a new user sends the first message. You can include the slug of your custom user details or the following slugs:
browser, browser_language, location, email, user_type, token, creation_time, country_code, current_url, os, city, address, postal_code, phone, birthdate, company, timezone, website. Default: email, browser, browser_language, location.
Information
When a new user sends the first message, a Slack message with the user details and a button to join the user's channel is sent to the main channel selected during the synchronization, or to the channel linked to the conversation's department.
Only the Slack account used during the synchronization will automatically join the user's channel, other Slack members will have to join it manually via the button.
When Settings > Slack > Agent linking is set, if the conversation is assigned to a department, only agents assigned to that department will receive the message, if the conversation is assigned to a single agent only that agent will receive the message.
Slack is free to use. Only large companies may need a paid subscription plan, more details
here.
Push notifications are compatible with Slack, when agents send messages via Slack, Push notifications are sent to users.
If you're using the chatbot, no messages will be received in Slack if the chatbot knows the answer. Once the human takeover is active all conversation's messages are sent to Slack.
The Slack app is compatible with email piping and the messaging apps.
Deleting or leaving a channel is not supported, only archiving a channel is supported.
When a conversation is archived in Support Board , the linked Slack channel is also archived.
When replying via Slack to a user, if the user is notified by email or text message, a Slack message is sent to notify you.
Use the Slack command /archive to archive a conversation from Slack.
If you do not see the channel of the user in Slack, go to Directories > Channels and manually join the channel.
LINE
LINE
The settings below are related to the LINE app.
Installation
From Settings > Apps, click LINE and enter your license key to install and activate the app.
More details here.
If you have the cloud version click Active.
Create a new Provider and then a new Messaging API channel, select Messaging API as channel type
From the channel Basic settings area copy Channel secret and paste it into Support Board > Settings > Line > Synchronization > Channel secret.
From the channel Messaging API area generate a Channel access token (long-lived), copy it and paste it into Support Board > Settings > Line > Synchronization > Access token.
Enter your Webhook URL into Webhook URL and click Verify. Get the Webhook URL from Support Board > Settings > Line > Synchronization > Webhook URL.
Enable Use webhook.
Scan the QR code with your LINE mobile app to start writing to your channel.
Disable the Auto-reply messages setting.
You're done. All messages sent to your LINE bot account will appear in the conversation admin area of Support Board.
More information
You have 7 days from when the end user's message was sent from WhatsApp to reply to the message.
Stickers are not supported.
Support Board rich messages are automatically converted to LINE rich messages when possible, otherwise they are removed from the message.
LINE conversations and messages are compatible with queue and routing.
The chatbot is supported. The human takeover feature is supported.
The supported AI features include language detetction, spelling correction, multilingual via translation, Google search.
The follow-up message is supported, but the message is always sent, also if an agent replies.
The offline message is supported, but the timetable is not sent.
WECHAT
WeChat
The settings below are related to the WeChat app.
Installation
From Settings > Apps, click WeChat and enter your license key to install and activate the app.
More details here.
If you have the cloud version click Active.
After the registration enter Official accounts area and from the left menu click Settings and development > WeChat verification. You must complete the verification, it takes a few weeks and costs USD 99, or CNY 300 for chinese entities.
From the left menu click Settings and development > Basic configuration and copy Developer ID(App ID), Developer Password(App Secret). Paste the information into Support Board > Settings > WeChat.
From the left menu click Settings and development > Basic configuration and complete the server configuration (服务器配置(已启用).
In Server Address(URL) enter the URL you get from Support Board > Settings > WeChat > Synchronization > Get configuration URL. In Token insert any value you want, the same value must be entered in Support Board > Settings > WeChat > Token.
You're done. All messages sent to your WeChat account will appear in the conversation admin area of Support Board.
More information
If you receive an error like {"errcode":41001,"errmsg":"access_token missing rid: 631111-470b3b22-48553870"} you need
to whitelist your server IP address from Official Account > Settings and Development > Basic Configuration > IP whitelist.
WeChat files and location attachments are not supported and are not received by Support Board.
Links are not supported in WeChat, they are converted to texts.
Support Board rich messages are automatically converted to WeChat rich messages when possible, otherwise they are removed from the message.
WeChat conversations and messages are compatible with queue and routing.
The chatbot is supported. The human takeover feature is supported.
The supported AI features include language detetction, spelling correction, multilingual via translation, Google search.
The follow-up message is supported, but the message is always sent, also if an agent replies.
The offline message is supported, but the timetable is not sent.
ZALO
Zalo
The settings below are related to the Zalo app.
Installation
From Settings > Apps, click Zalo and enter your license key to install and activate the app.
More details here.
If you have the cloud version click Active.
Copy the Application ID and Application secret key from the app you just created and paste them into Support Board > Settings > Synchronization > Zalo.
From the left menu click Webhooks and set the URL, get the URL from Support Board > Settings > Zalo > Synchronization > Webhook URL.
From the left menu click Webhooks copy OA Secret Key and paste it into Support Board > Settings > Zalo > Synchronization > OA secret key.
From the left menu click Webhooks and enable the following webhook events: user_send_location, user_send_image, user_send_link, user_send_text, user_send_sticker, user_send_gif, user_received_message, user_seen_message, oa_send_text, oa_send_image, oa_send_list, oa_send_gif, user_send_audio, user_send_video, user_send_file, user_reacted_message, user_received_message.
From the left menu click Official Account > OA Management and link your Official Account.
From the top menu click Tools > API Explorer or go to https://developers.zalo.me/tools/explorer/.
As Access token type select OA Access Token, click Get Access Token and select your Official Account.
Copy the Refresh token and paste it into Support Board > Settings > Zalo > Synchronization > Refresh token.
More details here.
From the left menu click Role and a test user as admin. You will use this user to send message to your Zalo Official Account and test the integration.
From the left menu click Sign up to use API > Official AccountAPI enable User Management and click Submit for review.
You're done. All messages sent to your Zalo Official account will appear in the conversation admin area of Support Board.
More information
You need a Zalo Official Account to use this integration. Support Board will receive messages sent to your Zalo Official Account.
The slider rich message only send the first element to Zalo.
Support Board rich messages are automatically converted to Zalo rich messages when possible.
Zalo conversations and messages are compatible with queue and routing.
The chatbot is supported. The human takeover feature is supported.
The supported AI features include language detetction, spelling correction, multilingual via translation, Google search.
The follow-up message is supported, but the message is always sent, also if an agent replies.
The offline message is supported, but the timetable is not sent.
Zendesk
Zendesk
The settings below are related to the Zendesk App.
Installation
From Settings > Apps, click Zendesk and enter your license key to install and activate the app.
More details here.
If you have the cloud version click Active.
Get the domain from the URL of your Zendesk admin area, copy the first part of the URL: https://domain.zendesk.com/. For example, the domain of https://supportboard.zendesk.com/agent/get-started/ticketing-system/ticketing-intro is supportboard.
Get the API key from Left menu > Admin > Channels > API > Settings.
Click Add API token.
The email is your Zendesk account email.
More information
Tickets converted by Support Board are automatically synchronized when new messages are sent and received in Support Board , and they are linked to an existing Zendesk user if any, otherwise a new Zendesk user is created.
Support Board links Zendesk users to Support Board users via email or phone number.
PERFEX CRM
Perfex
The settings below are related to the Perfex app.
Installation
The installation requires two steps:
From Settings > Apps, click Perfex and enter your license key to install and activate the app.
More details here.
The cloud is not compatible with the Perfex app.
Once the app is installed go to Settings > Perfex and enter the database information and the Perfex URL.
You can get the information from the file application/config/app-config.php in your Perfex installation folder.
If you do not know the Perfex prefix leave it empty, the default prefix is tbl.
Go to the admin area of Perfex, then go to Setups > Modules and install the Support Board module by uploading the file module.zip.
Once the module is installed go to Setups > Support Board and enter the Support Board plugin URL, get it from Settings > Miscellaneous > Installation URL.
If you're using the WordPress version, the URL must be like this:
https://example.com/wp-content/plugins/supportboard/supportboard.
To show Support Board inside the Perfex admin area, Support Board must be installed in the same domain and same file system of the Perfex installation.
If you have issues, or if you have changed the Perfex database details, make sure the file supportboard/config.php use the correct Perfex database details. Updating the details in Support Board will not update the details in the config.php file.
WHMCS
WHMCS
The settings below are related to the WHMCS App.
Installation
The process requires two installations, one is the WHMCS add-on, and one is the Support Board App.
App installation
From Settings > Apps, click WHMCS and enter your license key to install and activate the app.
More details here.
The cloud is not compatible with the WHMCS app.
Once the app is installed go to Settings > WHMCS and enter the database information and the WHMCS URL.
WHMCS add-on installation
Enter the folder supportboard inside the addon.zip (download it here) file into the
/modules/addons/ directory of your WHMCS installation.
Click the Configure button and enter the Support Board plugin URL.
How to update
Updating the WHMCS App in Support Board is easy, you can enable the automatic updates or manually update it. Details
here. To update the WHMCS add-on you will need to download the latest version of the add-on from
https://board.support/docs/files/whmcs/addon.zip and manually replace the
/modules/addons/supportboard/ directory of your WHMCS installation with the new one just downloaded.
If you have issues, or if you have changed the WHMCS database details, make sure the file supportboard/config.php use the correct WHMCS database details. Updating the details in Support Board will not update the details in the config.php file.
OpenCart
OpenCart
The settings below are related to the OpenCart App.
Installation
From Settings > Apps, click Martfury and enter your license key to install and activate the app.
More details here.
If you have the cloud version click Active.
Once the app is installed go to Settings > OpenCart and enter the OpenCart details.
To get the Username and API key enter the admin area of OpenCart and go to System >Users > API .
You'll see a predefined user named Default. Edit it generate the API key, then set the Status to enable.
Next, add your IP to list of permitted for API access.
With a file manager or FTP, edit file catalog/controller/common/header.php in the OpenCart installation folder and add the following key-value in $data variable:
Edit the file /catalog/view/theme/default/template/common/header.twig and add <script>{{ supportboard }}</script> somewhere within the <head> tag.
Mind that if you are not using the default theme the path will be different.
Enter the OpenCart Extensions page and click the top-right button Update.
Download the sb.php file and upload it into catalog/controller/api.
More information
This app supports OpenCart Multistore.
On OpenCart update you have to apply code above again.
Currently only Opencart 3 is supported.
Active eCommerce
Active eCommerce
The settings below are related to the Active eCommerce app.
Installation
The process requires two installations, one is the Support Board App, and one is the installation in Active eCommerce.
App installation
From Settings > Apps, click Active eCommerce and enter your license key to install and activate the app.
More details here.
The cloud is not compatible with the Active eCommerce app.
Once the App is installed go to Settings > Active eCommerce and enter the database information, the Active eCommerce URL, and the other settings.
The Secret key can be found in the file
.env located in the root directory of Active eCommerce. Copy the APP_KEY value.
If you have issues, make sure the file supportboard/config.php use the correct Active eCommerce database details.
Installation in Active eCommerce
Edit the file \resources\views\frontend\inc\footer.blade.php in the directory of Active eCommerce and Enter the code below just after the footer opening tag <footer.
Replace [YOUR-SITE] with the URL of your Support Board installation, get it from Settings > Miscellaneous > Installation URL.
Updating the Active eCommerce App in Support Board is easy, you can enable the automatic updates or manually update it. Details here.
If you update Active eCommerce, you will need to insert again the code above in the file footer.blade.php.
Sellers chat
To force sellers to see only the conversations of users writing from their product pages enable the option Settings > Miscellaneous > Hide conversations of other agents.
After that, just click the button Settings > Active eCommerce > Import vendors and you're done!
The sellers will be registered in Support Board and can log in to the admin area.
Admins can always see the conversations of all agents(sellers).
Martfury
Martfury
The settings below are related to the Martfury app.
Installation
From Settings > Apps, click Martfury and enter your license key to install and activate the app.
More details here.
The cloud is not compatible with the Martfury app.
Once the app is installed go to Settings > Martfury and enter the database information, Martfury URL, Secret key.
Get the information from the .envfile located in the root directory of Martfury.
Set the Martfury path in Settings > Martfury > Martfury path. Get this information by uploading this file in the /public/ folder of the root directory of Martfury, after the upload open it via browser (e.g. https://shop.com/public/path.php).
To show the chat on the website enter the Support Board code of the PHP installation into Martfury Admin > Appearance > Custom JS > Footer JS. Do not include jQuery.
If you have issues, make sure the file supportboard/config.php use the correct Martfury database details.
How to update
Updating the Martfury App in Support Board is easy, you can enable the automatic updates or manually update it. Details here.
Sellers chat
To force stores to see only the conversations of users writing from their product pages follow the steps below.
Check the options Settings > Martfury > Private chat, Settings > Chat > Disable dashboard, Settings > Chat > Allow only one conversation.
From Settings > Martfury > Import vendors import all vendors.
In Settings > Martfury > Private chat linking each each vendor to the correct store. You can get the vendor IDs from Users > Agents and Admins.
WORDPRESS
WordPress
The settings below are related to the WordPress version of Support Board that is installed on your WordPress website.
If you are using the cloud version of Support Board and its WordPress plugin, the feature below are not available.
User synchronization
WordPress users can be automatically synchronized with Support Board by selecting "WordPress" under the Users system in the Settings > WordPress area.
When active, the front-end chat automatically recognize all logged-in WordPress users and create a new Support Board user account with the same details (name, surname, email, and password).
Also, the log-in form recognize the email and password of each WordPress user.
On Support Board login, the user is automatically logged in WordPress as well.
To create a WordPress user when a visitor register to Support Board enable the option Settings > WordPress > WordPress registration and include password and email fields in the registration form, they are required.
The WordPress user if logged in automatically.
More information
Direct access and PWA
You can access the admin area directly without going through WordPress by navigating to /wp-content/plugins/supportboard/supportboard/admin.php and
logging in with your default WordPress user or agent email and password.
Keep in mind that your wp-content folder might be different.
By accessing the admin directly, you will also be able to use the admin area as a Progressive Web App.
You can find more details on this by clicking here.
Login and logout
To logout from the admin area of Support Board , logout from WordPress from the admin area of Support Board , once logged-out you will be able to login with another WordPress account.
To access the admin area from within WordPress you must log in with one of the following WordPress user roles: administrator, author, editor.
Get a page or Post Type ID
To get the ID of a specific page or Post Type, go to the admin area of WordPress and edit the page or post. The ID is displayed in the address bar.
Example: http://your-site.com/wp-admin/post.php?post=11&action=edit&lang=en (the page/post ID is equal to 11).
Get a Post Type slug
The Post Type slug of the blog archive and posts is post. The Post Type of the pages is page.
To obtain the slug of a custom Post Type, go to the admin area of WordPress and open the custom Post Type page from the left menu.
The slug is displayed in the address bar.
Example: http://your-site.com/wp-admin/edit.php?post_type=food (the slug is food).
Disable WordPress Emoji
The prevent WordPress from replacing the chat emoji with the WordPress ones Enter the code below in the file functions.php of your theme.
If you have multisite installation, you must install Support Board in the main website.
WordPress Multilingual
If you want the chat to use the same language as the pages on your website, disable the Settings > Chat > Language option.
WOOCOMMERCE
WooCommerce
The settings below are related to the WooCommerce App for the WordPress version of Support Board.
Installation
From Settings > Apps, click WooCommerce and enter your license key to install and activate the app.
More details here.
The cloud and PHP versions are not compatible with the WooCommerce app.
Chatbot
Getting started
To start using the chatbot with WooCommerce you only have to enable it, for more details click here.
The chatbot will start replying to questions related to your shop automatically.
Built-in chatbot questions and answers list
The OpenAI chatbot can answer the questions like the below ones.
Do you sell any shoes for less than $299?
Show me your bags
Do you have anything for women in promotion?
What are the best shoes of 2020?
Add Abstract Print to the cart
Remove Abstract Print from the cart
What's the status of my order?
What is the price of the Abstract Print?
Display the products in my cart!
Do you ship in Australia?
Where do you ship?
Multilingual
The multilingual feature is compatible with WPML and Polylang plugins.
To activate the multilingual feature go to Settings > WordPress > Multilingual plugin and choose WPML or Polylang.
The chatbot can display up to 15 products via the slider rich message.
The chatbot is automatically updated every 60 minutes by default, but it can take longer.
If you update a product, category, tag, or attribute, please wait a few hours for the new contents to take effect.
The synchronization detects the following events: product deleted, product restored from trash, product updated, new product added, product deleted, category or tag deleted, category or tag updated, new category or tag added.
To improve the chatbot add all the possible variants of an attribute, including the variants not used in your products.
Example: if you sell only yellow and red t-shirts add all possible colors to the attribute color, not only yellow and red.
Products must have the Regular price attribute set.
Products names must not use the double-quote char: ".
Some multilingual feature is not compatible with sub-domains or external domains language URLs.
If your store uses UTF-8 characters (this applies if your language includes special characters like ñ, ü, ç, 蝦餃, حار, or, for example, a product name like e-Karta brązowa), make sure your database collation is set to utf8mb4_unicode_ci or utf8mb4_unicode_520_ci, and the charset is utf8mb4.
Also, ensure your wp-config.php includes define('DB_CHARSET', 'utf8mb4');
You can verify that strings are stored correctly by checking the wp_post table using a tool like phpMyAdmin.
If you see corrupted characters like �� (), it means your table's text is corrupted, and the chatbot will not be able to perform actions such as finding products.
Merge fields and shortcodes
The following merge fields and shortcodes can be used in emails and messages.
Code
Description
{product_images id="123"}
Display a slider of the product's images using the images slider rich message.
If there are no results, the full message is replaced by "No results found".
Replace 123 with the product ID.
{product_name id="123"}
Display the product name. Replace 123 with the product ID.
{product_image id="123"}
Display the main product image. Replace 123 with the product ID.
{product_price id="123"}
Display the main product price. Replace 123 with the product ID.
{product_description id="123"}
Display the product description. Replace 123 with the product ID.
{product_rating id="123"}
Display the product rating. If the product has no ratings yet, the full message is replaced by "[product name] has no ratings or reviews yet".
Replace 123 with the product ID.
{product_link id="123"}
Product link. Replace 123 with the product ID.
{shipping_locations}
List of the shipping countries.
{shop_link}
Shop link.
{cart_link}
Cart link.
{cart}
Display a list of the products in the user's cart. If the cart is empty, the full message is replaced by "Your cart is currently empty".
{order_status}
Status of the last user's order. If the user has never placed an order, the full message is replaced by "You haven't placed an order yet".
{order_details)
Details of the last order user's order.
If the user has never placed an order, the full message is replaced by "You haven't placed an order yet".
Search for the products matching the given attribures and display them using the slider rich message.
If there are no results, the full message is replaced by "No results found".
Attributes:
id The products IDs separated by commas. If this attribute is setted, all other attrbutes are ignored.
tag Display only the products of the given tag.
category Display only the products of the given category.
discounted Set it to true to show only the products in promotions.
rating Display only the products with a rating equal or bigger than the given value. Enter a value from 1 to 5.
max-price Display only the products with a price equal or smaller than the given value. Enter a number.
min-price Display only the products with a price equal or bigger than the given value. Enter a number.
attribute Display only the products with the given attribute term.
link-type The action on user click. Available values: purchase, checkout, link. Default: purchase.
link-text The button text. Default: Purchase.
language The language code of the products to display.
{payment_methods}
Available payment methods.
{coupon discount="110" expiration="2 days"}
Generate a coupon code. Attributes:
discount The coupon discount Enter a value from 1 to 100.
Add a product or multiple products to the user's cart. Optionally apply a coupon code, and redirect the user to the checkout page.
More information
Disable chatbot store integration
If you want to disable the chatbot store integration, go to Settings > WooCommerce > Disable store integration.
The chatbot will no longer connect directly to your WooCommerce store data (e.g. products and categories) to reply to questions related to your products.
Instead, you will have to train the chatbot via website training to allow it to reply to questions related to your products.
This feature is useful if the chatbot is providing wrong answers, in this case training it via website training may improve the answers.
Waiting list
The message is sent automatically when a user visits a page of a product that's out of stock.
The message is sent automatically when a user tries to purchase a product that's out of stock via the chatbot.
The message is sent a maximum of 1 time every 24 hours for each out of stock product.
If the user'email is not set, the chat asks for the user' email automatically.
Removed item from cart notification
If the coupon is included, the chat message is sent only for the first removed item, then again after coupon expiration.
The coupon is valid only for the removed items.
The following merge fields can be used in the email subject too: {coupon}, {discount_price}, {original_price}, {product_names}, {customer_name}.
Only the users with an email will get notified via email.
Returning visitors notification
The chat message is sent after 15 seconds.
The chat message is sent to the active conversation, if any, otherwise to a new conversation.
A visitor is a "returning visitor" only if at least 24 hours have passed since the last visit.
The chat message is sent only 1 time, if the visitor returns again, the message is not sent.
Follow-up message
If the message contains a coupon, the message is sent only if there are no other valid coupons assigned to the user.
When a visitor completes a purchase, if an existing Support Board user exists, it is updated with the details provided in the checkout form.
The automatic messages(abandoned cart message, follow-up messages,...) are sent to the active conversation, if any, otherwise to a new conversation.
The default coupon values are 0% discount and 7 days expiration.
Coupons in the trash are still valid, you must permanently delete them.
All coupons can be used only 1 time.
Expired coupons are deleted automatically via cron jobs.
The products pop-up of the admin conversations area search by product name, description, and price.
The products pop-up of the admin conversations area is multilingual and displays automatically the products of the user's language if available.
To view orders of guest users who did not send any chat message before the purchase you need to enable Settings > Users > Register all visitors.
The Ticket products selector > Exclude products setting accepts WooCommerce product IDs separated by commas.
WhatsApp shop
To allow a user to purchase your WooCommerce shop products on WhatsApp the product ID of your WhatsApp shop products must be the same as the product ID of your WooCommerce products.
Once the user has sent the WhatsApp order, WooCommerce automatically saves it, use the merge field {catalog_checkout} to send the user the checkout link.
The settings below are related to the Ultimate Membership Pro app.
App installation
From Settings > Apps, click Ultimate Membership Pro and enter your license key to install and activate the app.
More details here.
The cloud and PHP versions are not compatible with the Ultimate Membership Pro app.
Once the App is installed go to Settings > Active eCommerce and enter the database information, the Active eCommerce URL, and the other settings.
The Secret key can be found in the file
.env located in the root directory of Active eCommerce. Copy the APP_KEY value.
If you have issues, make sure the file supportboard/config.php use the correct Active eCommerce database details.
Users synchronization
New users are synchronized automatically. To manually syncronize existing users go to Settings > WordPress > Synchronize users and click Import users.
More information
To limits the access to a specific plan only use this shortcode [ihc-hide-content ihc_mb_type="show" ihc_mb_who="4" ihc_mb_template="2"]<script id="sbinit" src="YOUR-URL/supportboard/supportboard/js/main.js"></script>[/ihc-hide-content]
Replace 4 with the user's level you want and YOUR-URL with your WordPress /plugins/ folder URL.
You also have to check Settings > WordPress > Manual init.
ARMEMBER
ARMember
The settings below are related to the ARMember app.
App installation
From Settings > Apps, click ARMember and enter your license key to install and activate the app.
More details here.
The cloud and PHP versions are not compatible with the ARMember app.
Once the App is installed go to Settings > Active eCommerce and enter the database information, the Active eCommerce URL, and the other settings.
The Secret key can be found in the file
.env located in the root directory of Active eCommerce. Copy the APP_KEY value.
If you have issues, make sure the file supportboard/config.php use the correct Active eCommerce database details.
Users synchronization
New users are synchronized automatically. To manually syncronize existing users go to Settings > WordPress > Synchronize users and click Import users.
More information
A user is a paid member only if it has at least one active paid plan which is not expired.
CLOUD VERSION
Cloud version
The information in this section is exclusively related to the cloud version of Support Board, accessible at https://cloud.board.support.
Credits
Credits are used only in the cloud version of Support Board.
Credits are used by the following functions, only in Automatic sync mode.
The Manual sync mode doesn't use credits.
If you do not want to use credits, you can use the Manual sync mode and your API keys.
Artificial Intelligence > Google > Automatic Translations, Language detection, Multilingual via translation.
You can change the sync mode at any time from Settings > Artificial Intelligence > OpenAI > Sync mode or Settings > Artificial Intelligence > Google > Sync mode.
Google Translations and language detection $0.00004 per char.
OpenAI gpt-3.5-turbo-instruct $0.000004 per token.
OpenAI gpt-3.5-turbo $0.000004 per token.
OpenAI gpt-3.5-turbo-0125 $0.000001 per token.
OpenAI gpt-3.5-turbo-1106 $0.000002 per token.
OpenAI gpt-5 $0.00001 per token.
OpenAI gpt-5-mini $0.000002 per token.
OpenAI gpt-5-nano $0.0000004 per token.
OpenAI gpt-4 $0.00012 per token.
OpenAI gpt-4-32k $0.00024 per token.
OpenAI gpt-4-turbo $0.00003 per token.
OpenAI gpt-4o $0.00001 per token.
OpenAI gpt-4o-mini $0.00000015 per token.
OpenAI gpt-4.1-nano $0.0000004 per token.
OpenAI gpt-4.1-mini $0.0000016 per token.
OpenAI gpt-4.1 $0.000008 per token.
OpenAI o1 $0.00006 per token.
OpenAI o1-mini $0.000012 per token.
OpenAI o3-mini $0.0000044 per token.
OpenAI o4-mini $0.0000044 per token.
OpenAI ada $0.0000001 per token.
OpenAI text-embedding-3-small $0.00000004 per token.
OpenAI audio-to-text whisper $0.0002 per second of audio.
OpenAI whisper $0.0001 per second of audio.
Information
When your credits run out, if the automatic recharge is not enabled, you will be notified via email. You will receive a maximum of two email notifications.
Activate the automatic recharge to prevent running out of credits.
When automatic recharge is enabled, the credit will be recharged once it falls below 1.
Shopify
The Shopify integration is available only in the cloud version of Support Board and allow you to synchronize your Shopify store and users with Support Board.
To use the Shopify integration, you must have a Shopify store and install the Support Board Shopify App.
After the installation, the chat widget should appear on your Shopify store.
If it doesn't, go to Sales channels > Online store
and on the left menu, click App embeds, make sure the Support Board block there and it is active.
The chatbot can access your store products, collections, tags, variants, and vendors to answer the user's questions. No setup is required. It works automatically.
To enable the chatbot, go to Settings > Artificial Intelligence > OpenAI > Chatbot and enable the option.
More details here.
If your store is multilingual, go to Settings > Chat > Language and set it to Multilingual.
The chat and chatbot will then automatically use the store's language.
Th Shopify logged in user details are detected and synchronized with Support Board.
Use the following merge field to display product cards and sliders in the chat: {shopify product_id="12345678"}.
Replace 12345678 with the product ID. Show a slider of multiple products by adding multiple product IDs separated by commas.
The search feature of the products pop-up of the admin area only search by product title and product type.
Shopify collections, tags, varians, vendors are cached and refreshed every 10 days.
The chatbot will use them to answer the user's questions.
If your store URL changes, you need to delete and reinstall the Support Board Shopify app.
You can switch between accounts without having to sign out and in by adding the accounts in Settings > Admin > Switch accounts.
The cloud version is hosted on our Amazon AWS server.
If you are experiencing a white screen while accessing the cloud version, add the URL attribute reset-login to the URL and open it again. E.g. https://cloud.board.support/?reset-login.
MISCELLANEOUS
Miscellaneous
This section contains help for other features not listed above.
Progressive Web App
The Support Board admin area is a PWA, which means that you can install it on desktop, Mac, iPhone, or mobile devices and use it like a fully-functional app.
Note: This feature is optimized for Google Chrome and Safari. The PWA is supported on all versions of Support Board.
Desktop installation
Enter in your admin area (e.g. https://www.your-site.com/supportboard/admin.php or https://cloud.board.support), and click the + icon on the top right of the URL bar of your Chrome browser.
If you are using the WordPress version see the information below.
Mobile installation - Android - Cloud version only - Not recommended
If you are using the cloud version of Support Board on Android you can use the apps available on Google Play.
We recommend using the PWA instead of the Android app to have the latest features and updates.
Mobile installation - Android and Windows - All versions
Enter in your admin area with Google Chrome (e.g. https://www.your-site.com/supportboard/admin.php or https://cloud.board.support/)
Open your browser's settings.
Scroll down and tap Add to Home screen.
Confirm by tapping Add.
Mobile installation - iPhone or Mac - All versions
Enter in your admin area with Safari (e.g. https://www.your-site.com/supportboard/admin.php or https://cloud.board.support/)
Press the Share button and select Add to Home Screen from the popup.
Tap Add in the top right corner to finish installing the PWA.
WordPress installation
To install the PWA on WordPress, you need to access the admin area directly by going to:
[SUPPORT-BOARD-URL]/admin.php
Replace [SUPPORT-BOARD-URL] with your Installation URL, get it from Settings > Miscellaneous > Installation URL.
Change PWA icon and name
Download the manifest.json file here.
Edit it and replace YOUR NAME with your brand name, YOUR NAME DESCRIPTION with any text you want, and example.png with the URL of your icon, the icon size must be 512x512px.
After finishing the file edit, move it to the Support Board installation folder where the admin.php file is located.
Please note that help with this is not included in our support. If you require assistance, you can hire us.
Keyboard shortcuts
Admin area keyboard shortcuts are enabled on both PC and MAC and work as follows:
Shortcut
Description
ENTER
or
SPACE
Confirm or close a dialog alert; the same as clicking
OK.
ESC
or
CANCEL
Decline a dialog alert and close it.
SHIFT + ENTER or
CTRL + ENTER
Add a line break to a message. This only works for the admin editor.
ESC
Close a lightbox.
CANCEL
In the admin conversations area, archive a conversation, or delete it.
CTRL + UP/DOWN ARROW
In the admin conversations area, navigate between the conversations of the list.
CTRL + RIGHT/LEFT ARROW
In the admin users area, navigate between the users.
CTRL + V
Paste an image from the clipboard and send it as message.
CTRL + Left mouse click
To select multiple conversations in the conversations list of the admin area, hold down the CTRL key while clicking each one.
You can then perform bulk actions like archiving, deleting, marking as read or unread, and more on all selected conversations.
Config file
The config.php file is a special file that contains the MySQL database log-in details and other import settings.
Most of the settings are generated automatically, but some are optional.
You can add the following settings below:
Code
Description
define('SB_UPLOAD_URL', 'YOUR-URL')
Change the uploads directory (the default directory is: /supportboard/uploads/).
Enter a URL: for example, https://your-site.com/myuplaods/.
For this setting you need also to define the SB_UPLOAD_PATH.
define('SB_UPLOAD_PATH', 'YOUR-PATH')
Change the uploads directory path (the default path is: /supportboard/uploads/).
Enter a PATH: for example, C:\xampp\htdocs\uploads. Finding the root path of your website can be a bit tricky.
You can try copying the path displayed in your FTP client or simply contact your web hosting provider for additional support.
$GLOBALS['SB_LOCAL_SETTINGS'] = []
Overwrite the default settings. The value is an array of keys and values, each key is a setting, e.g. ["registration-required" => [true]].
View an example here.
Get the settings list from resources/json/settings.json and the files settings.json inside the app folders.
Cron Jobs
Cron jobs are executed by the first user that visit the website at any given hour of the day.
Cron jobs are executed every 60 minutes (60 seconds for email piping), but it can take longer, or it can take less time as well, in relation to the traffic of your website.
Because cron jobs are initiated by users, if you have less than 1 visitor per hour (per minute for email piping), it could take longer.
As long as there is at least one active user on the site, execution every 60 minutes (60 seconds for email piping) is guaranteed.
You can speed up the cron jobs execution by manually run them via WEB API, or PHP API.
You can speed up the cron jobs also by creating a cron job that runs the URL [SUPPORT-BOARD-URL]/include/api.php?cron=true. Use the command */59 * * * * wget [SUPPORT-BOARD-URL]/include/api.php?cron=true to run it via a command.
Replace [SUPPORT-BOARD-URL] with your Installation URL.
To obtain the URL, follow these steps:
If you are using the WP or PHP version, go to Settings > Miscellaneous > Installation URL.
If you are using the cloud version, use this URL: https://cloud.board.support/script/include/api.php?piping=true&cloud=API-TOKEN and replace API-TOKEN with your API token.
Logs
You can enable the log file from Settings > Miscellaneous > Logs.
This feature is not available in the cloud version.
The log file is saved in the Support Board installation directory.
The logs record the following actions of agents and administrators: message sent, message deleted, conversation archived, conversation deleted, conversation restored, conversation assigned to an agent, conversation assigned to a department, user updated, user deleted.
URL parameters
Front-end chat
URL parameters allow the chat to perform specific actions on page load. To use them, append the URL parameters below to any URL on your website that displays the chat.
Ex. https://example.com/?conversation=1234
URL parameter
Description
?token=TOKEN
Login an existing user. Replace TOKEN with the user's token. Get it from the user's profile box in the admin area.
?conversation=ID
Open a conversation. Replace ID with the conversation ID.
The attribute token is required for not logged in users.
?chat=open
Open the chat.
Admin area
URL parameters allow the administration area to perform specific actions on page load.
To use them, append the URL parameters below to your admin URL.
Ex. https://example.com/supportboard/admin.php?conversation=1234 or https://cloud.board.support/?conversation=1234.
URL parameter
Description
?conversation=ID
Open a conversation of the conversations area. Replace ID with the conversation ID.
?user=ID
Open the profile box of a user. Replace ID with the user ID.
?setting=ID
Open a setting of the settings area. Replace ID with the setting ID.
?report=ID
Open a report of the reports area. Replace ID with the report ID.
?area=name
Open an area of the admin. Replace name with: conversations, users, settings, reports.
?login_email=email&login_password=password
Login an existing agent or user automatically.
Replace email with the account email and password with the account password.
Calendly
Follow the steps below to send a Calendly booking invitation.
To send the Calendly invitation, utilize the rich messagebutton type.
Ensure to enter the Calendly URL you copied in the previous step as the URL.
Additionally, include the success attribute to customize the message that will be sent after the booking is successfully completed.
E.g. [button link="https://calendly.com/federicoschiocchet/sb" name="Schedule a meeting" success="Thank you! Your meeting has been scheduled."]
Integrate Zapier with Support Board by following the steps below.
Integration is based on the Support Board webhooks, each webhook is a Zapier trigger, so you have 15+ Zapier triggers available, for more details visit the webhooks page.
If you are using the PHP or WordPress version, the manual integraton is the only available option.
Create a new integration by clicking Start a Zapier Integration, or visit https://developer.zapier.com/app/new. Fill in all required fields, like name and description, and click Create, you can enter any text you want, but keep the name of the app in mind because you will need it later.
From the left menu click Triggers and then Add Trigger.
Fill in all required fields, like key and description, and click Save And Continue, you can enter any text you want.
On top click API Configuration, choose REST Hook as Trigger Type, and click Save.
Search for your newly created app by entering the app name and click it. In Trigger Event select your trigger and click continue.
Copy the Webhook URL, click Continue, and then enter the Support Board admin area and enter it into Settings > Miscellaneous > Webhooks > URL, activate the webhooks, save the settings and reload Support Board.
Make something to trigger a webhook like sending a message, or creating a new user, then go back to Zapier and click Test Trigger and you should see the Support Board webhook data. Click Continue.
Click the right button Filters and set up the filter in order to trigger the integration only if a variable exists.
You need the filter because Support Board will send all webhooks to all zaps.
Example: if your zap wants to integrate the messages of Support Board , you will need to set the filter to continue only if the variable message exists.
Click Continue, or + and add your integration.
To use multiple zaps and webhooks you will need to update Settings > Miscellaneous > Webhooks > URL and add the new zap IDs, separated by commas.
Example: if you have two zaps with URLs https://hooks.zapier.com/hooks/catch/10352851/bbad21f/ and https://hooks.zapier.com/hooks/catch/10352851/aaaa66t/, the URL must be https://hooks.zapier.com/hooks/catch/10352851/bbad21f,aaaa66t/.
Envato purchase code validation
The Envato purchase code validation feature allows you to verify an Envato product purchase prior to allowing the user to register a new account.
Get the token from https://build.envato.com/create-token.
Select the following scopes: View and search Envato sites, View the user's items' sales history, Verify purchases of the user's items, Verify purchases the user has made, View the user's purchases of the app creator's items
Add multiple product IDs, separated by commas, to allow only specific products.
Boxcoin license key validation
The Boxcoin license key validation feature allows you to verify a Boxcoin license key prior to allowing the user to register a new account.
Enter the Boxcoin admin area and set the api key from Settings > API key.
If you are using the cloud version, you can find the API key at https://cloud.boxcoin.dev/#account.
As URL enter the URL of your Boxcoin installation, without the admin.php part. If you are using the cloud version enter this URL: https://cloud.boxcoin.dev/.
Add multiple checkout IDs, separated by commas, to allow only specific checkouts.
Security
Security is critical here at Support Board. We work with security experts who perform periodic security audits.
We continually implement the latest security technologies and stay up-to-date on the latest security threats.
Find below some of the security measures that have been implemented in Support Board.
IP ban
Support Board permits a maximum of 10 unsuccessful login attempts within an hour.
In case the limit is exceeded by a user, admin, or agent, they will be unable to access their account or the admin area for a period of 1 hour. This blocking mechanism is based on the user's IP address and serves to deter brute force attacks aimed at uncovering login credentials.
If you encounter the "Too many login attempts. Please retry again in a few hours." error, you have two options:
either wait for a few hours or make changes to the Support Board database by deleting the ip-ban row from the sb_settings table.
XSS injection protection
To prevent XSS injection protection attacks, all sensitive user inputs undergo sanitization.
Cross-Site Request Forgery (CSRF) protection
To prevent CSRF attacks, all requests are validated by checking the login cookie and the client-side login string.
Active sessions termination on user update
Whenever the password or the details for an admin or agent is changed, all active sessions are automatically logged out when sensitive operations are executed or after 1 hour.
AES-256-bit encryption
We use 256-bit AES encryption to encrypt sensitive data such as active session login data.
Password by filename protection
Support Board ensures that all uploads are renamed with a random alphanumeric string prepended to the original file name to prevent discovery of the URL and unauthorized download of the uploaded file.
Kindly note that, for this feature to function properly, your server must prohibit directory listing.
MySQL encrypted connections
To configure Support Board and MySQL to use encrypted connections edit the Support Board config.php file and add the following constants: SB_DB_CERTIFICATE_PATH, SB_DB_CERTIFICATE_CLIENT_KEY, SB_DB_CERTIFICATE_CLIENT, SB_DB_CERTIFICATE_CA.
Enter the appropriate values for each constant.
More details here.
Performance
Support Board is one of the fastest support systems on the market.
Its JavaScript and CSS file sizes are significantly smaller than those of most competitors, ensuring faster load times.
Server-side performance is equally impressive.
The system is extremely lightweight, built without frameworks or unnecessary code.
It's modular, minimal, and fully optimized for maximum performance.
Nevertheless, you can further improve performance from Settings > Miscellaneous > Performance optimization.
Below is a description of each available optimization setting.
Minify JS:
Enable loading of minified JavaScript and CSS files for the front-end chat widget to reduce file size and improve loading speed.
Disable reports:
Disable the reports area and stop recording report data.
This prevents the system from consuming resources to collect and store report-related information.
Disable articles:
Disable the articles area and article functionality.
This reduces resource usage by preventing the system from loading articles on both the admin and client sides.
Archive old messages:
Move messages older than the specified interval to a dedicated database backup table.
Archived messages and their associated conversations will no longer appear in the admin or user conversation areas.
However, if a user sends a new message in the future, the system will automatically restore the conversation and its message history.
You can also manually access and restore archived conversations at any time by opening the user's profile and selecting the archived conversation.
Activate this feature if you handle a large volume of messages (in the millions). It will drastically improve performance.
Async PHP process
An asynchronous PHP process is a PHP script that runs independently in the background, without blocking or waiting for the main script to finish.
It allows long-running or secondary tasks (e.g., showing typing indicators) to execute concurrently while the main PHP request continues or completes immediately.
To enable the async PHP process, follow the steps below.
Ensure your web hosting provider supports the PHP exec() function.
Some providers disable it for security reasons.
Edit the Support Board config.php file and add the define('IEE_PHP_PATH', 'YOUR-PHP-PATH'); constant, replacing YOUR-PHP-PATH with the path to your PHP executable.
The PHP installation path on your server, e.g., /usr/bin/php or /opt/plesk/php/8.3/bin/php. If your installation is on a Windows server, you also need to add the define('IEE_WINDOWS', true); constant, set it to true.
Please note that help with this is not included in our support. If you require assistance, you can hire us.
Customization
You can fully edit the source code of Support Board PHP and WordPress versions. See the terms of service for more details.
The cloud version source code is not editable, but you can customize it by using the JavaScript API and the Web API, or with JavaScript and CSS.
The chat widget does not use an iframe, so you can easily customize it with JavaScript and CSS.
Hire us
If you want us to customize Support Board for you, please contact us and send us your requirements. We will provide you with a quote based on the complexity of the work. Our hourly rate is 100 USD.
Contact us throught the chat here on the right bottom corner of the page or email us at sales@board.support. We usually reply within 24 hours.
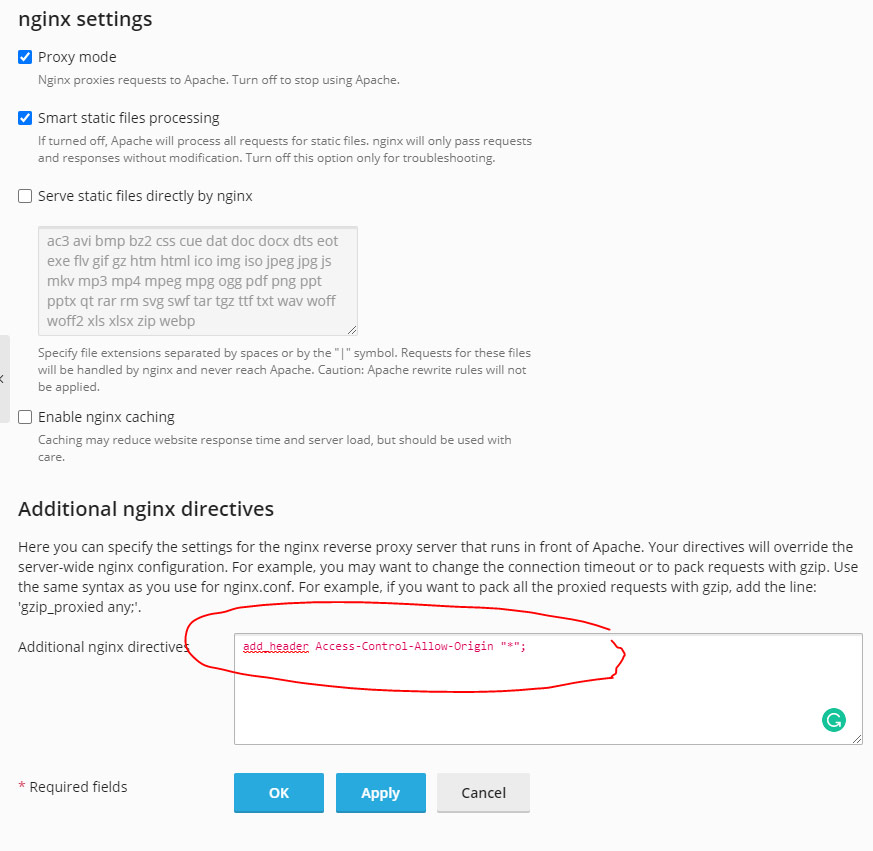
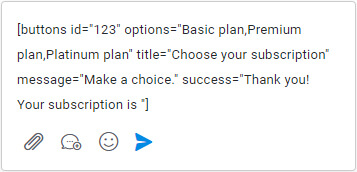 Create a rich message by inserting the shortcode into the text editor of the admin area. Customize all of the parameters with your information and send your message.

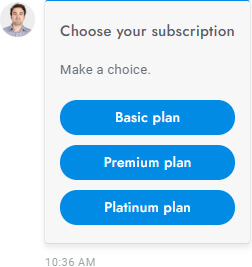 When a shortcode is used, the user sees the rich message (not the shortcode) and can select or enter the required information to complete the form submission.
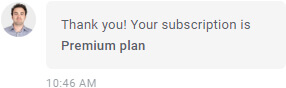 Once the rich message form has been filled out and sent by the user, a success message is shown and the form data is saved.
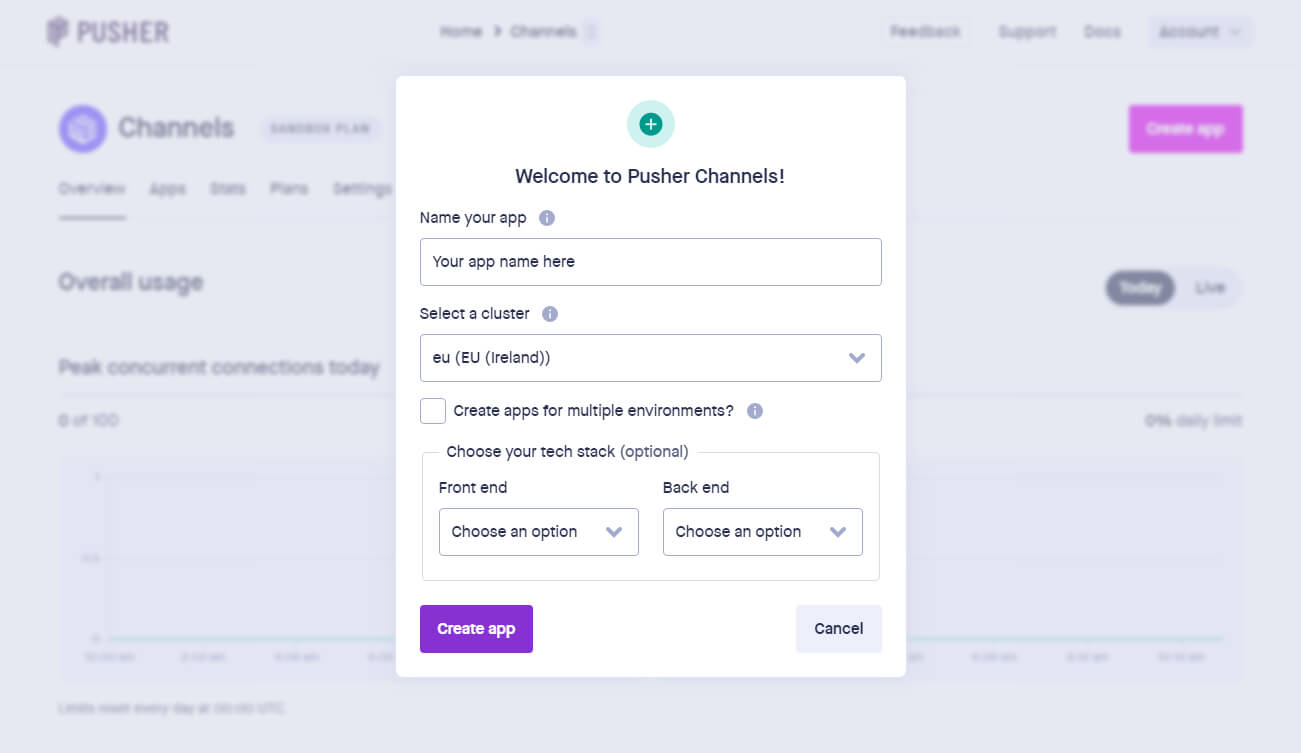
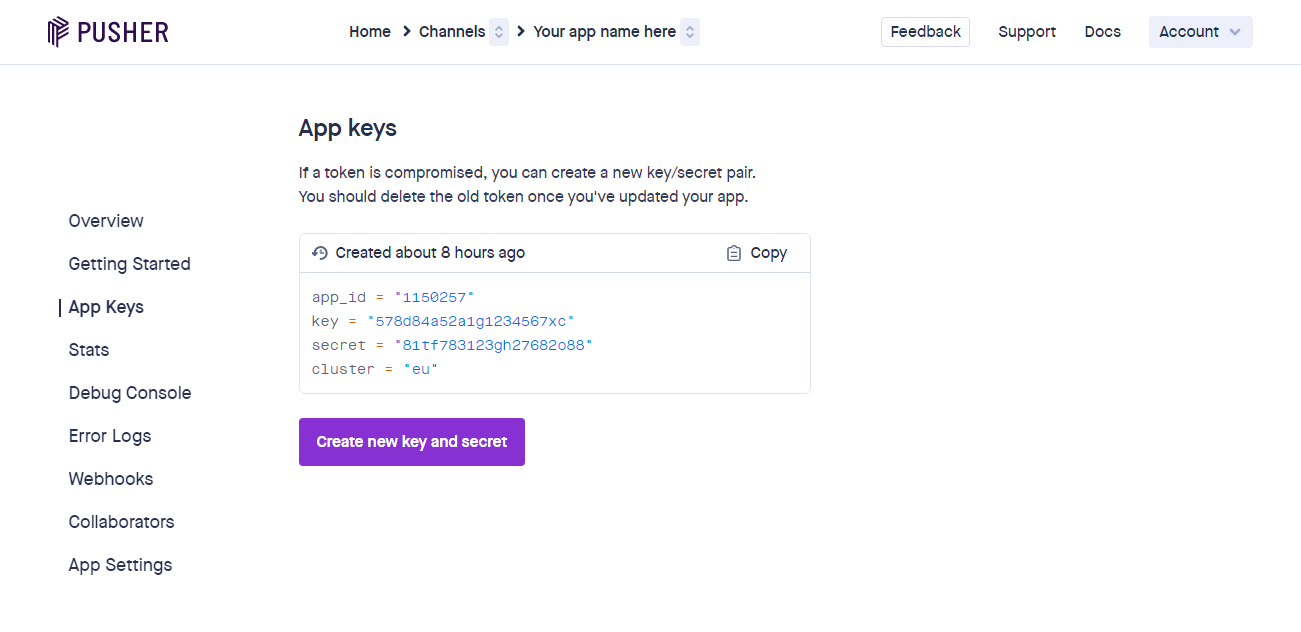
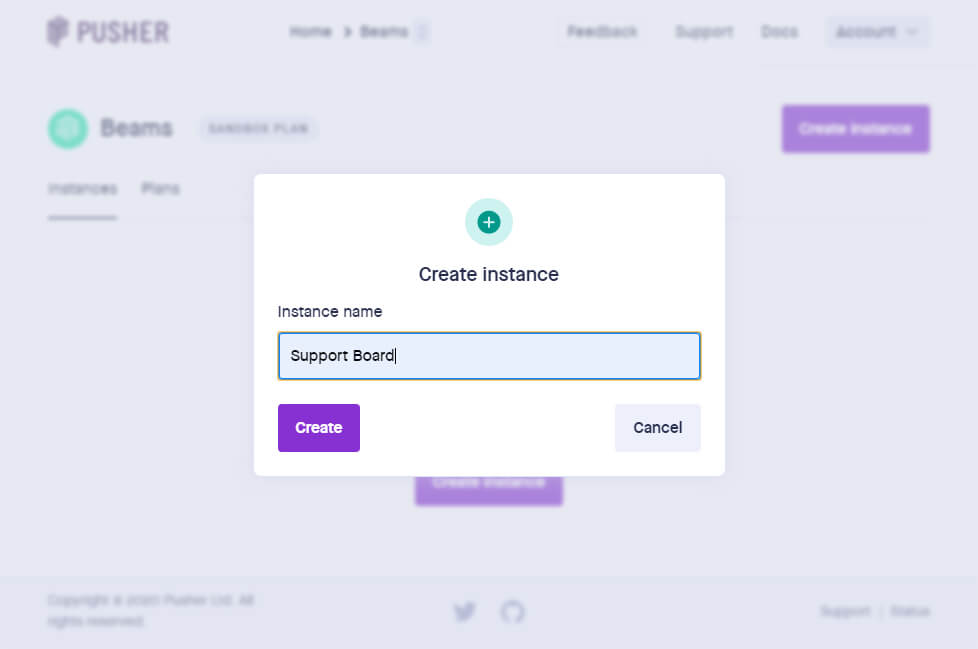
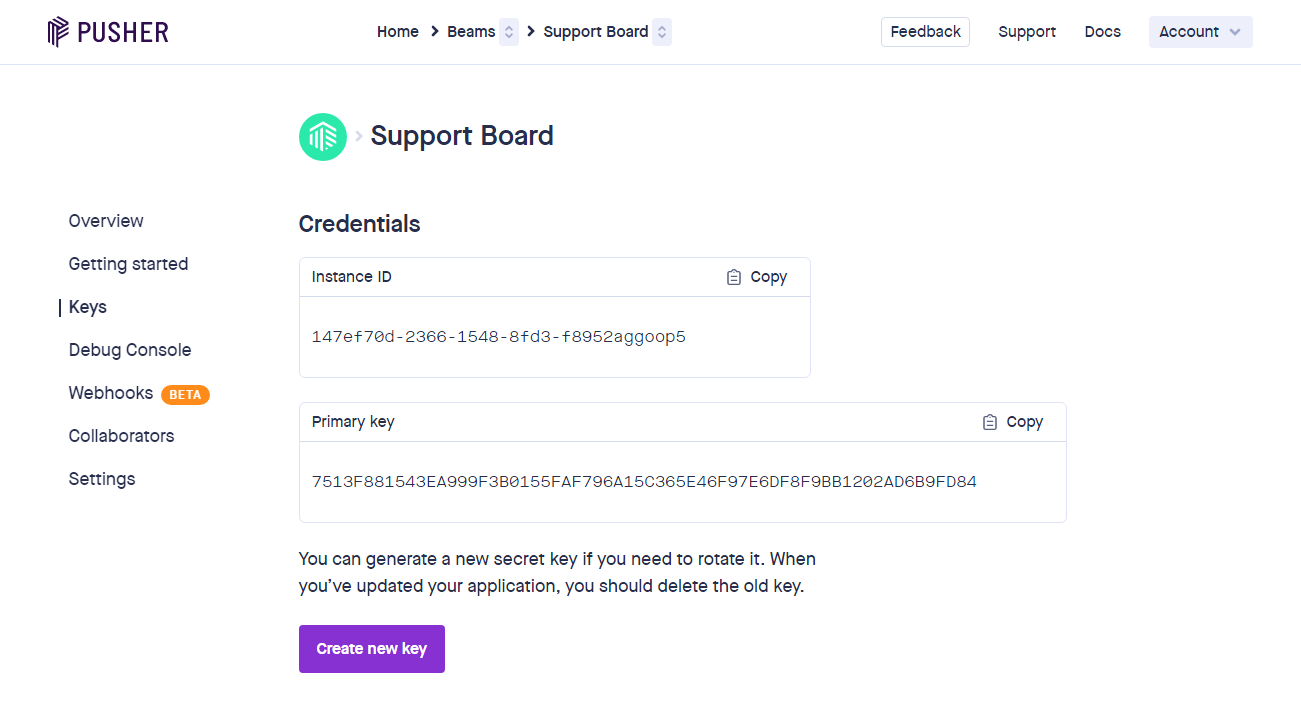
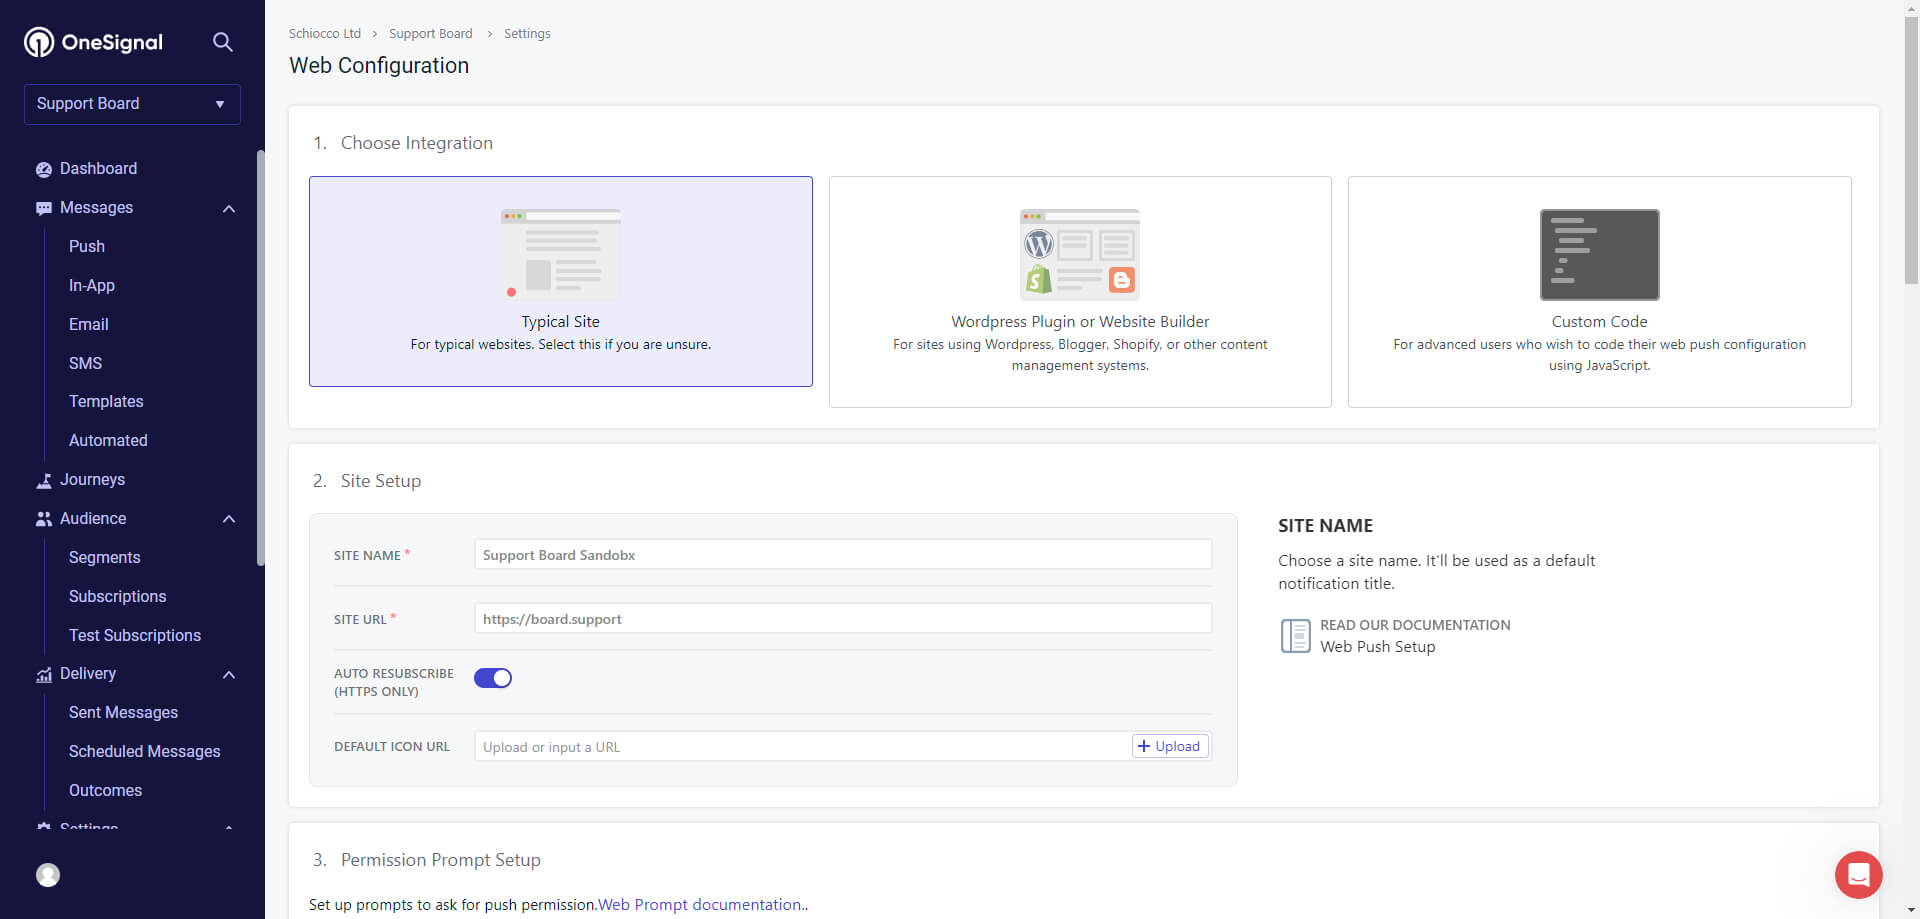
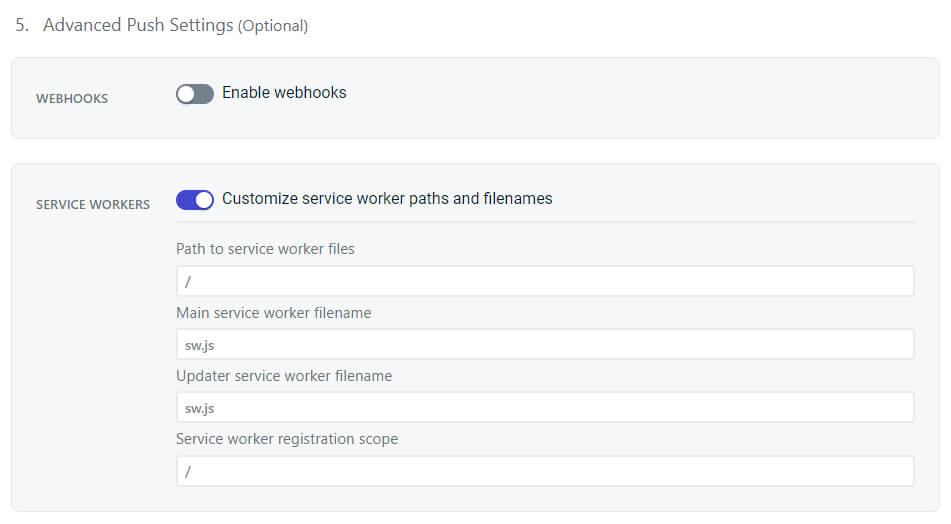
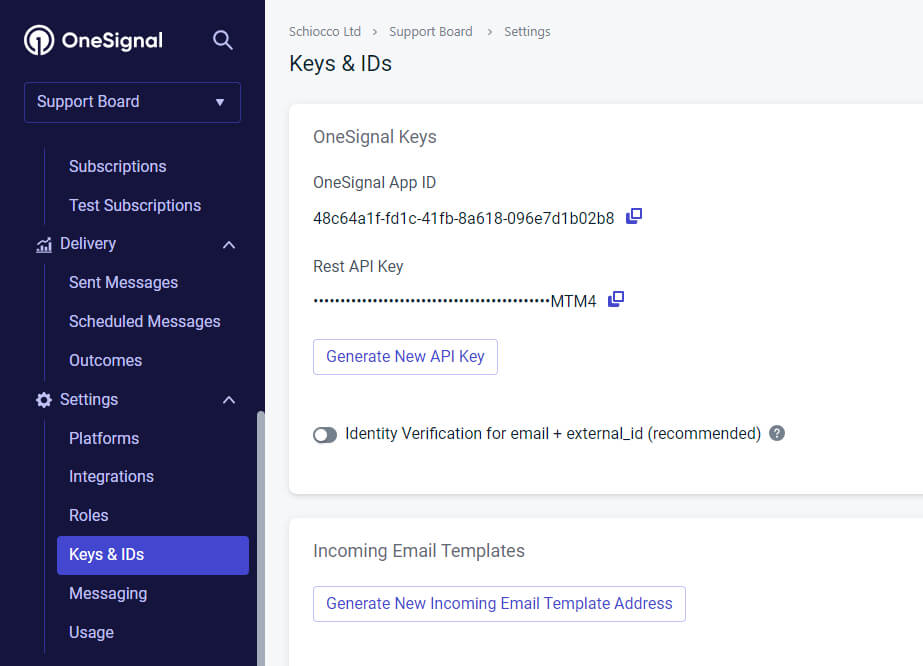
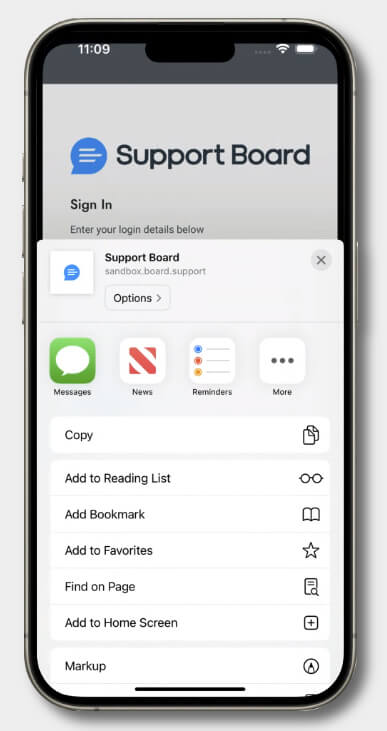
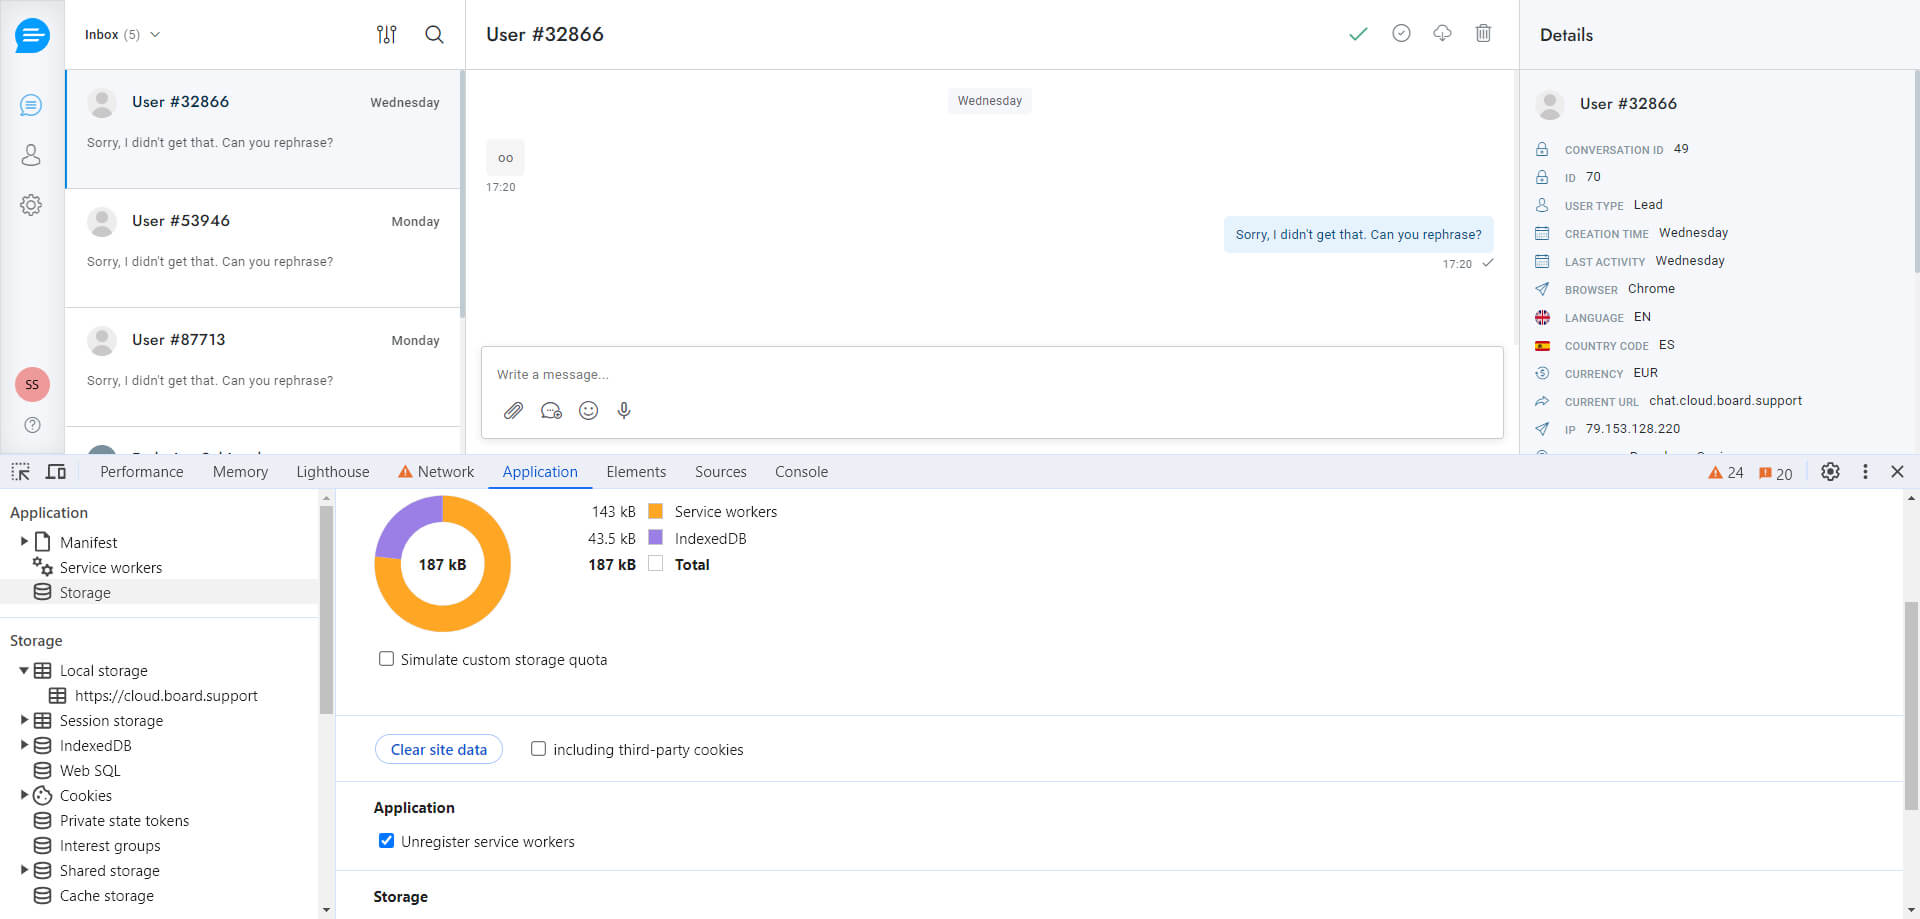
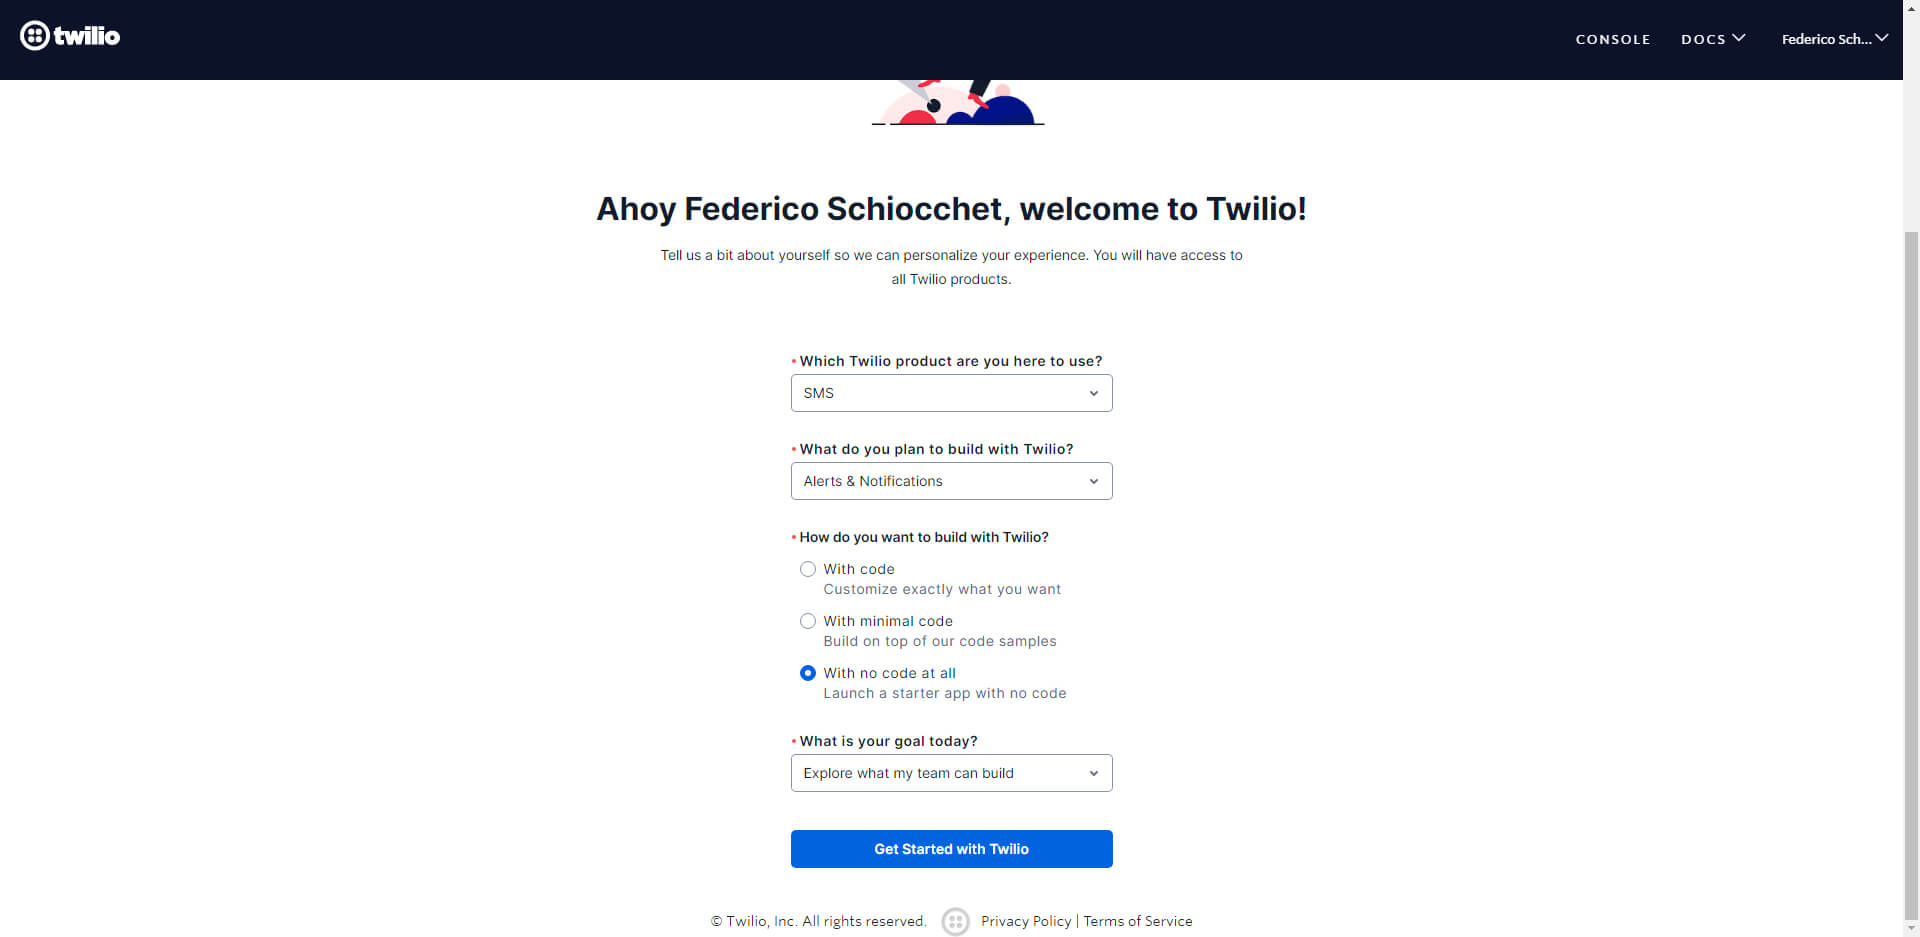
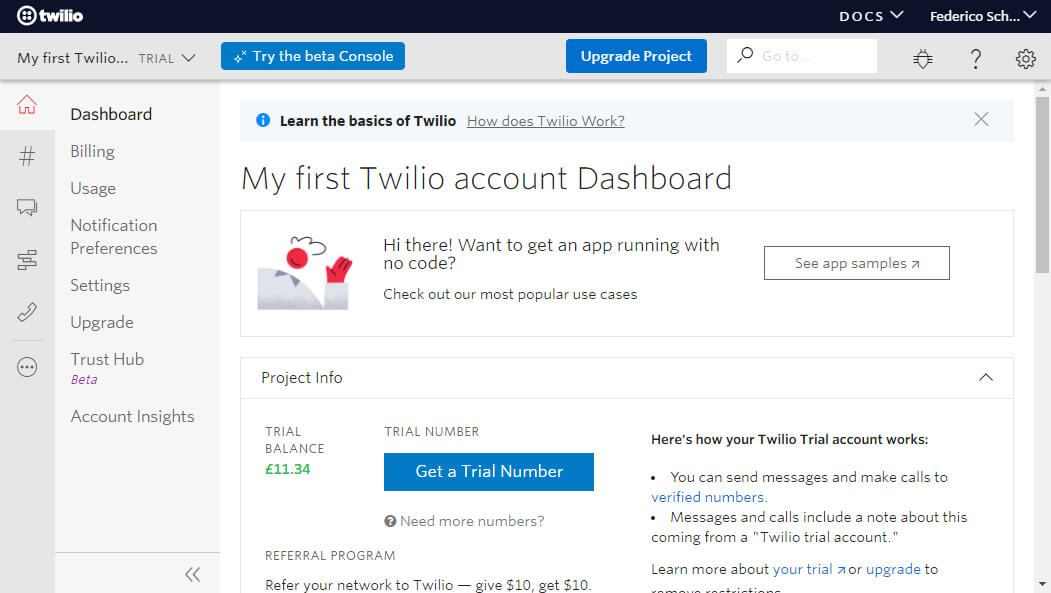
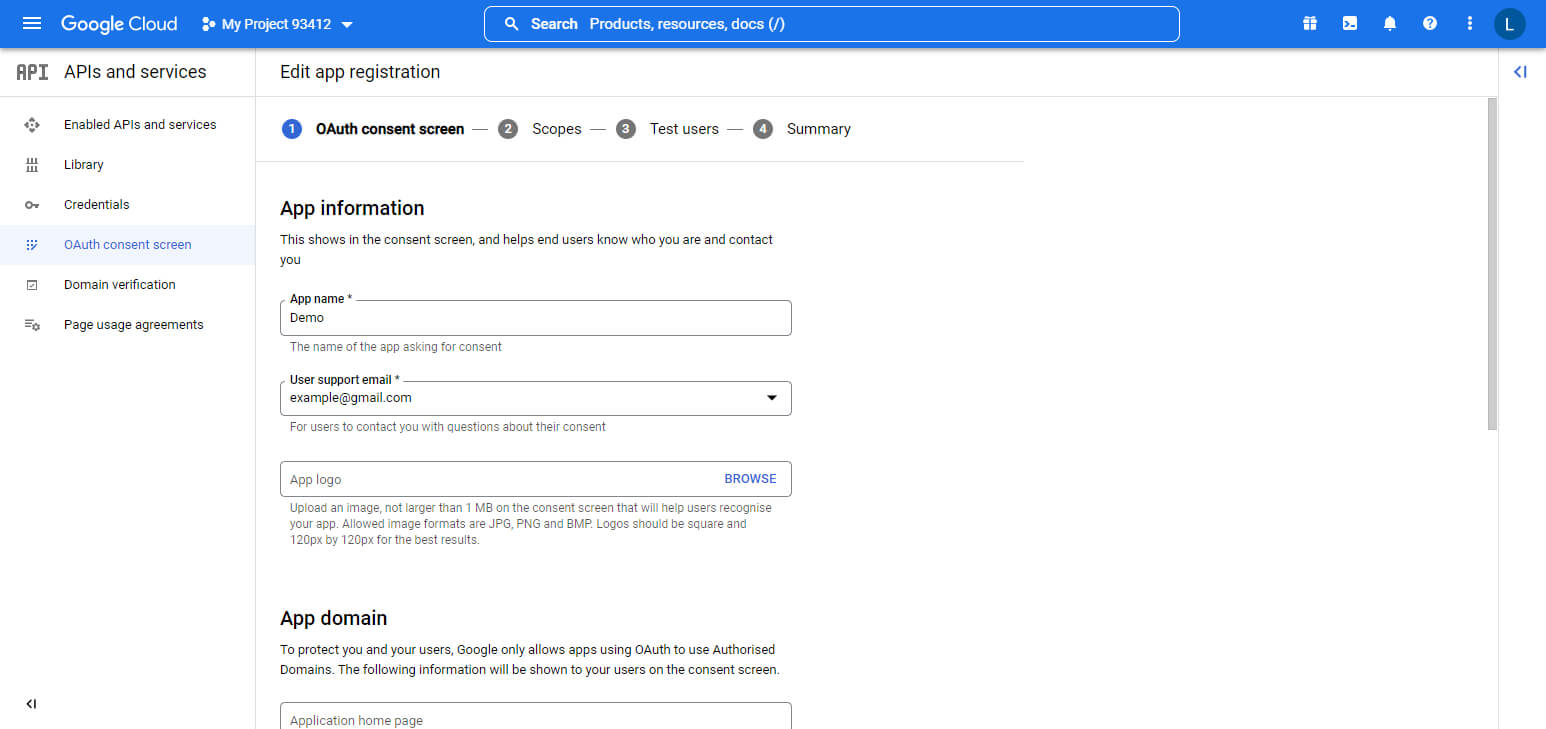
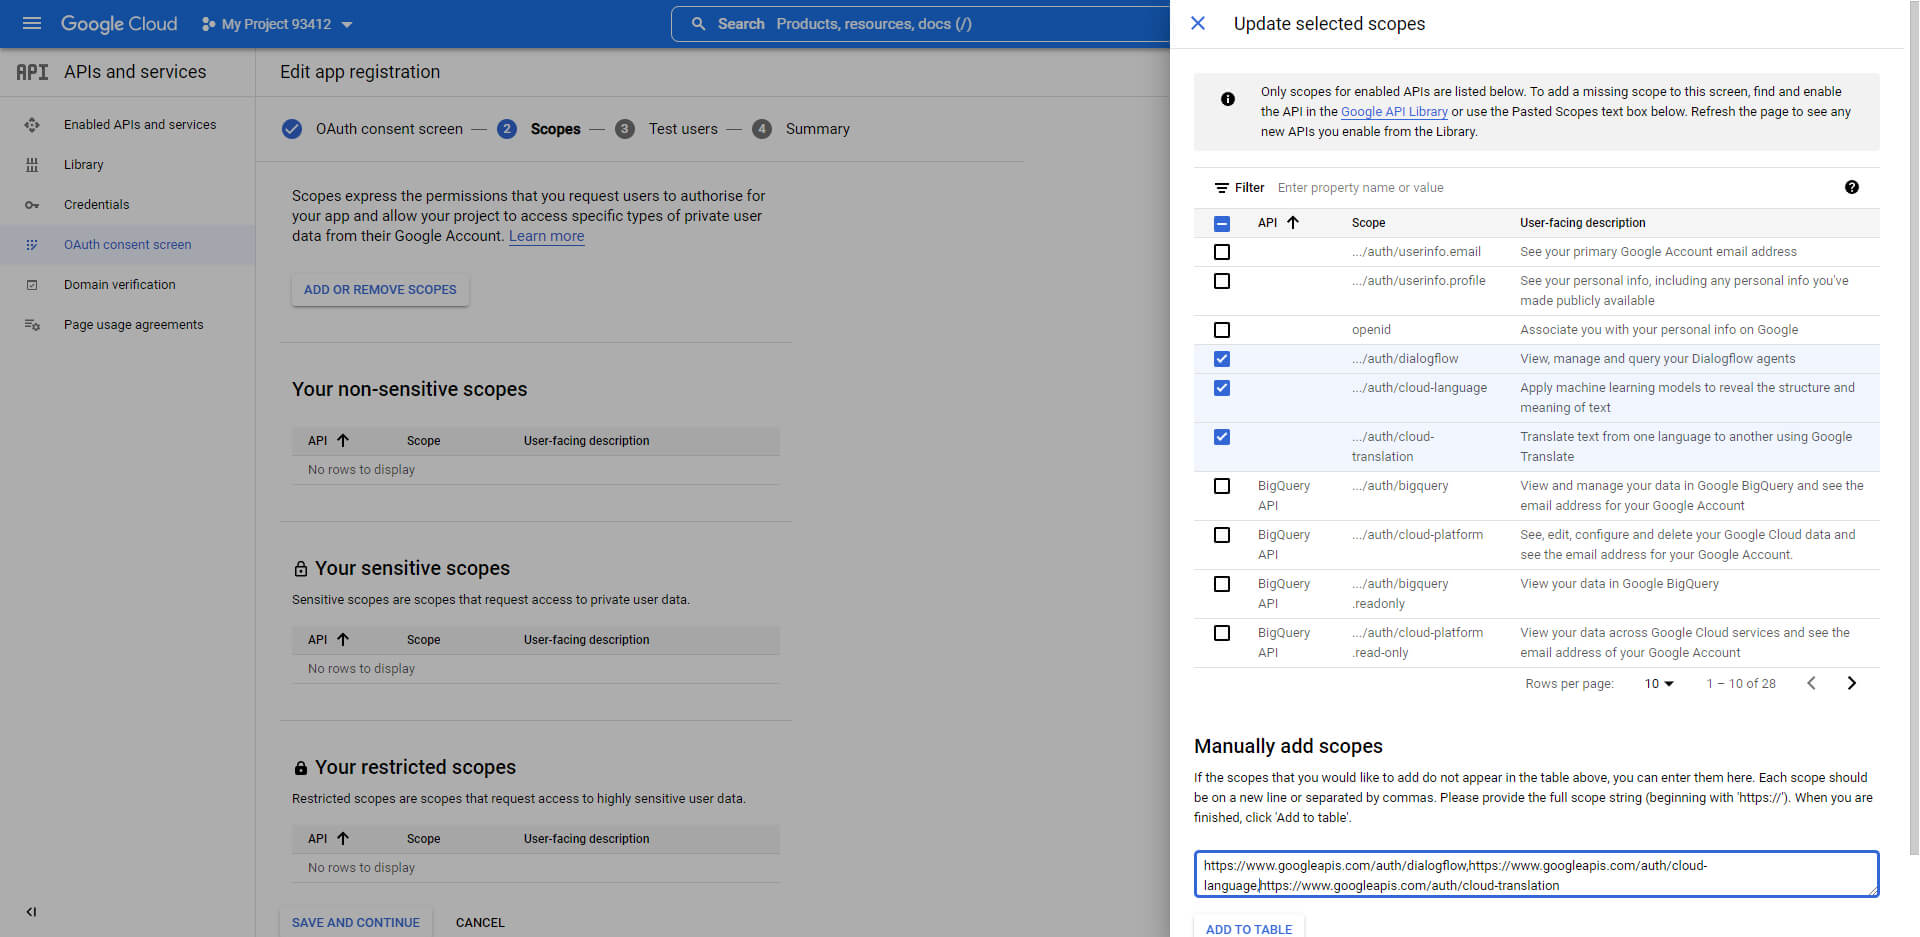
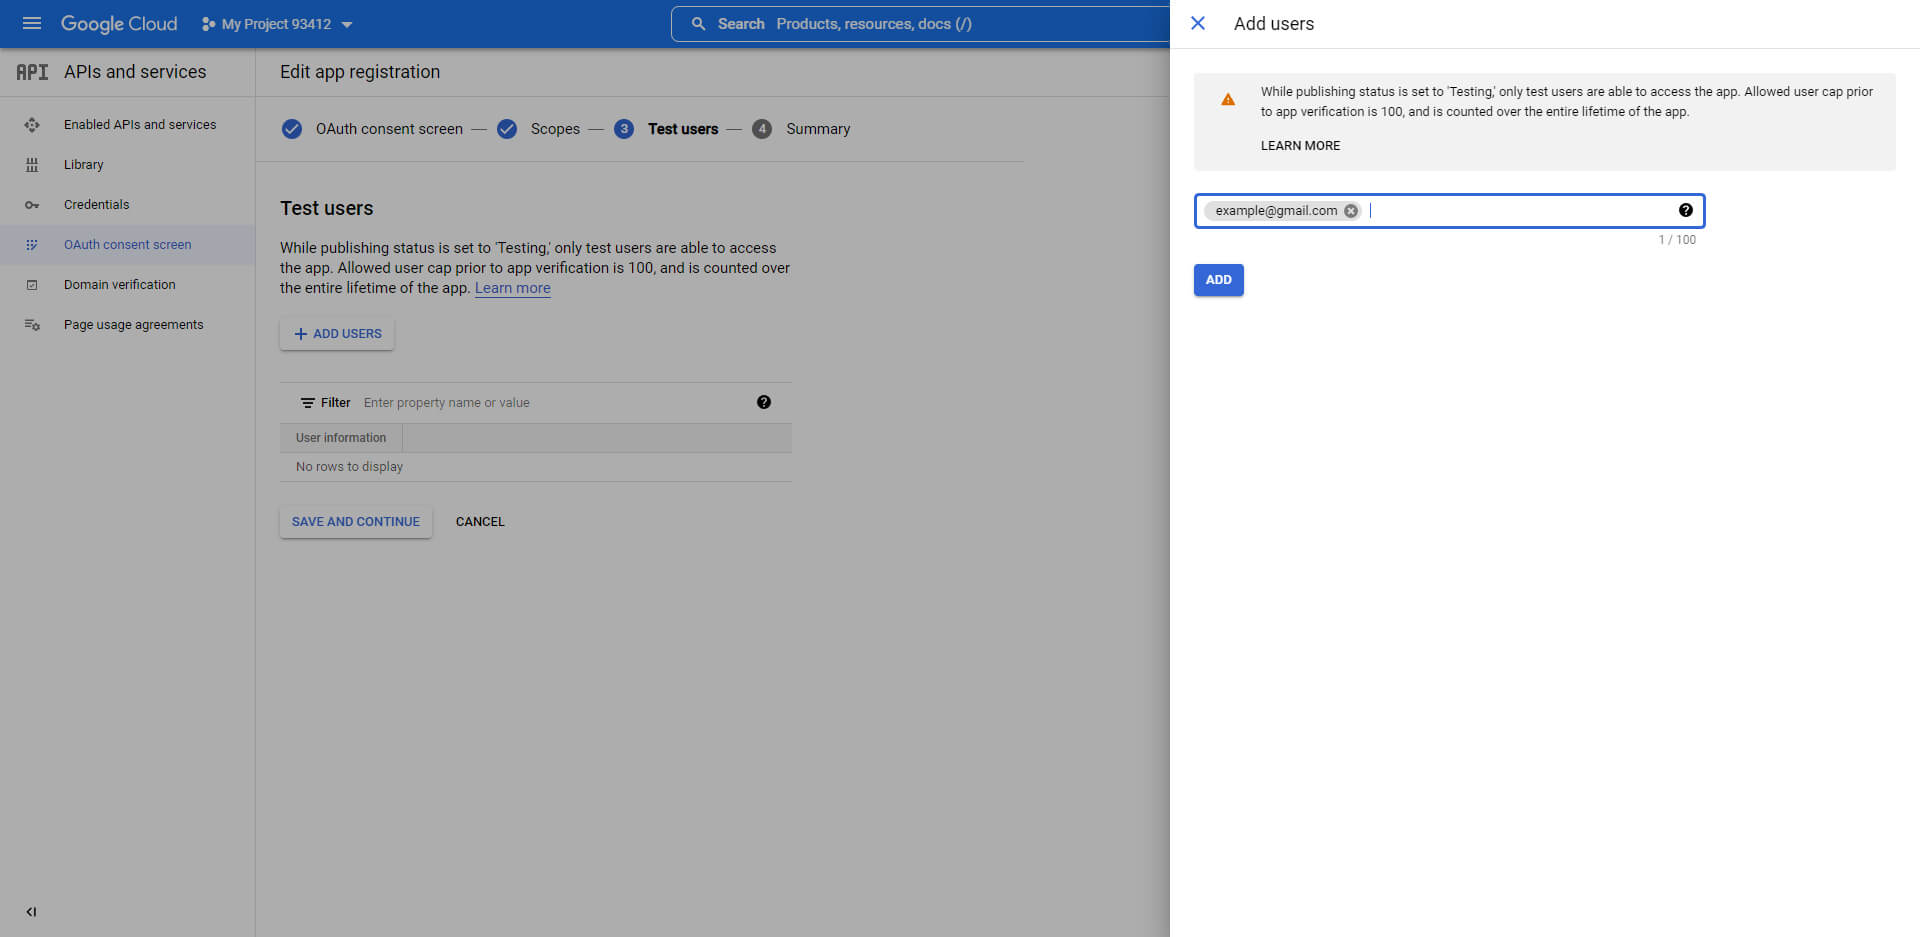
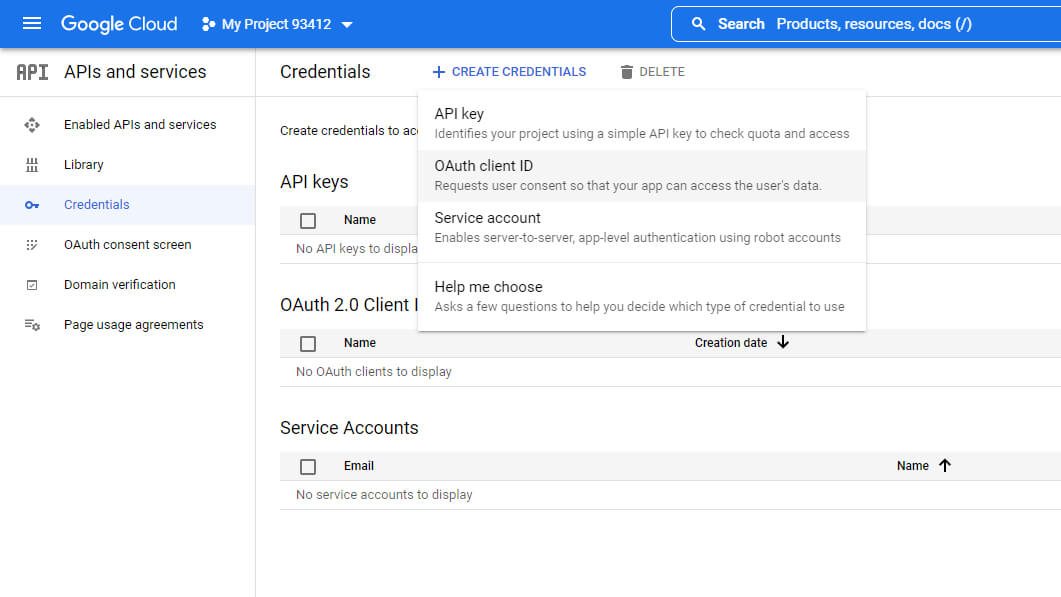
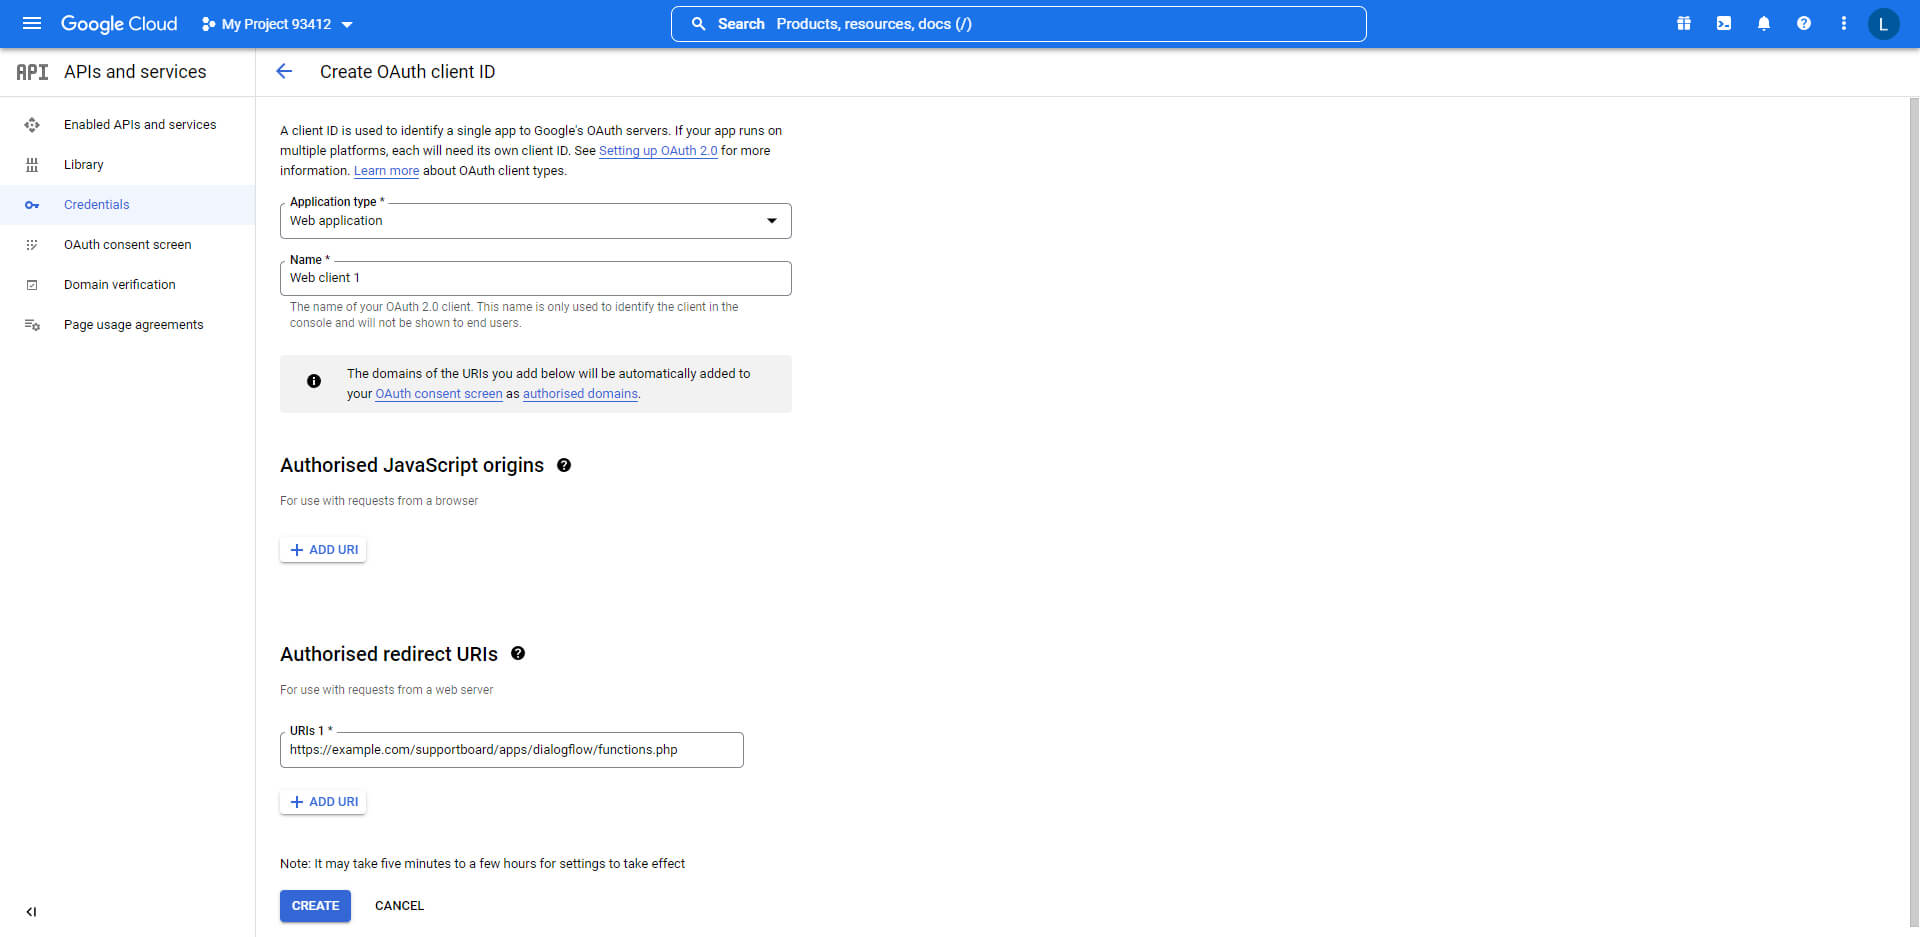
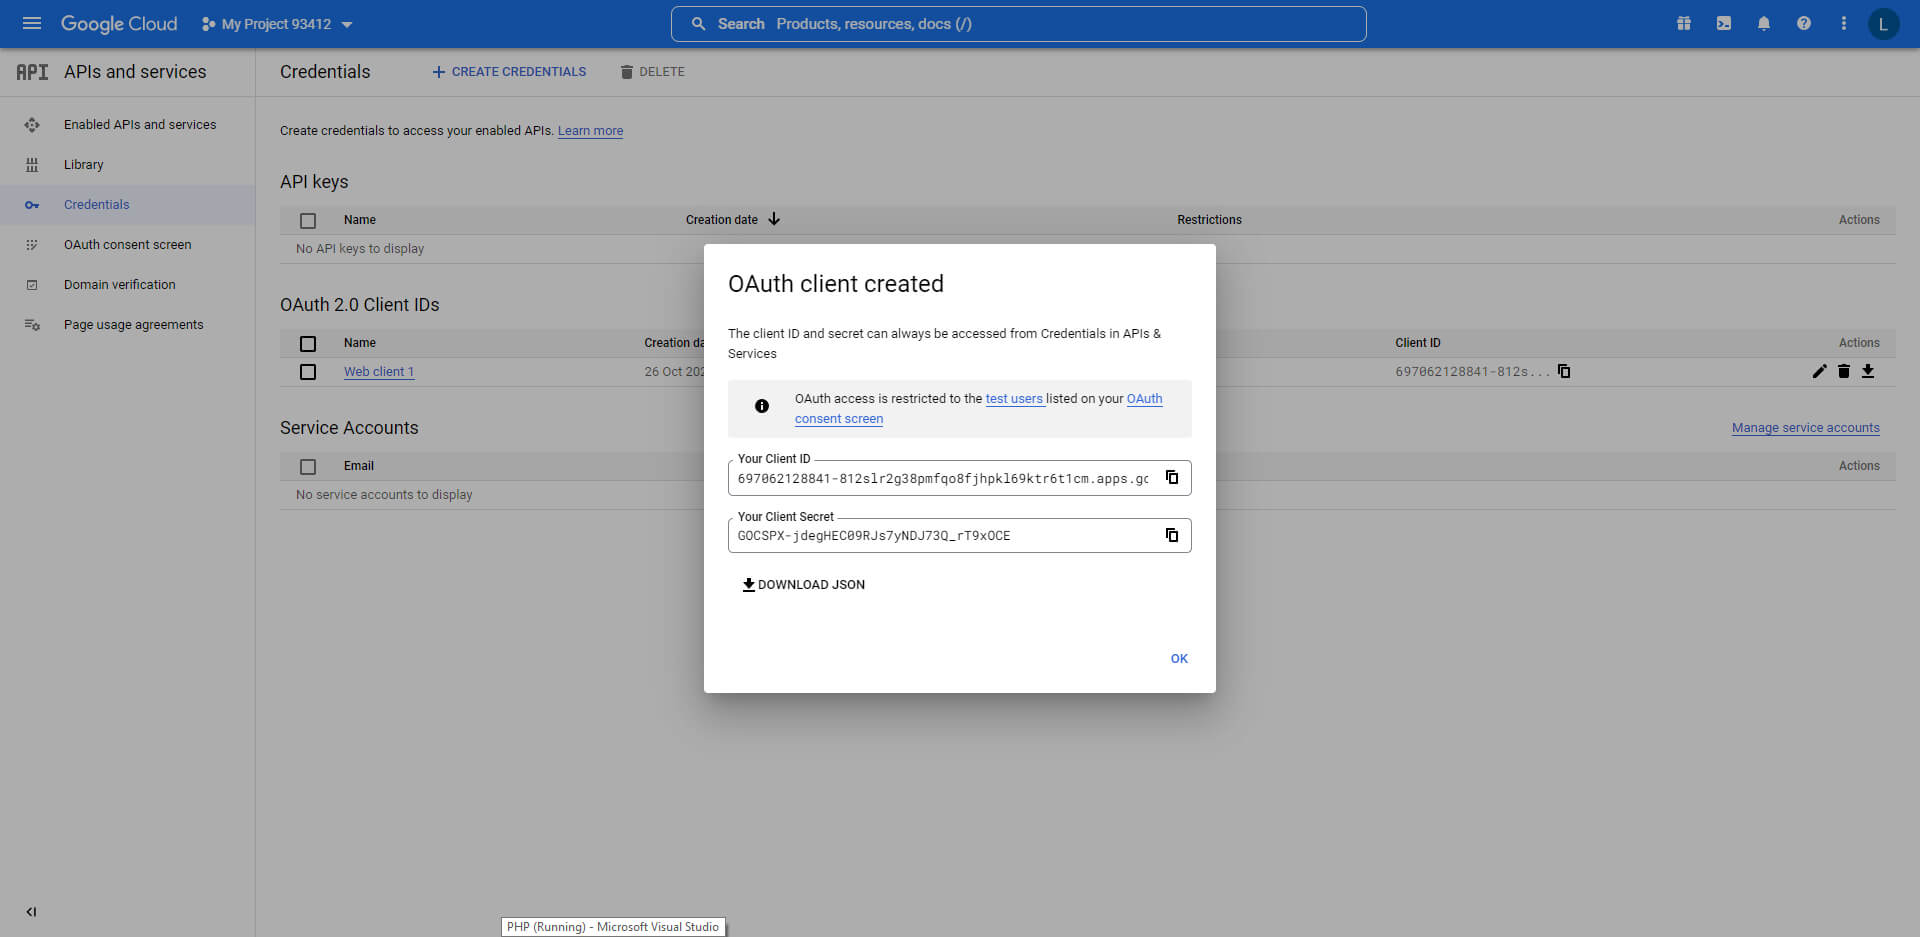
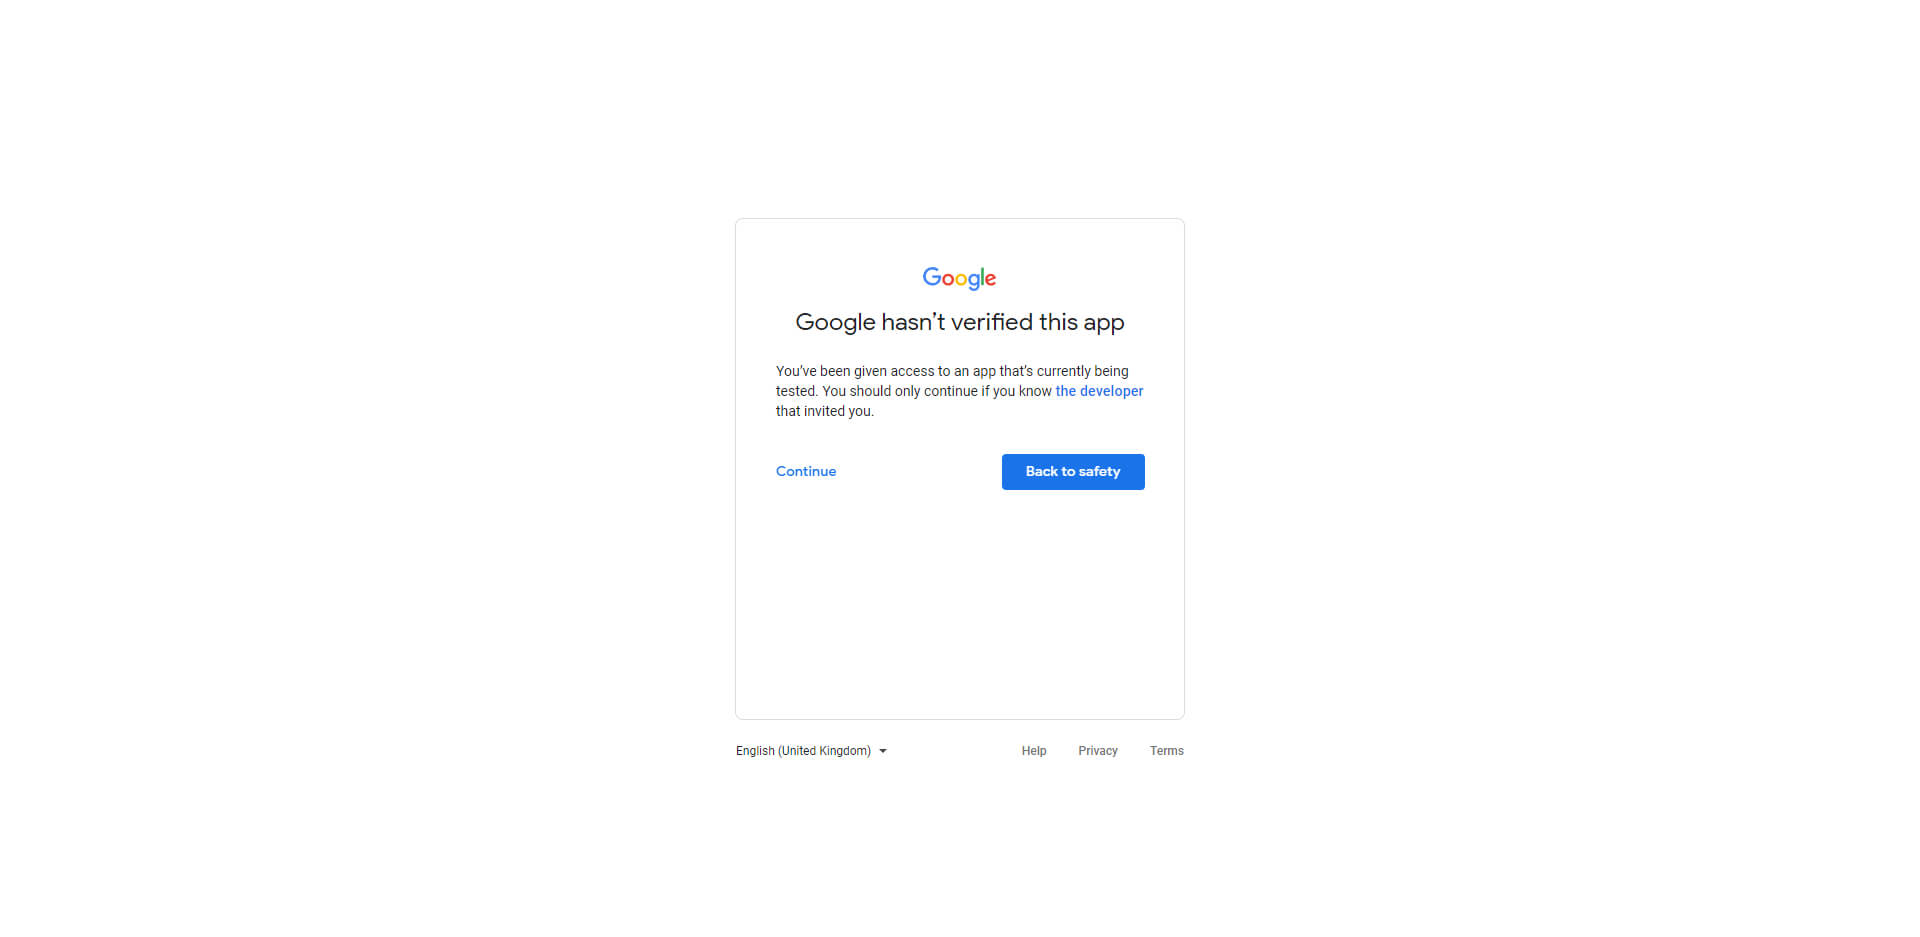
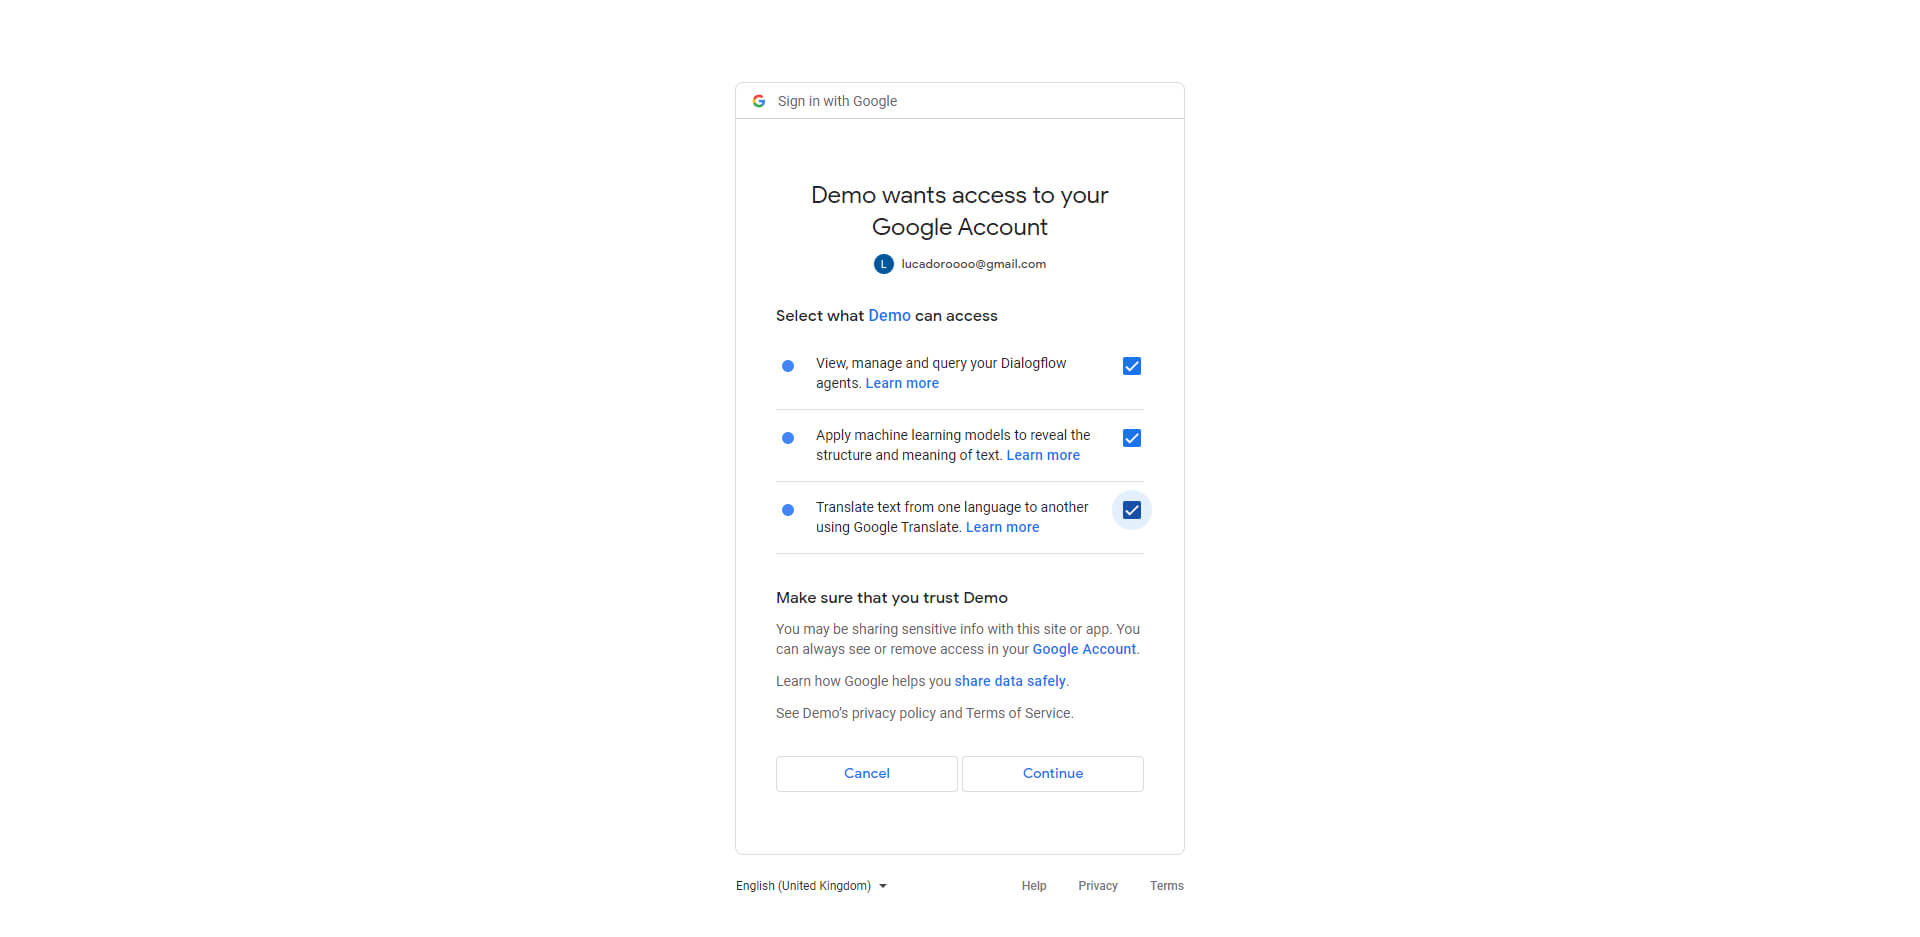
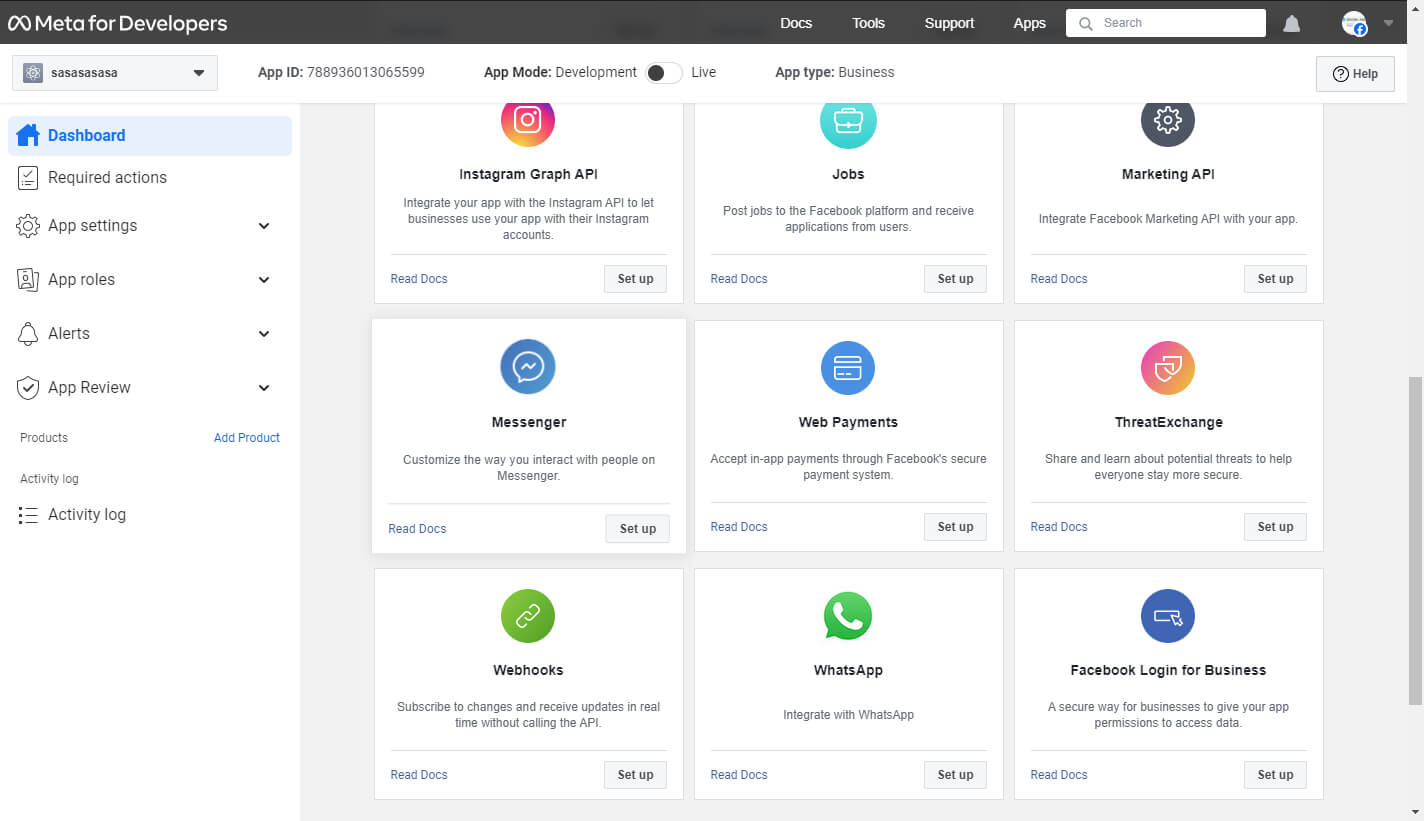
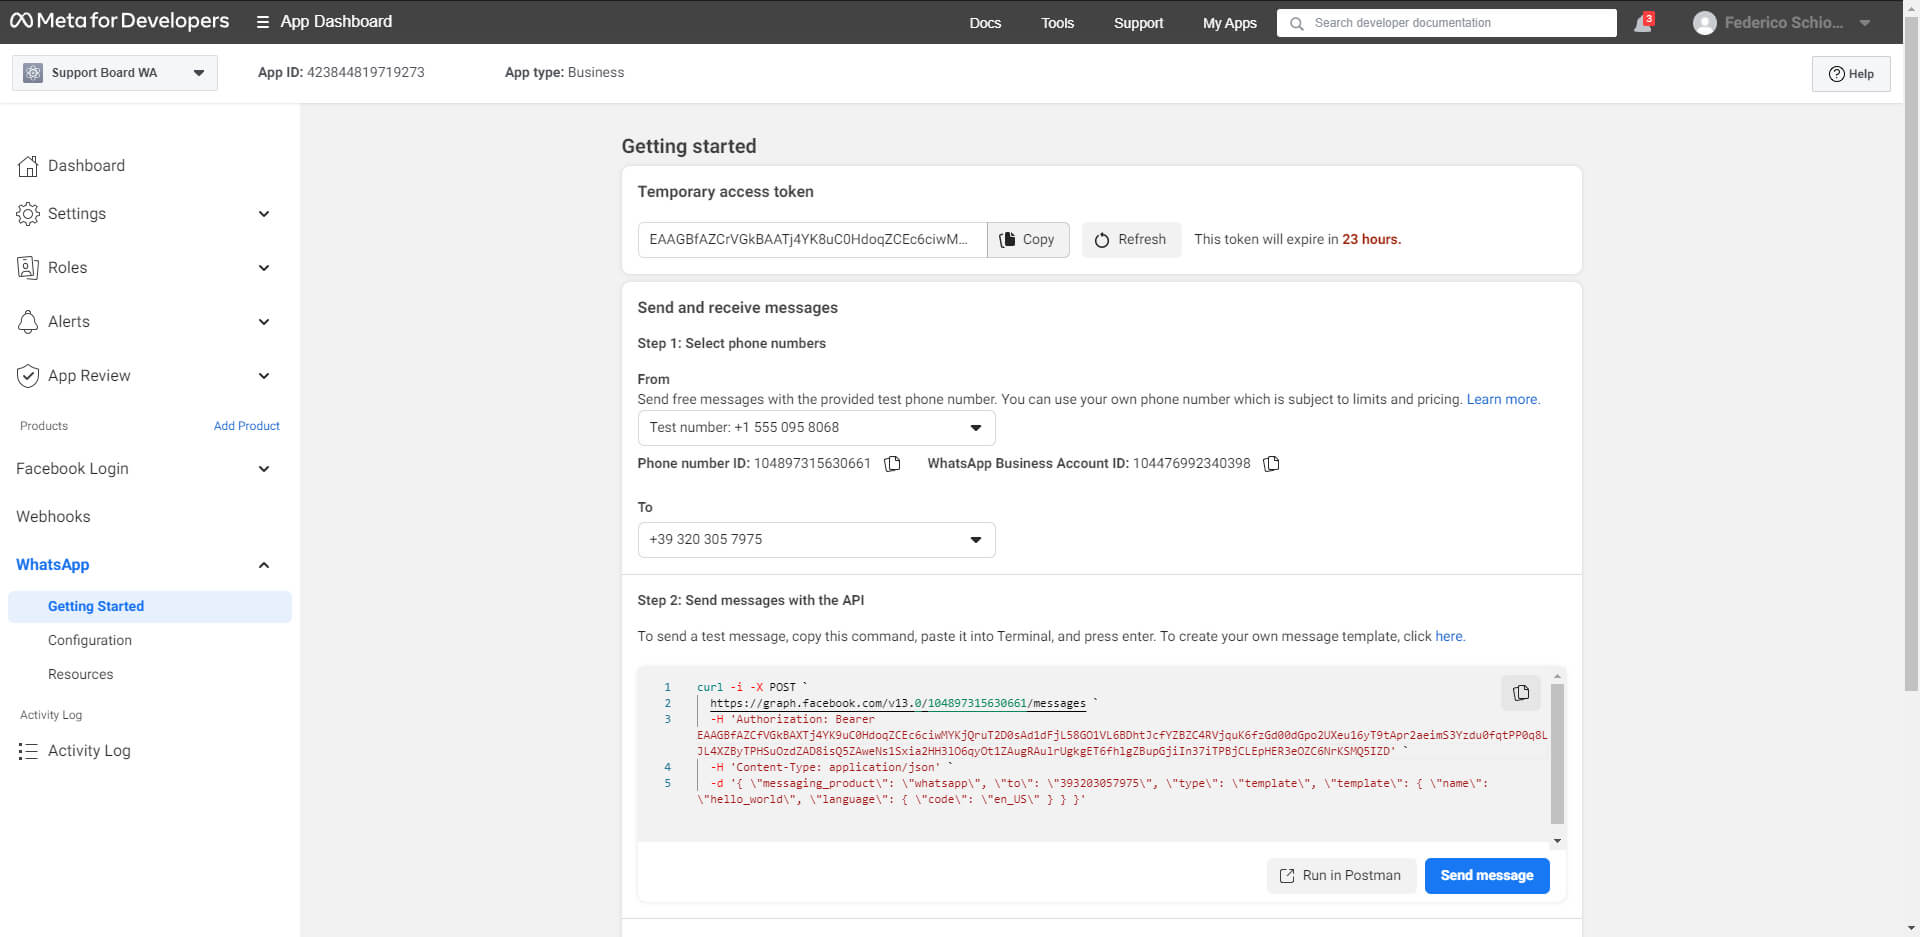
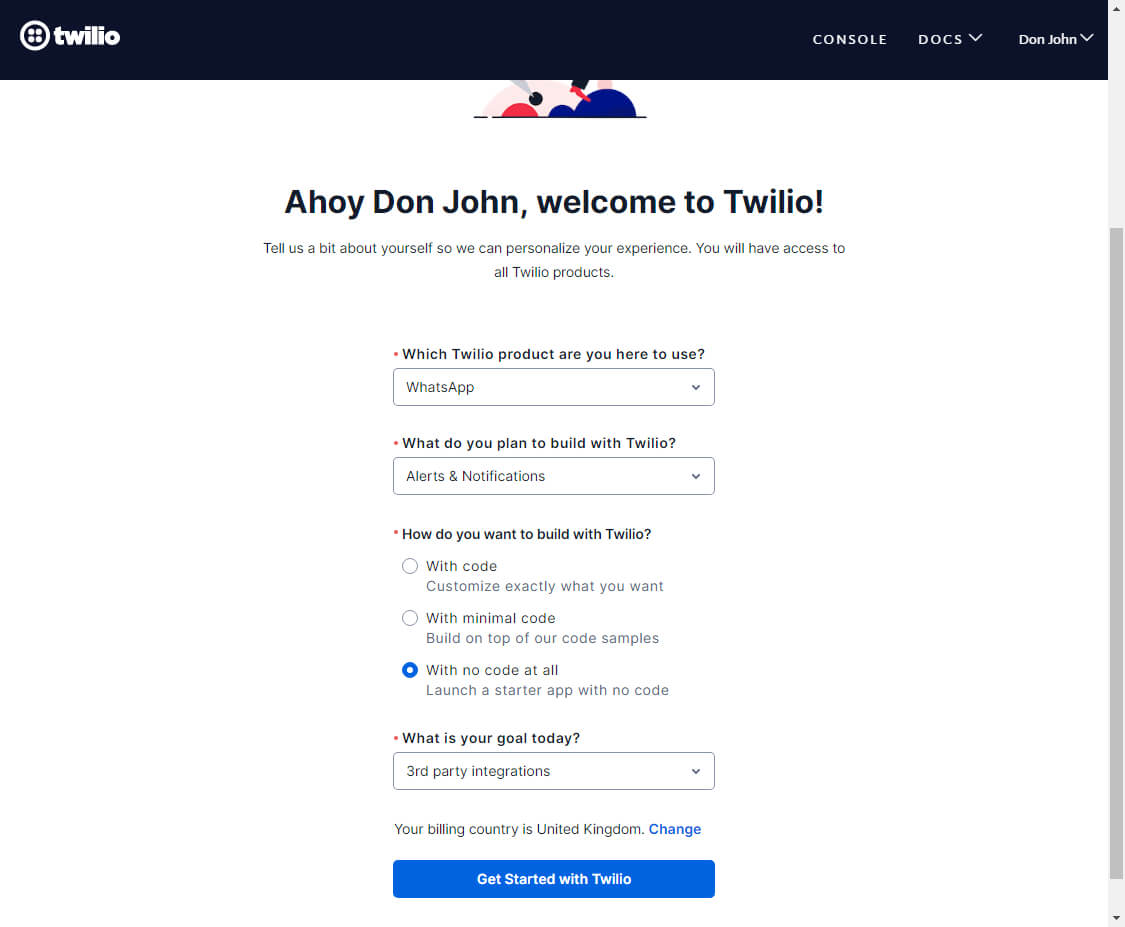
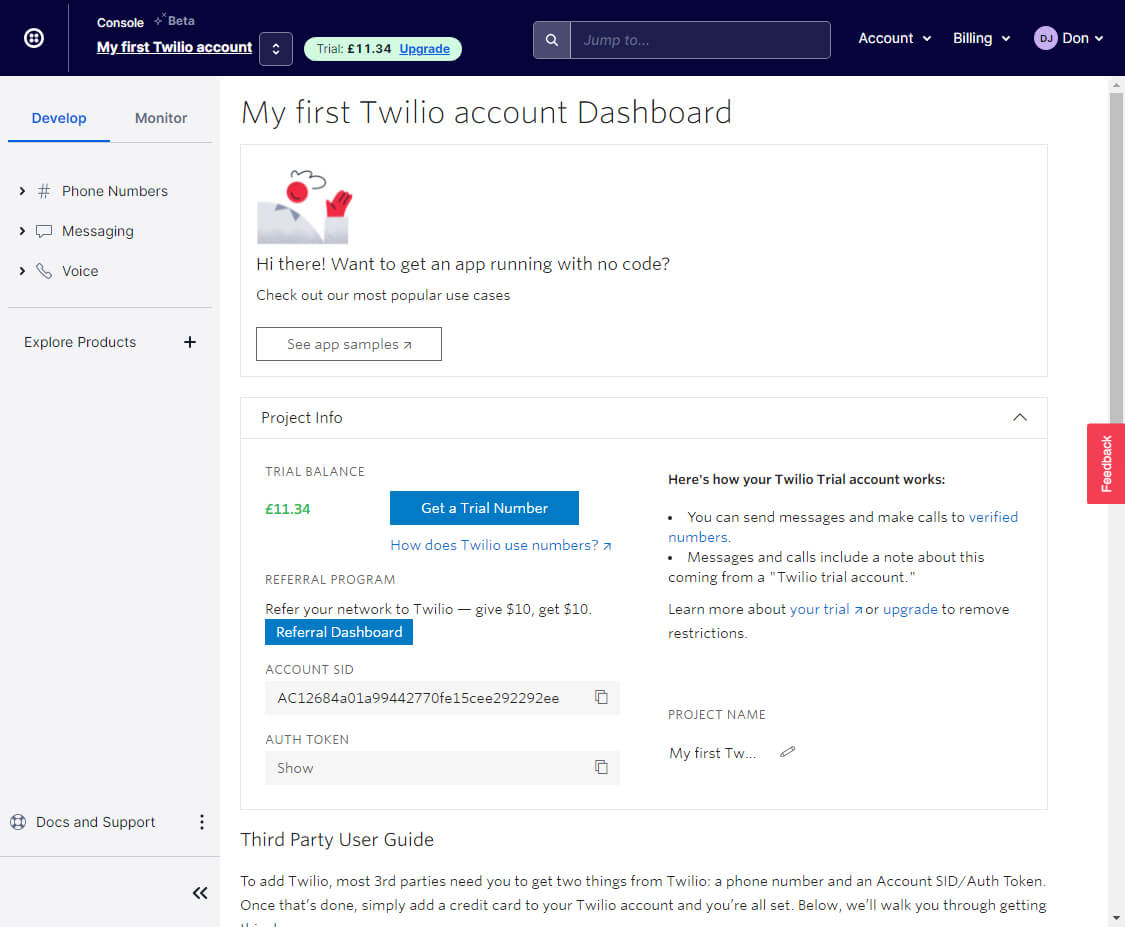
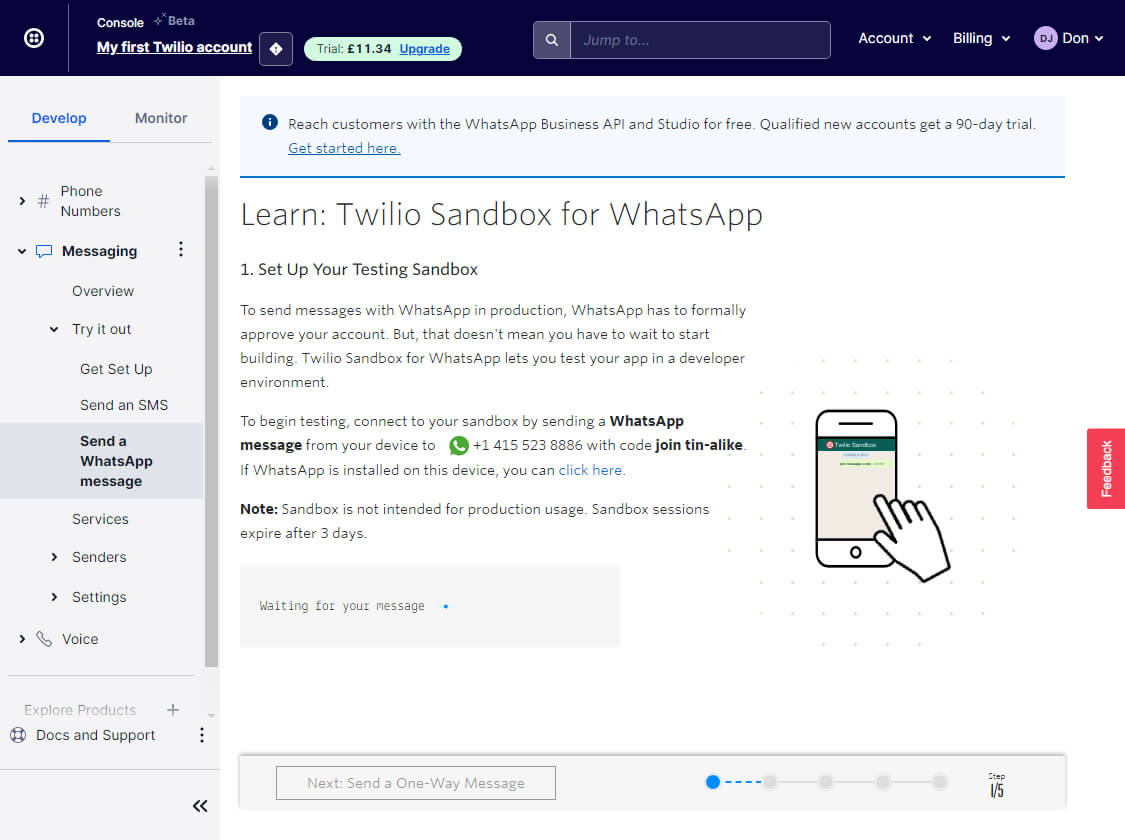
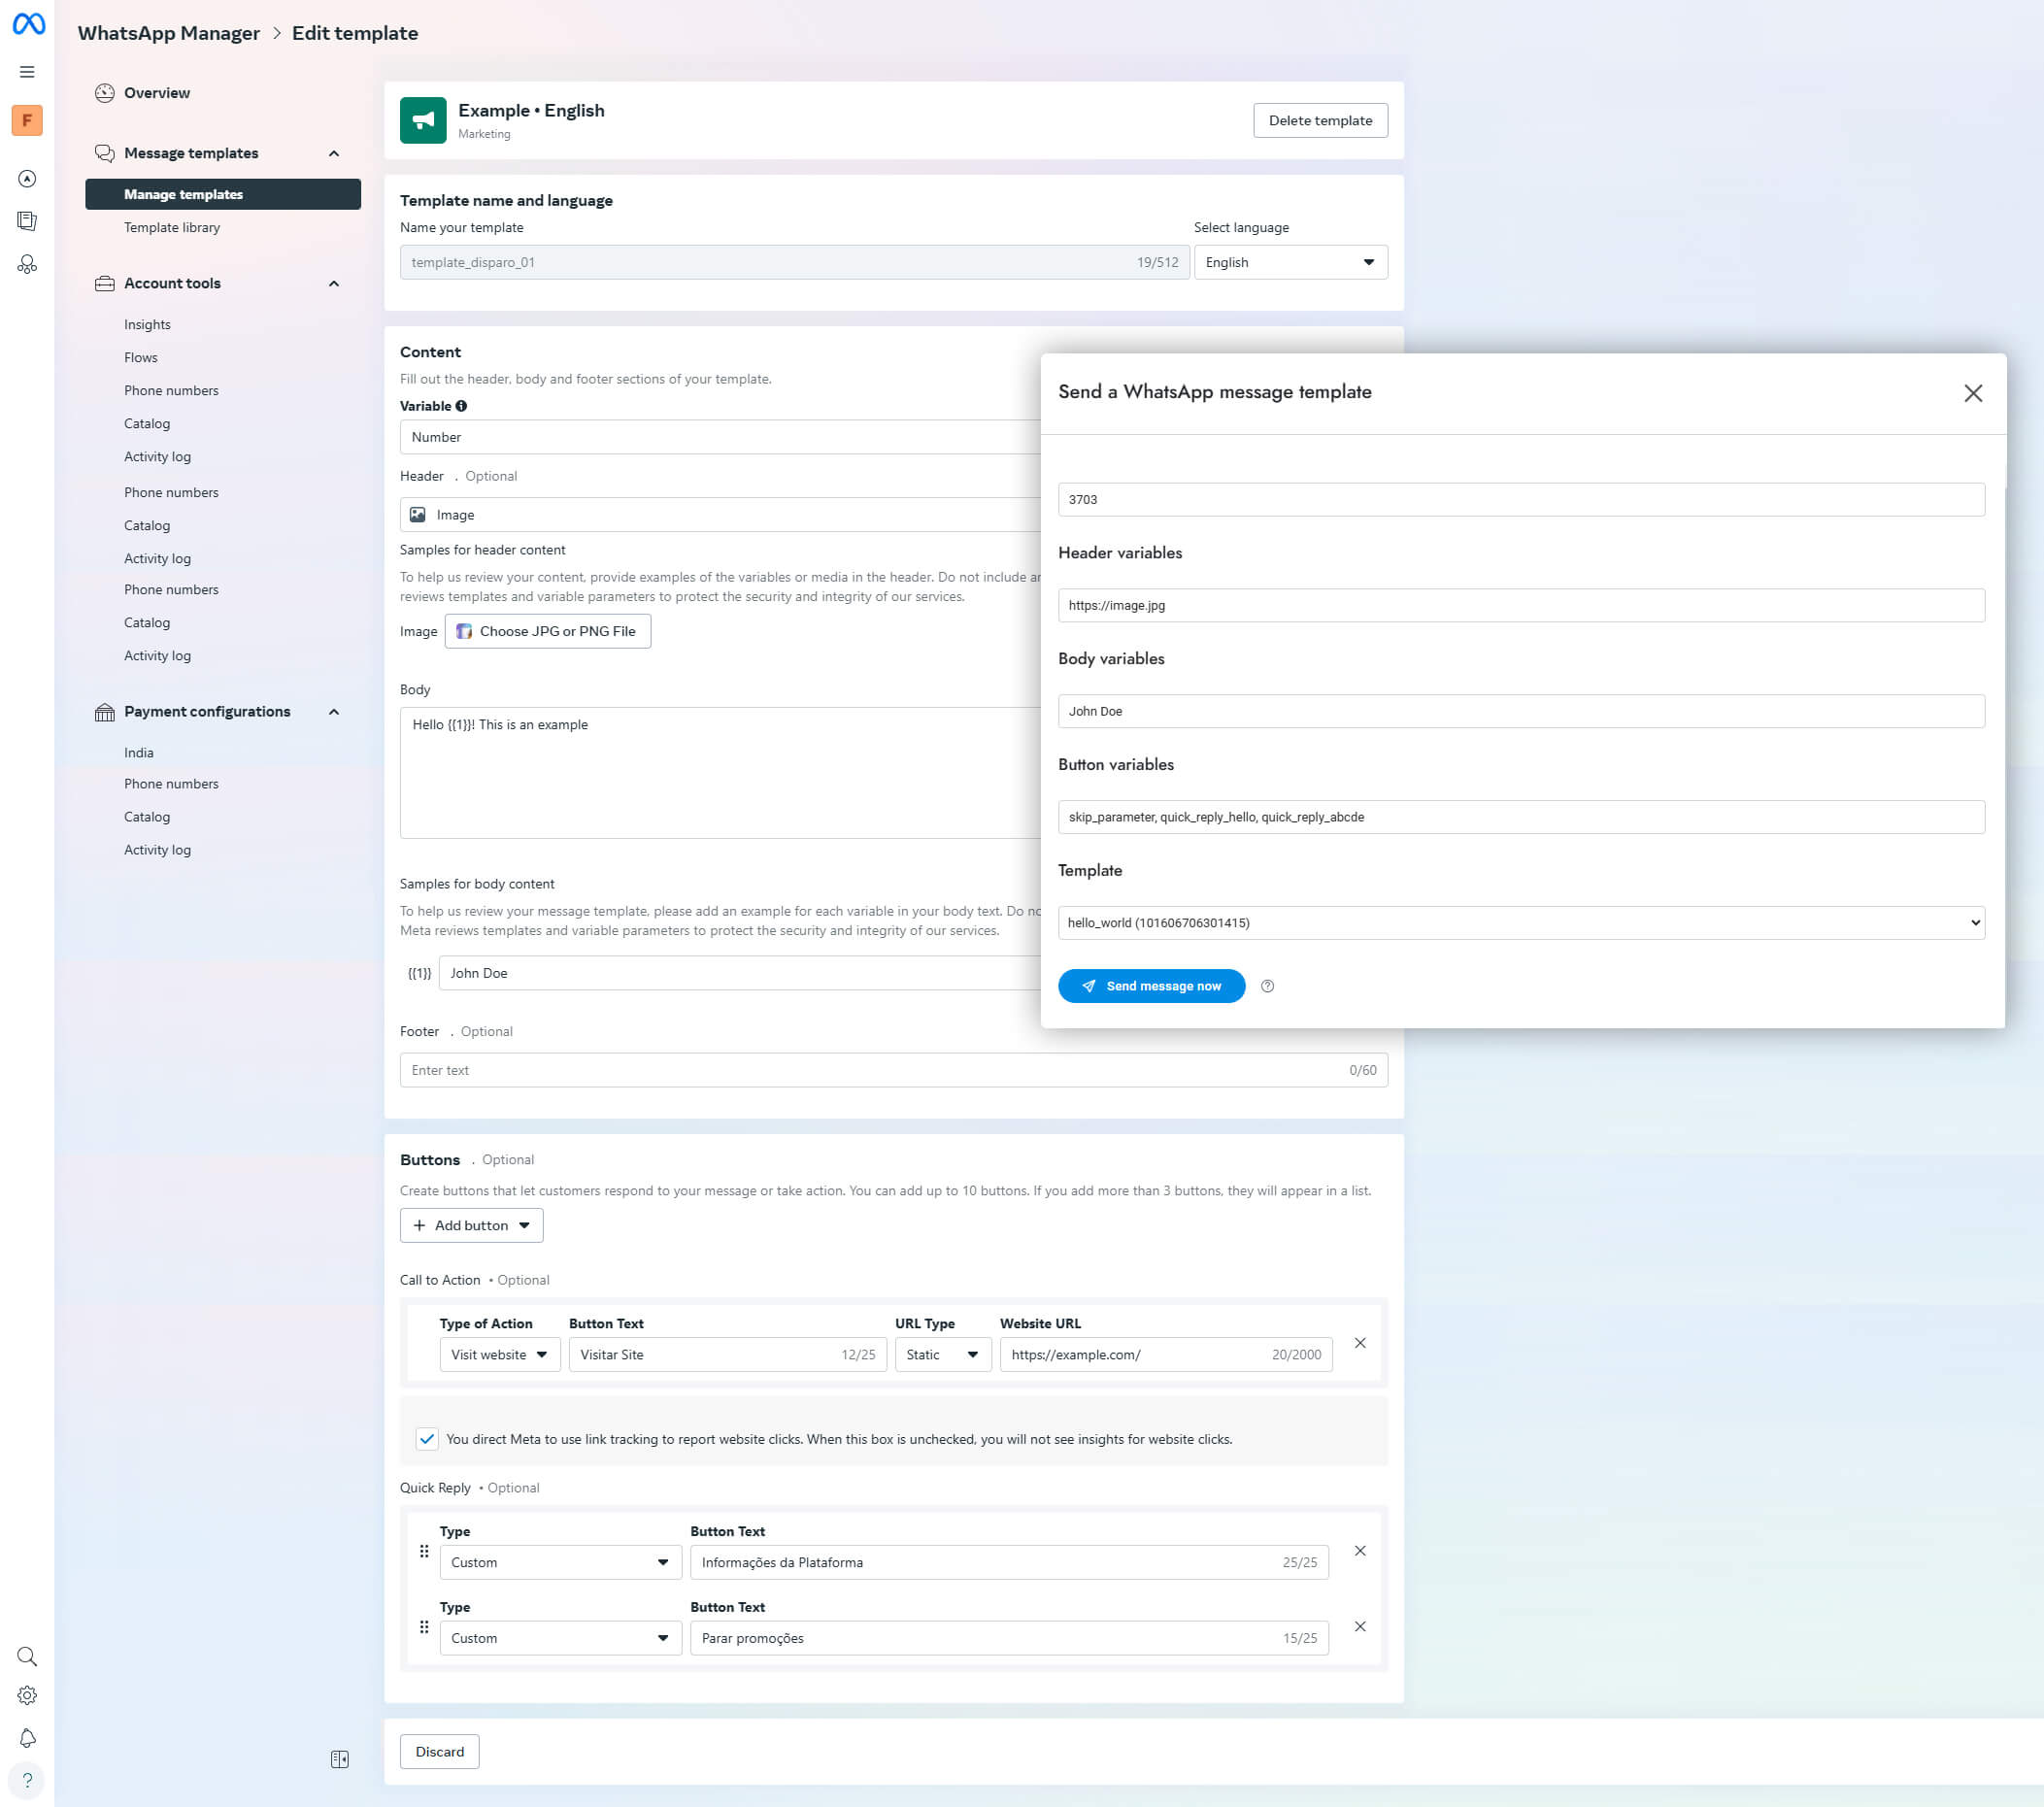
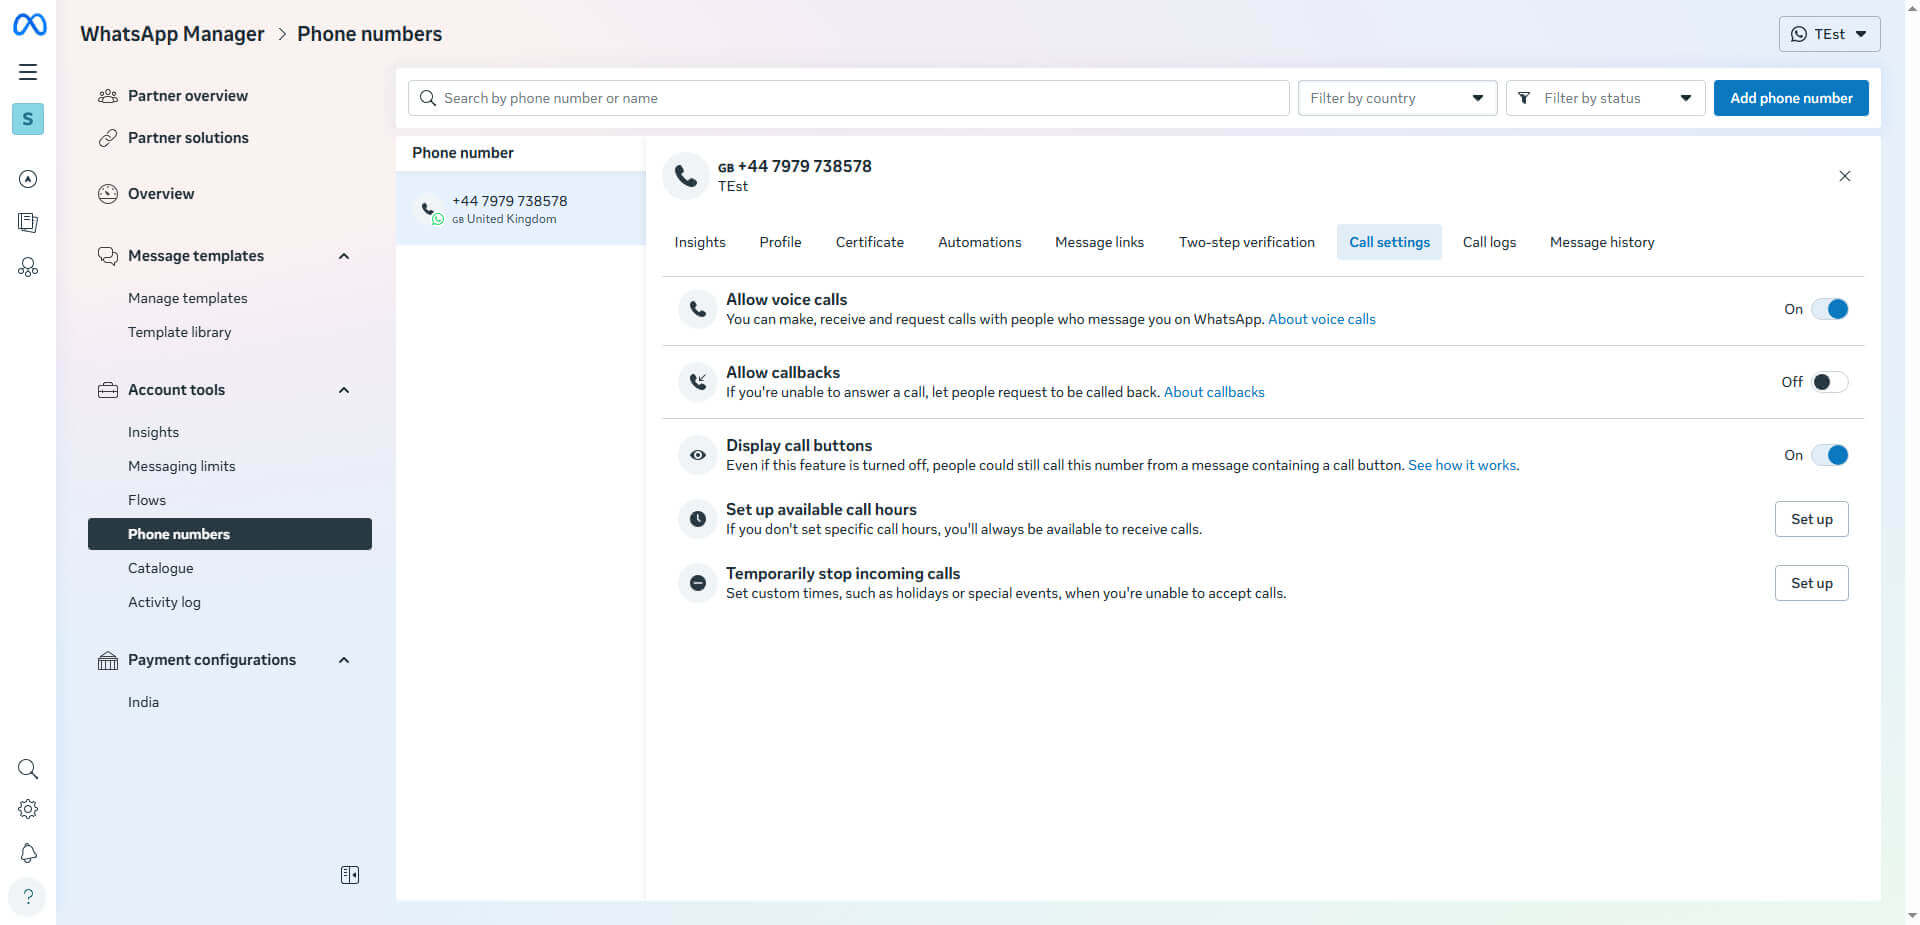
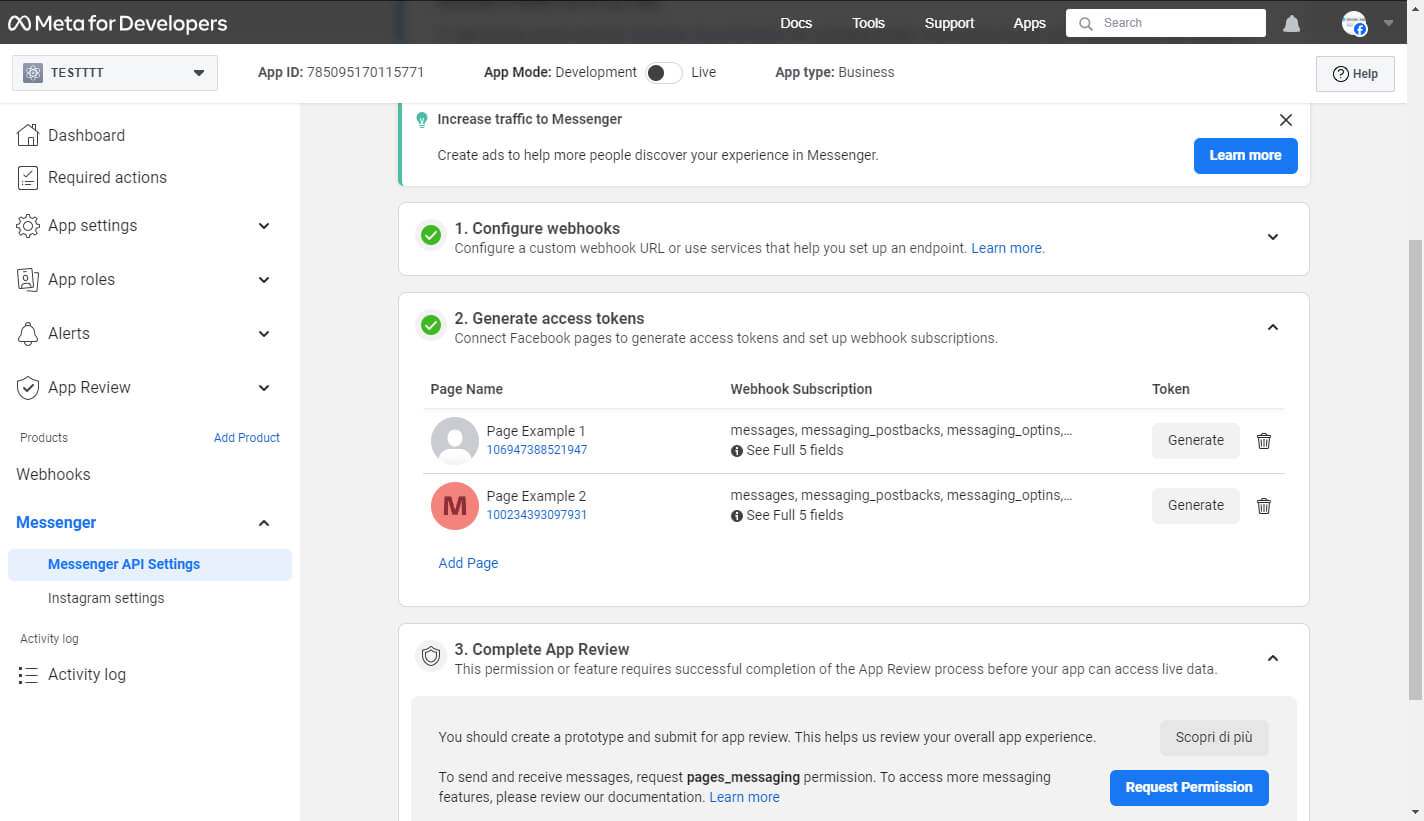
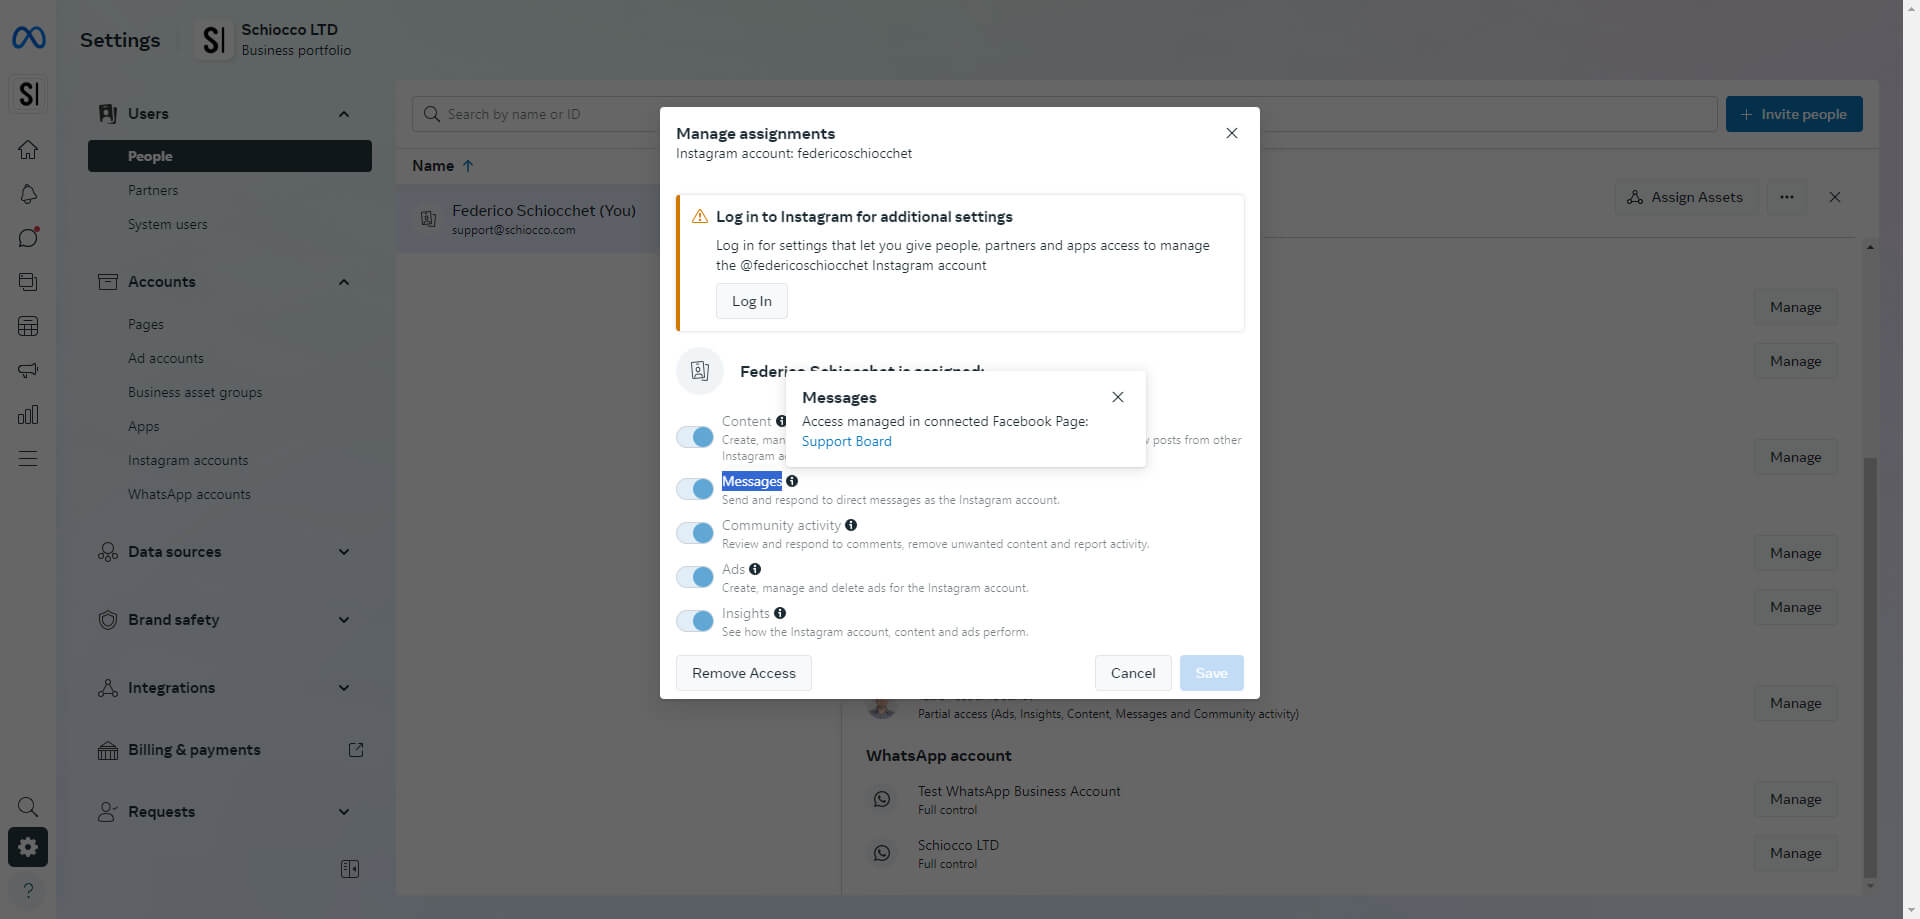
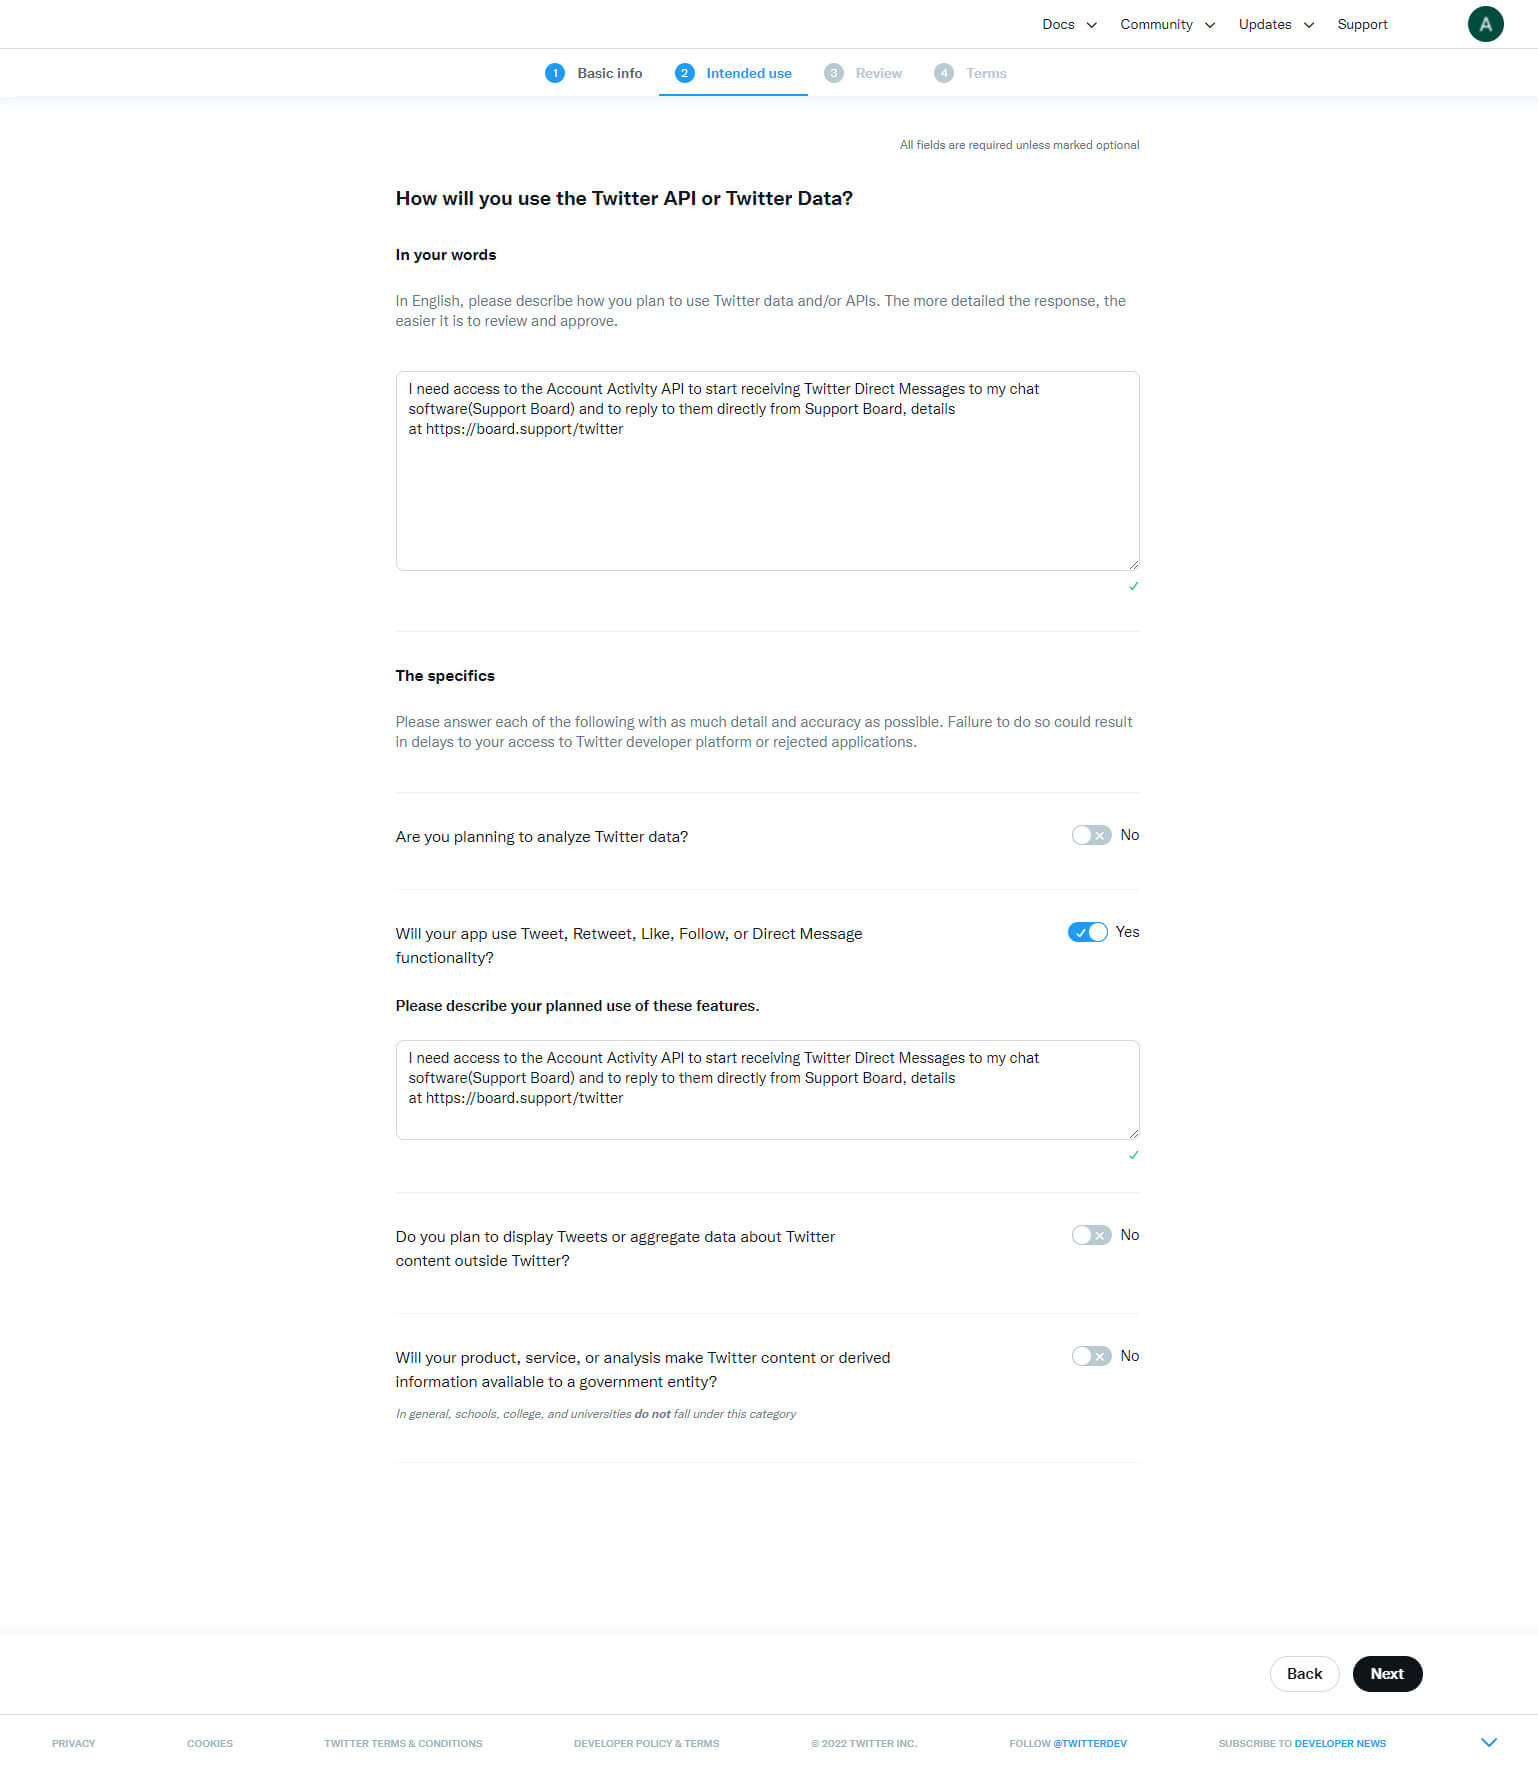
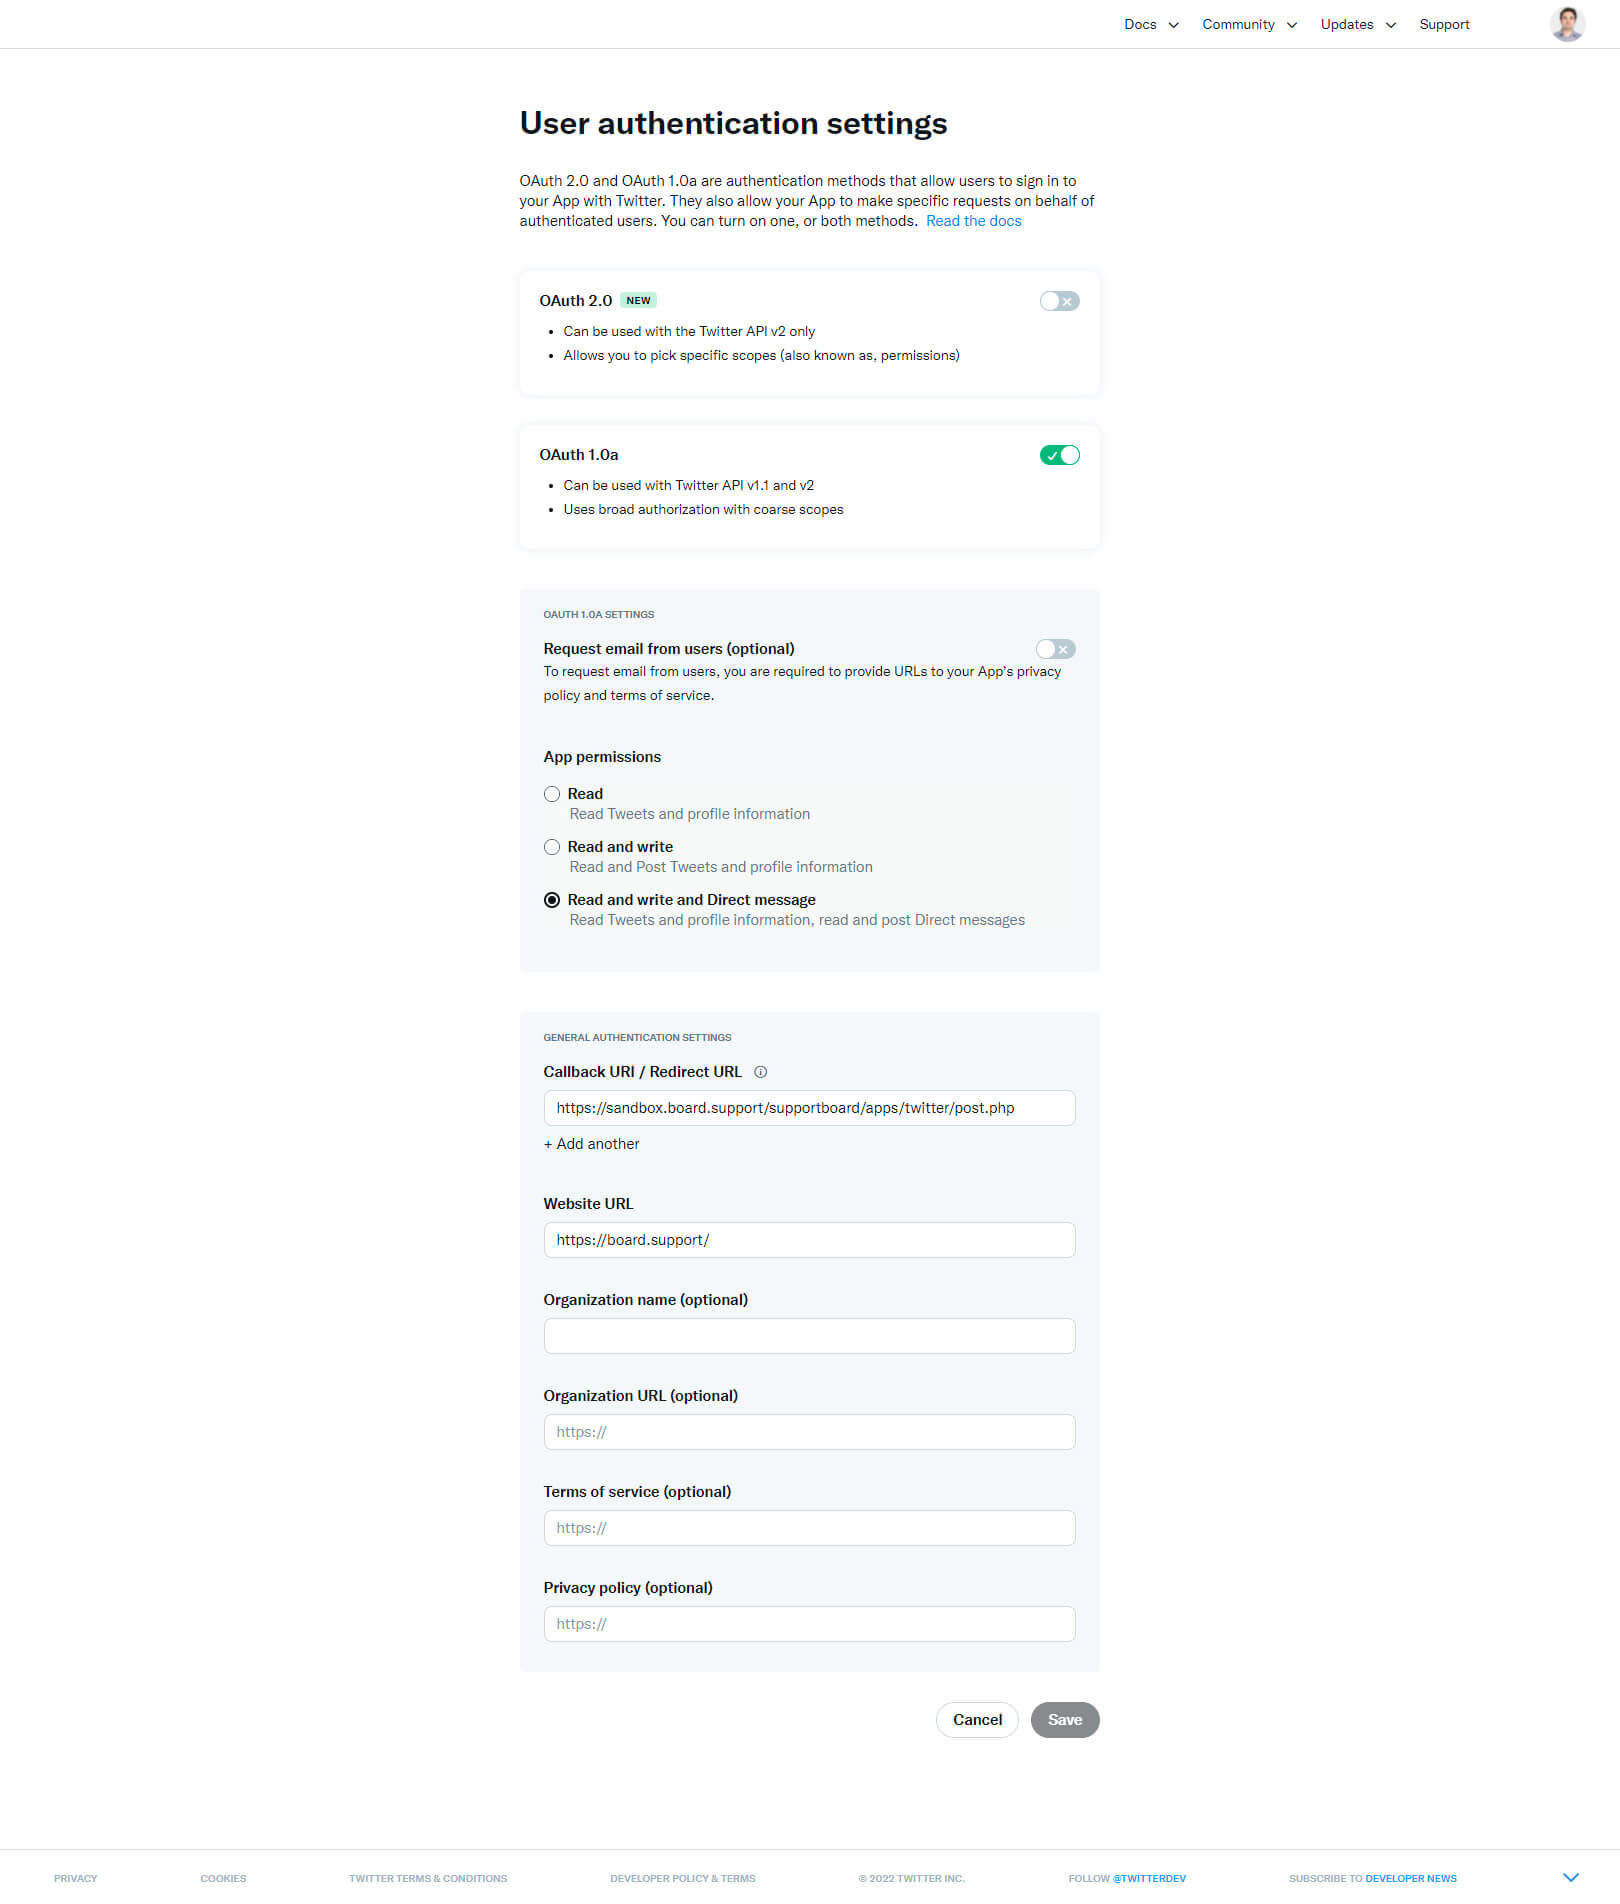
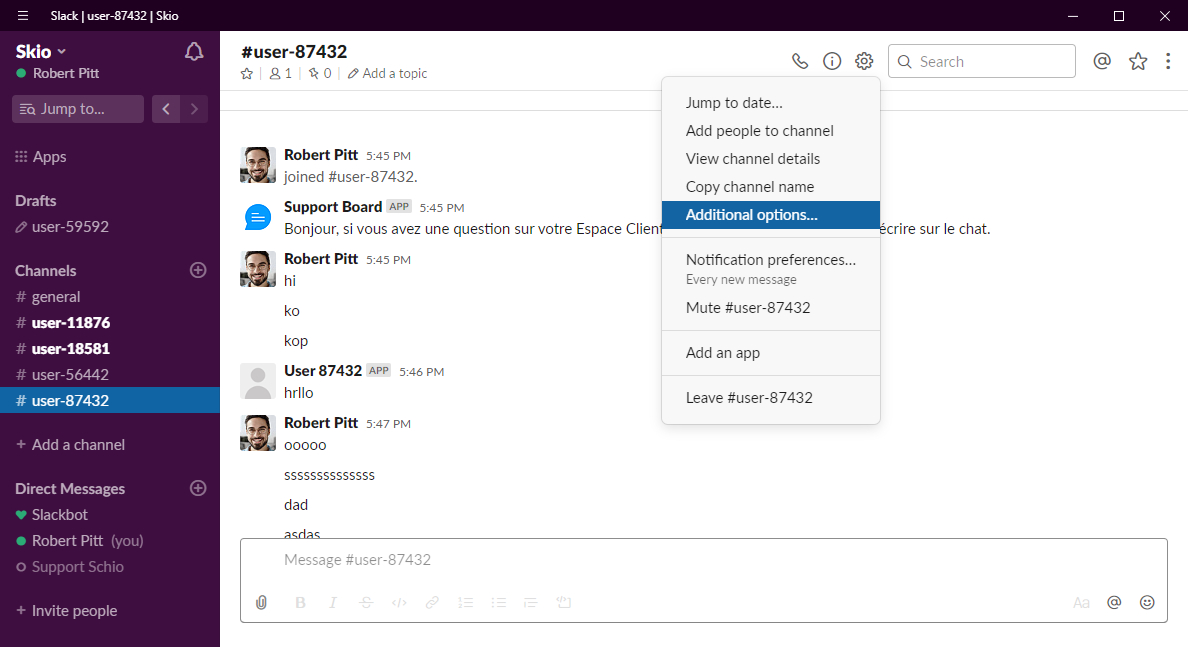
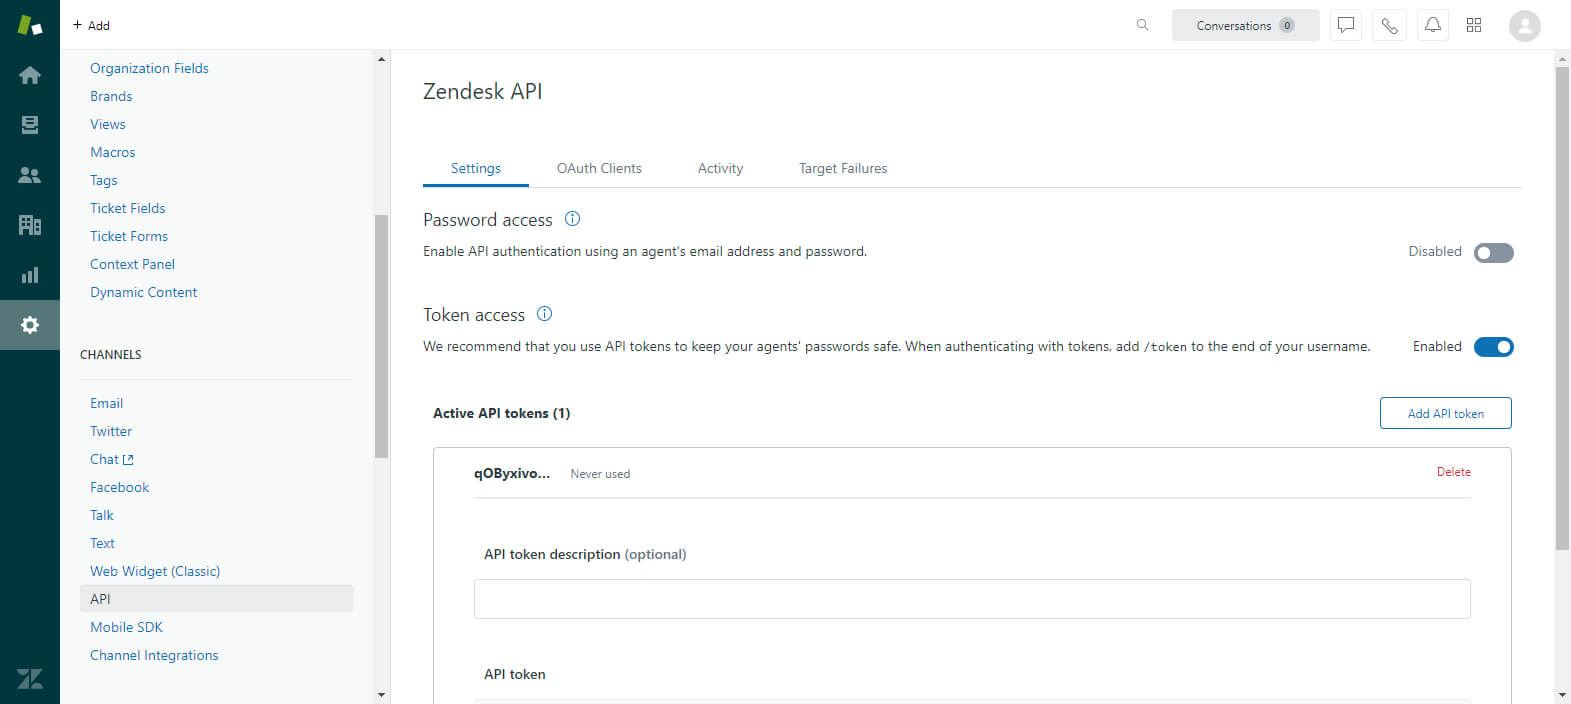
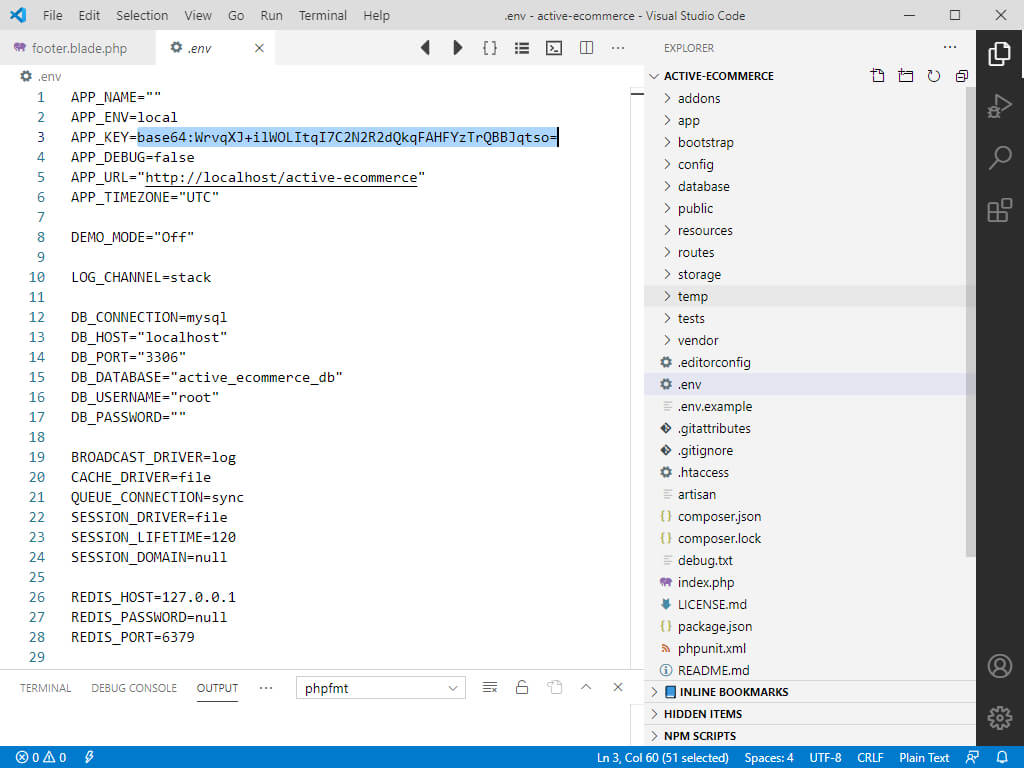
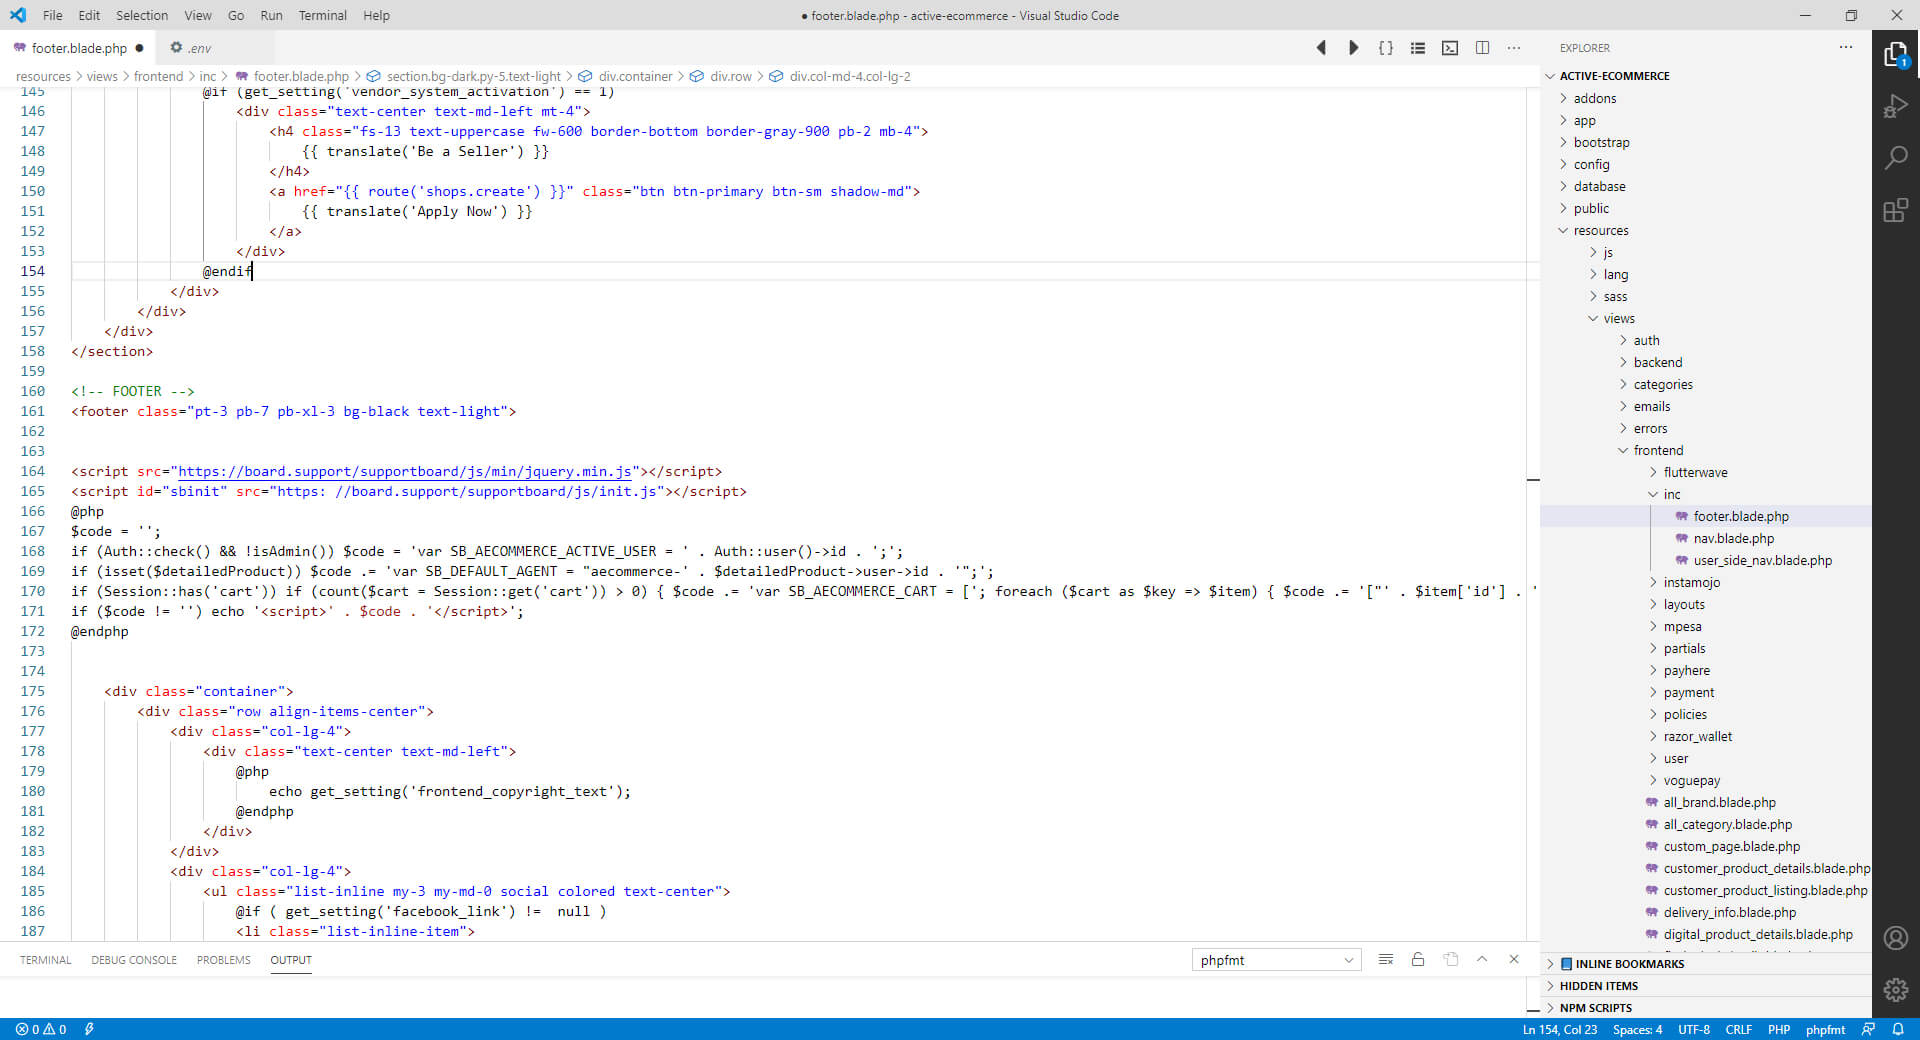
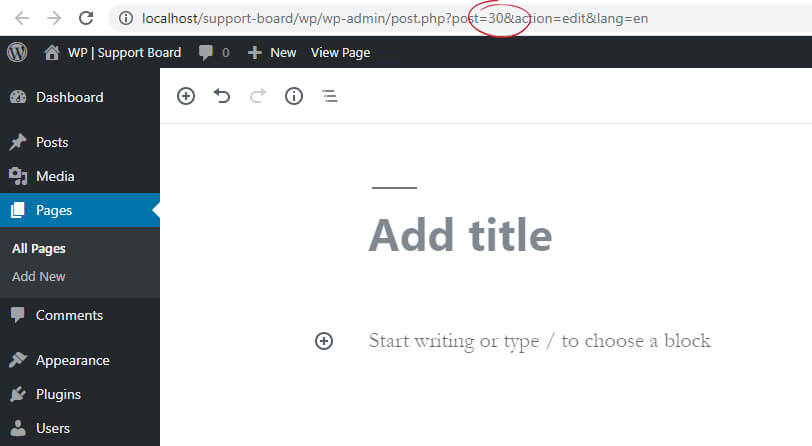
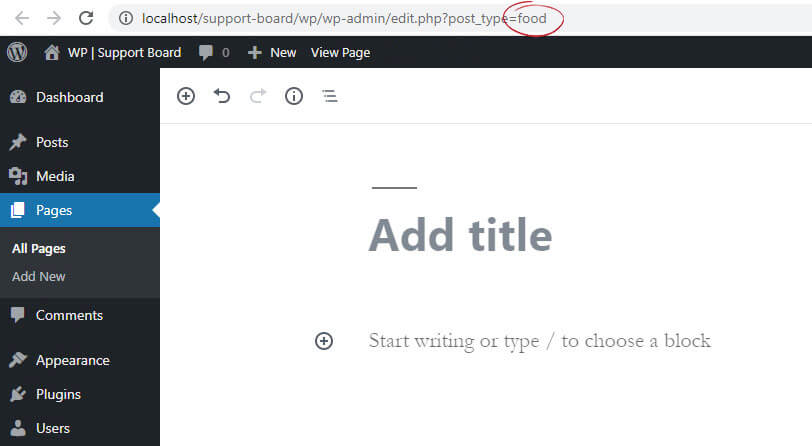
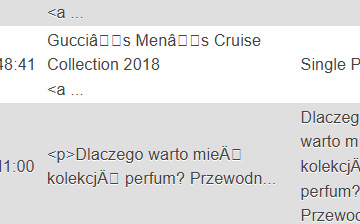
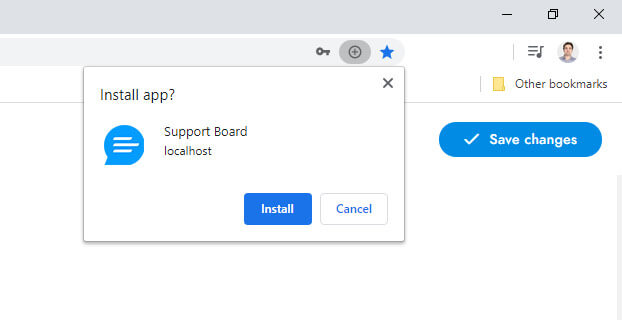
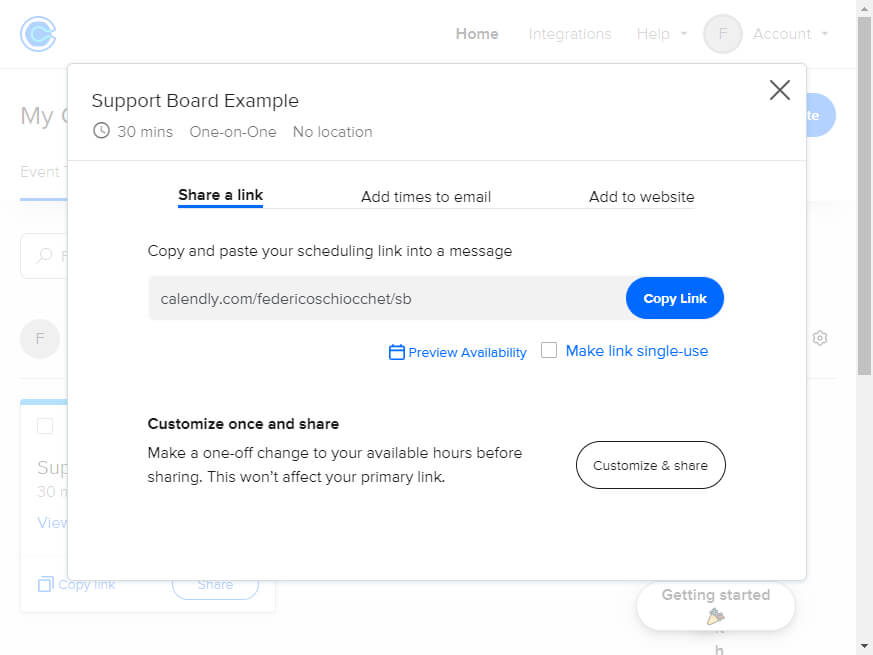